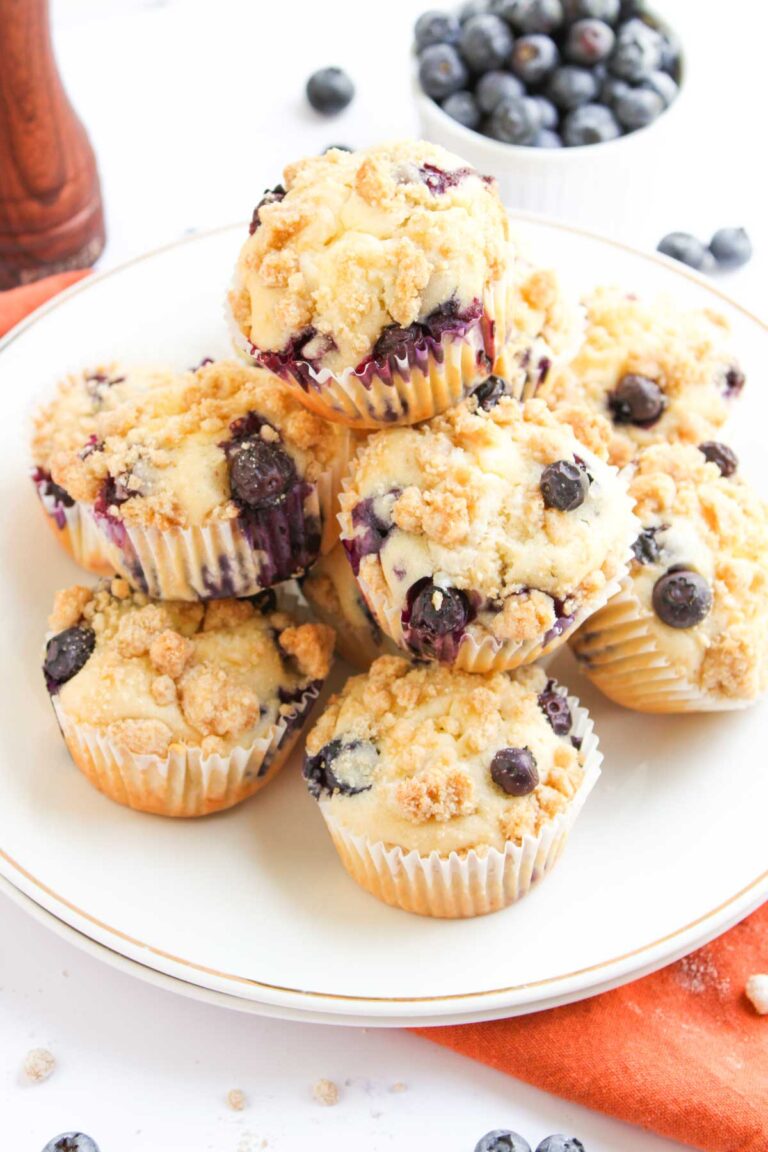
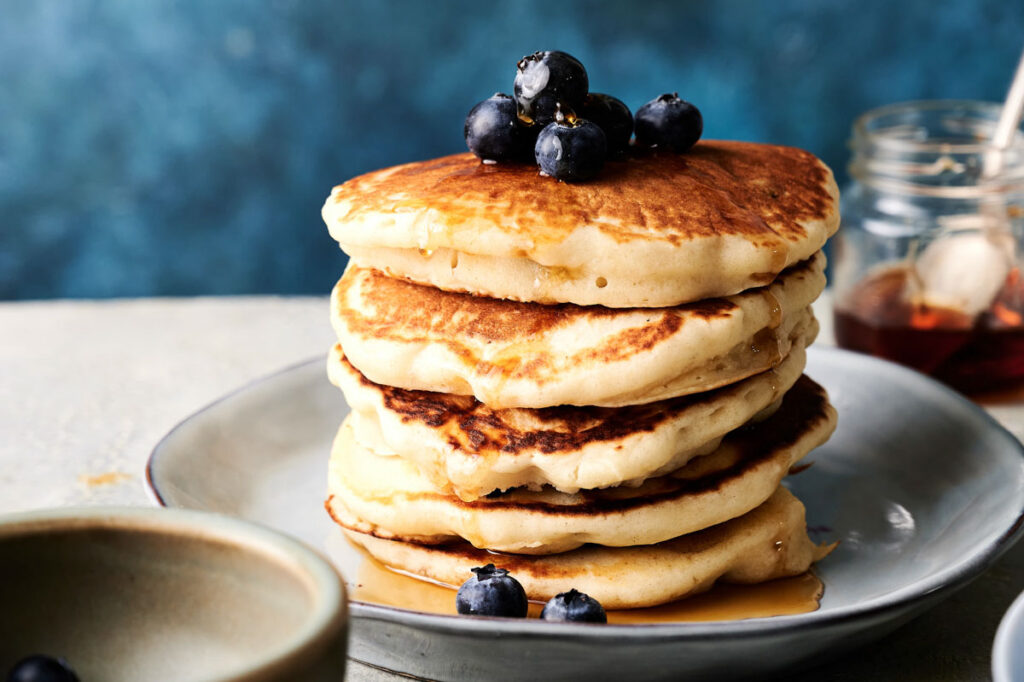
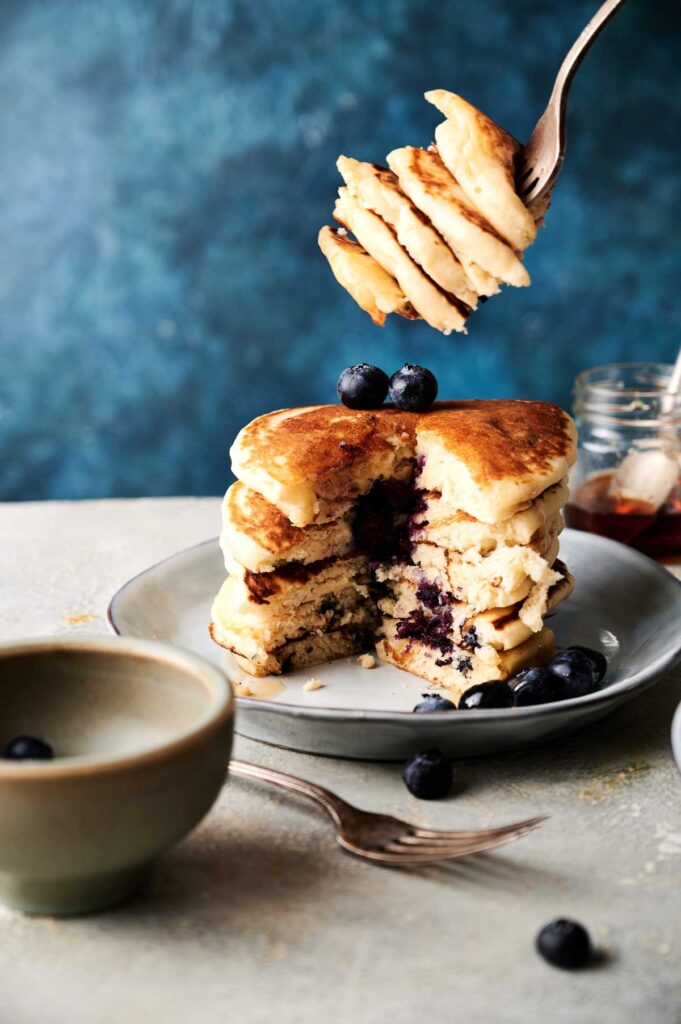
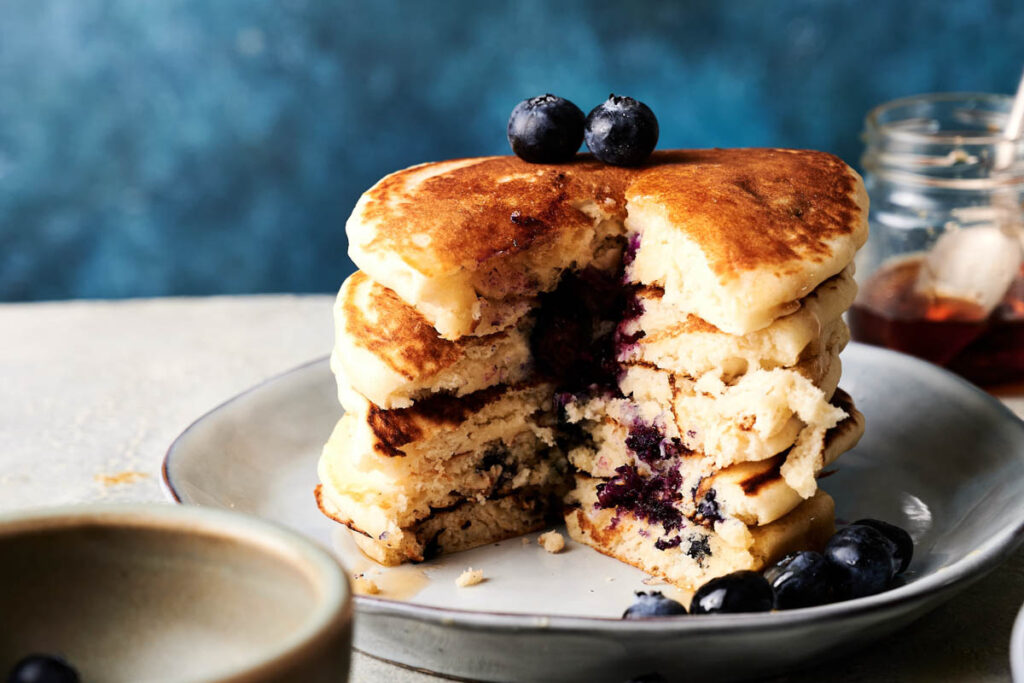
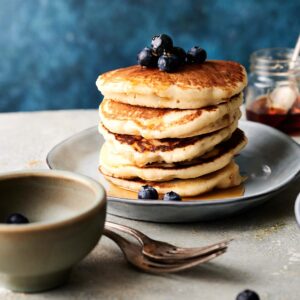
Fluffy Blueberry Pancakes are one of those breakfasts that never get old. You get the perfect balance of soft, tender centers and crispy edges in every bite, and the whole, juicy blueberries hold their shape, adding bursts of sweetness that make each bite pop. If you’re looking to make your mornings sweeter and brighter, this is the way to go.
This post contains affiliate links. As an Amazon Affiliate, if you purchase through those links, I earn a commission. Thank you!
When I need something quick and easy that everyone’s happy with, especially for a relaxed brunch, laid-back gathering, or busy morning, these fluffy pancakes always come through. They freeze well, reheat beautifully, and don’t take much planning. I like that they can be made ahead, so you can join your loved ones on the table and not get stuck in the kitchen.
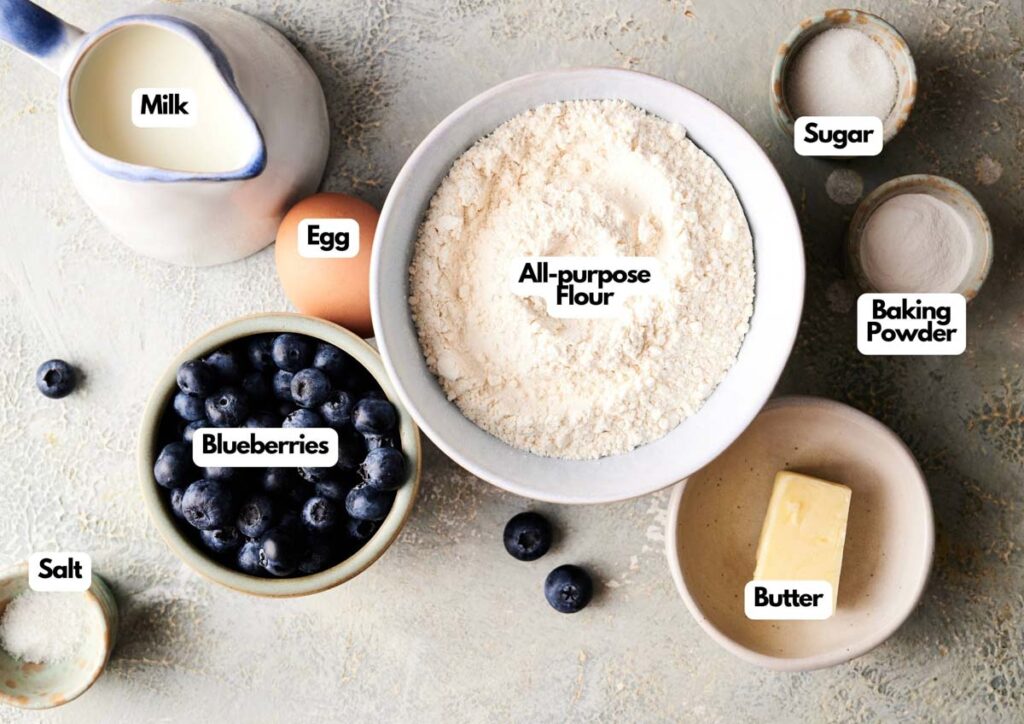
Ingredients You’ll Need
You’ll need all the ingredients shown in the photograph below.
How to Make Blueberry Pancakes with Step-By-Step Instructions
Scroll down for the full recipe card containing a full printable recipe and measurements in both US customary and metric units.
These pancakes are easy to pull off when you follow my simple, clear steps below.
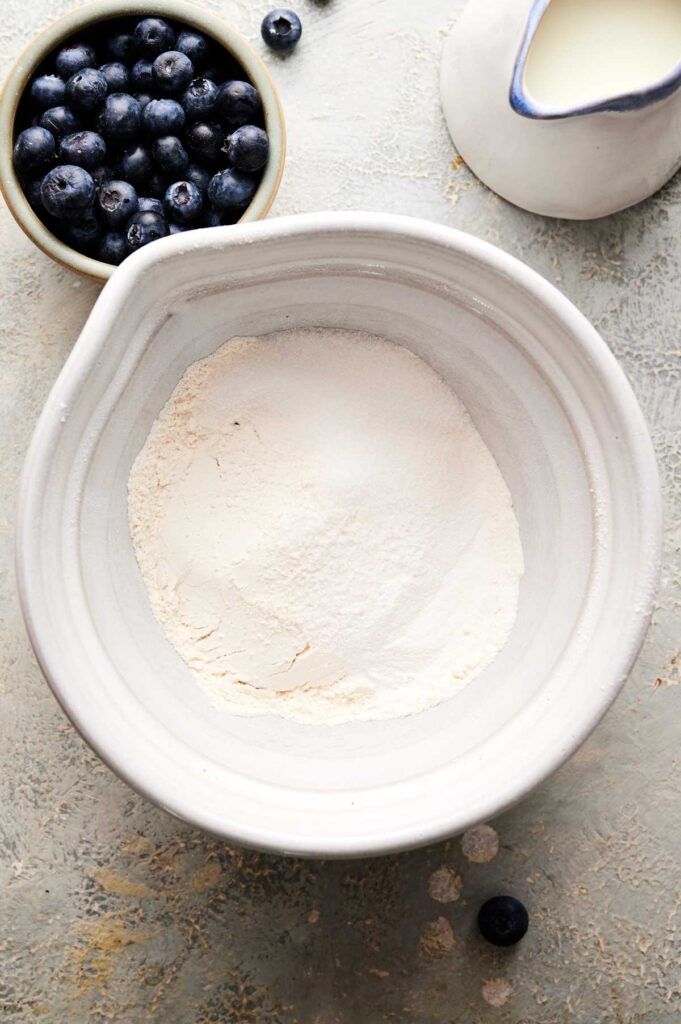
Mix the Dry Ingredients
In a large bowl, whisk together the all-purpose flour, baking powder, salt, and sugar. This helps distribute everything evenly so the pancakes rise properly and taste balanced.
I use this batter bowl here with a convenient pour spout, which helps me pour the batter neatly without making a mess—perfect for pancakes! I also like using this large, deep mixing bowl as it makes it easier to stir everything without flour flying everywhere.
For whisking, a sturdy balloon whisk like this makes it easy to combine the dry ingredients without leaving clumps.
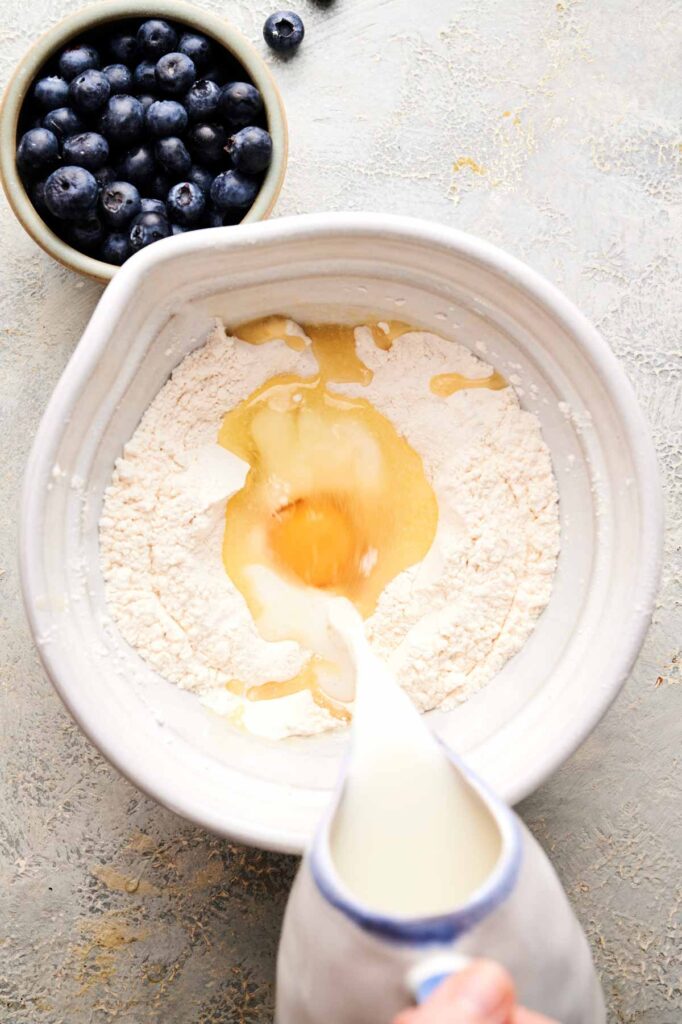
Add the Wet Ingredients
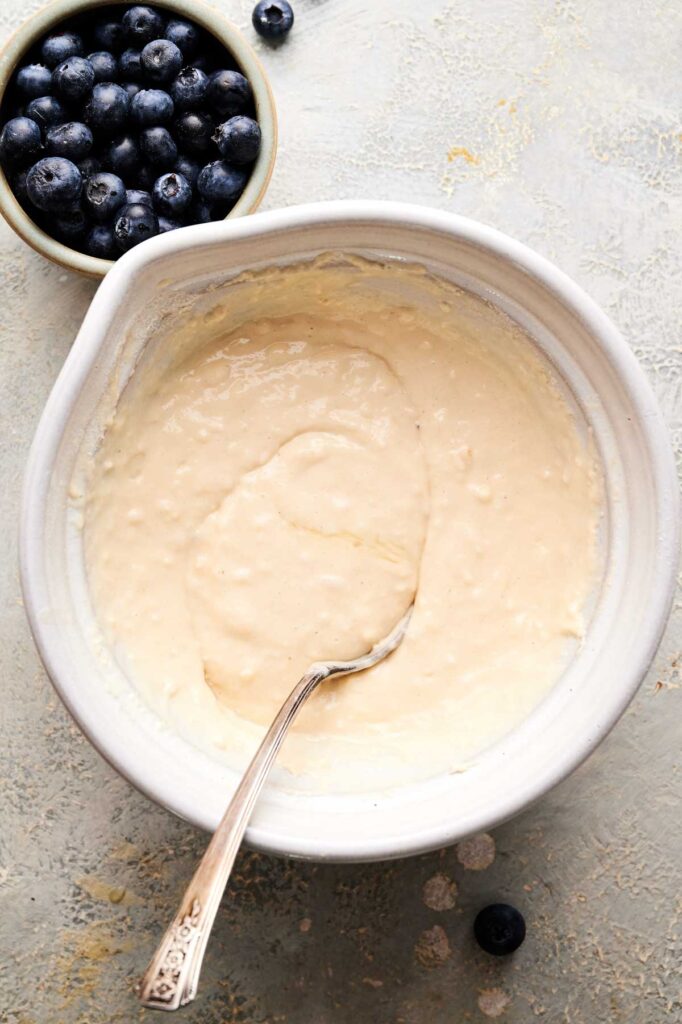
Create a well in the center of the flour mixture and pour in the melted butter, egg, and milk. If you don’t create a well, the wet ingredients can spread unevenly through the dry mix, making it harder to combine everything smoothly.
Stir everything together gently—overmixing can develop too much gluten, which makes the pancakes tough instead of light and fluffy. If the batter has a few lumps, don’t worry. That actually means you haven’t overmixed it.
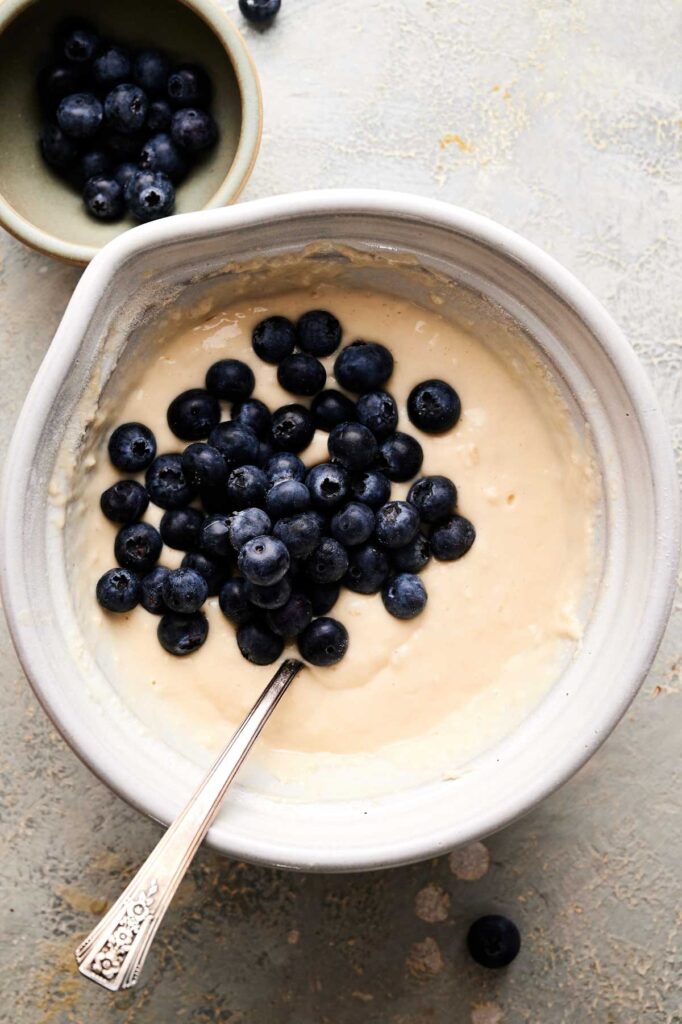
Fold in the Blueberries
Add the fresh blueberries and fold them in carefully with a spatula. Be gentle so the berries stay mostly whole, which helps avoid streaky batter and keeps the pancakes from turning purple.
I usually use a silicone spatula like this one to gently fold the ingredients—it’s flexible and also great for scraping the bowl clean. Also, if you want to keep the berries from sinking, you can toss them first in a bit of flour using a small prep bowl like this.

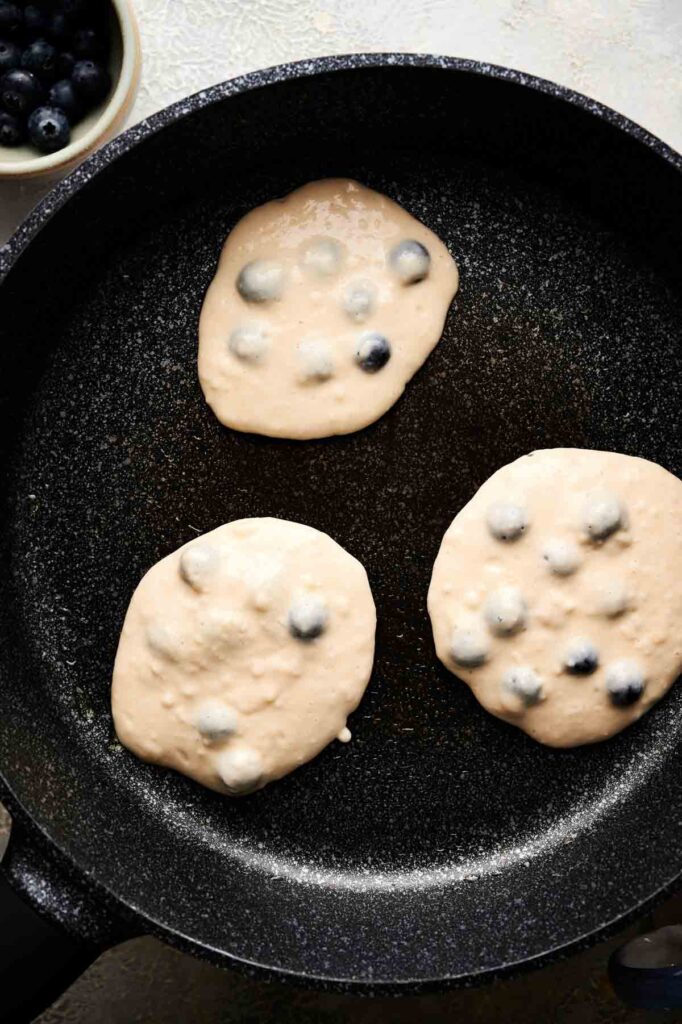
Cook the Pancakes
Heat a non-stick skillet or griddle over medium heat and lightly grease it with oil or butter to prevent sticking. I love using this large nonstick skillet, or sometimes, this griddle, because you can cook multiple pancakes at once using either without uneven hot spots.
Pour about ¼ cup of batter onto the hot surface for each pancake, spacing them a couple inches apart so they have room to spread, cook evenly, and are easy to flip. Work in batches if needed, so you don’t overcrowd the pan—overcrowding can lead to undercooked spots.
Keeping the batter amount consistent also helps all the pancakes cook at the same rate look more uniform, which makes stacking and serving easier. I use this set of measuring cups for this—it makes it easier to portion out batter accurately without needing to eyeball every time.
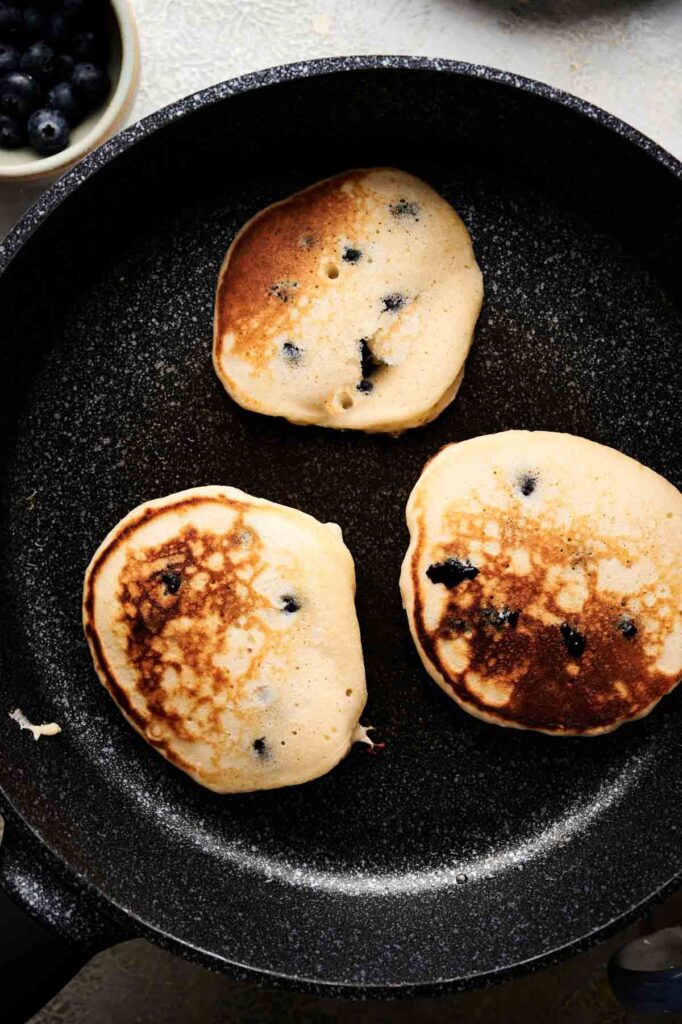
Flip and Finish
Once bubbles form on the surface and the edges begin to set—usually in 2-3 minutes—flip the pancakes. A wide silicone spatula like this makes flipping pancakes smooth and easy without sticking or breaking their edges.
The bubbles are a sign that the batter’s cooking through and releasing steam, which helps the pancakes build their light and fluffy texture. After flipping, cook for another 1-2 minutes on the other side until golden brown and fully cooked.
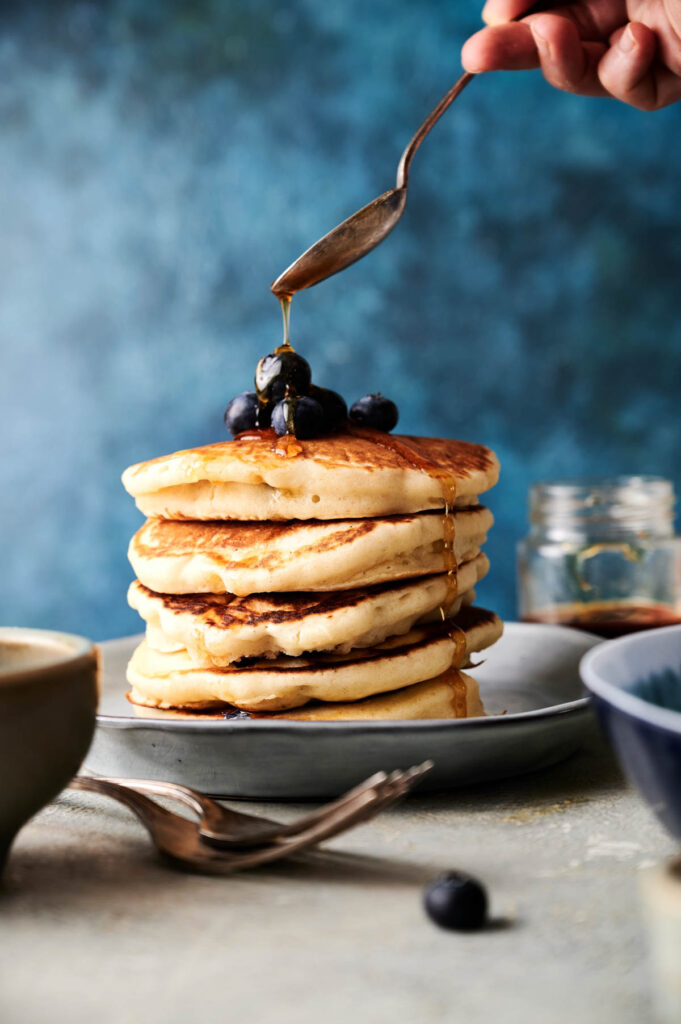
Serve Warm
Transfer pancakes to a plate and top with maple syrup, a handful of extra blueberries, or a dusting of powdered sugar if you like. For a pretty powdered sugar dusting, I use a fine mesh strainer like this one—works like a charm.
Serve hot, grab your fork, and enjoy!
If you’re making a large batch for a brunch or breakfast away from home, pack the pancakes into a hard-sided food container to keep them from getting squished. Then slide the container into an insulated casserole carrier to keep them nice and warm.
Recipe Notes and Expert Tips
I’ve included a few helpful tips below to make sure your pancakes come out just the way you want them.
- Measure flour the right way: Use the spoon-and-level method to avoid compacting the flour, which can lead to dense pancakes.
- Use what you have on hand wisely: Try avocado oil instead of butter, brown sugar for deeper flavor, and buttermilk for extra fluffiness. No buttermilk either? Mix milk with a splash of vinegar. A little vanilla also adds nice warmth.
- Stir, don’t beat: Mix the batter until just combined. Overmixing activates too much gluten and makes pancakes chewy instead of fluffy.
- Let the batter rest: Letting the batter rest—about 5-10 minutes—gives the flour time to absorb the liquid, which gives the pancakes a softer and fluffier texture once cooked.
- Help blueberries stay put: Tossing them in a little flour before folding them in keeps them from sinking so you get berries in every bite.
- Use medium heat: Too hot and the outsides will brown before the inside is done. Keep it moderate for even cooking.
- Wipe the skillet as needed: Between batches, clean off any burnt bits or butter to keep the next round of pancakes golden, not patchy. I wipe mine using this paper towel; it’s non-scratch, reusable, and super simple and effective.
- Hold pancakes in a warm oven: Place finished pancakes on a baking sheet in an oven if you want to keep them warm while finishing the rest of the batch.
How to Store Leftovers
Once the pancakes have cooled completely, store them in an airtight container in the fridge for up to 3-4 days. I like using this stackable glass container because the lid seals tight and prevents the pancakes from drying out.
You can also freeze them for up to 2 months by stacking them in a freezer-safe bag or container with wax papers between layers to prevent sticking. These thick freezer bags are super handy for keeping the pancakes secure while saving freezer space.
If I’m using containers, these freezer containers with locking lids are my go-to as they keep the pancakes fresh without freezer burn. I also make sure to slip some parchment paper in between if I’m stacking them, to keep them from clumping together as they freeze.
They also reheat beautifully in a toaster, oven, or microwave—no need to thaw first if you’re short on time. This oven toaster right here crisps them right back up, keeping them soft in the center, without drying them out.
What to Serve With Blueberry Pancakes
Pair your pancakes with crispy bacon, sausage links, or scrambled eggs for a full breakfast plate. If you want something lighter, a spoonful of Greek yogurt or a handful of fresh fruit on the side works great too. A hot cup of coffee or freshly squeezed orange juice rounds it out perfectly.
More Easy Recipes for You to Try at Home
I’ve got plenty more breakfast and brunch favorites that are just as simple and flavorful.
- Sourdough Waffles
- Amish Breakfast Casserole
- Jalapeño Honey Cornbread Muffins
- Cheddar Bay Sausage Balls
- Churros Recipe
Did you make this recipe? We’d love to know! Please leave a 5-star review below (it really helps!) and tag and follow us on Pinterest and Facebook for more tasty inspiration!
Blueberry Pancakes
Equipment
Ingredients
- 1 ½ cups all-purpose flour
- 3 ½ teaspoons baking powder
- ½ teaspoon salt
- 1 tablespoon sugar
- 1 ¼ cups milk
- 1 large egg
- 3 tablespoons unsalted butter melted
- 1 cup blueberries fresh or frozen
Instructions
- In a large mixing bowl, whisk together the flour, baking powder, salt, and sugar.1 ½ cups all-purpose flour, 3 ½ teaspoons baking powder, ½ teaspoon salt, 1 tablespoon sugar
- Make a well in the center and pour in the melted butter, egg, and milk. Stir until just combined — a few small lumps are fine. Avoid overmixing. Gently fold in the blueberries with a spatula, being careful not to overwork the batter.1 ¼ cups milk, 1 large egg, 3 tablespoons unsalted butter, 1 cup blueberries
- Heat a non-stick skillet or griddle over medium heat and lightly grease it with oil or butter.
- Pour about ¼ cup of batter onto the skillet for each pancake. Cook until bubbles form on the surface and the edges look set, about 2–3 minutes.
- Flip and cook for another 1–2 minutes, or until golden brown and cooked through. Transfer to a plate and repeat with the remaining batter.
- Serve warm with maple syrup, extra blueberries, or a dusting of powdered sugar.
Video
Notes
- Measure flour the right way: Use the spoon-and-level method to avoid compacting the flour, which can lead to dense pancakes.
- Use what you have on hand wisely: Try avocado oil instead of butter, brown sugar for deeper flavor, and buttermilk for extra fluffiness. No buttermilk either? Mix milk with a splash of vinegar. A little vanilla also adds nice warmth.
- Stir, don’t beat: Mix the batter until just combined. Overmixing activates too much gluten and makes pancakes chewy instead of fluffy.
- Let the batter rest: Letting the batter rest—about 5-10 minutes—gives the flour time to absorb the liquid, which gives the pancakes a softer and fluffier texture once cooked.
- Help blueberries stay put: Tossing them in a little flour before folding them in keeps them from sinking so you get berries in every bite.
- Use medium heat: Too hot and the outsides will brown before the inside is done. Keep it moderate for even cooking.
- Wipe the skillet as needed: Between batches, clean off any burnt bits or butter to keep the next round of pancakes golden, not patchy. I wipe mine using this paper towel; it’s non-scratch, reusable, and super simple and effective.
- Hold pancakes in a warm oven: Place finished pancakes on a baking sheet in an oven if you want to keep them warm while finishing the rest of the batch.