
I always seem to have a bowl of cherries waiting to be eaten, and Cherry Pie is the easiest way to turn them into something special. The cherries cook down into a glossy, jammy filling with just the right amount of sweetness, all wrapped in a golden, flaky crust. There’s one simple step that keeps the fruit from falling apart as it bakes, and you’ll know it’s worth every bite.

This post contains affiliate links. As an Amazon Affiliate, if you purchase through those links, I earn a commission. Thank you!
Cherry Pie works for just about any occasion, from summer BBQs and 4th of July picnics to Thanksgiving and Christmas parties. I like to bake it the night before so it cools fully and slices cleanly the next day. It stores well in the fridge and freezes easily, too. It’s the kind of make-ahead dessert that always makes things feel a little simpler.
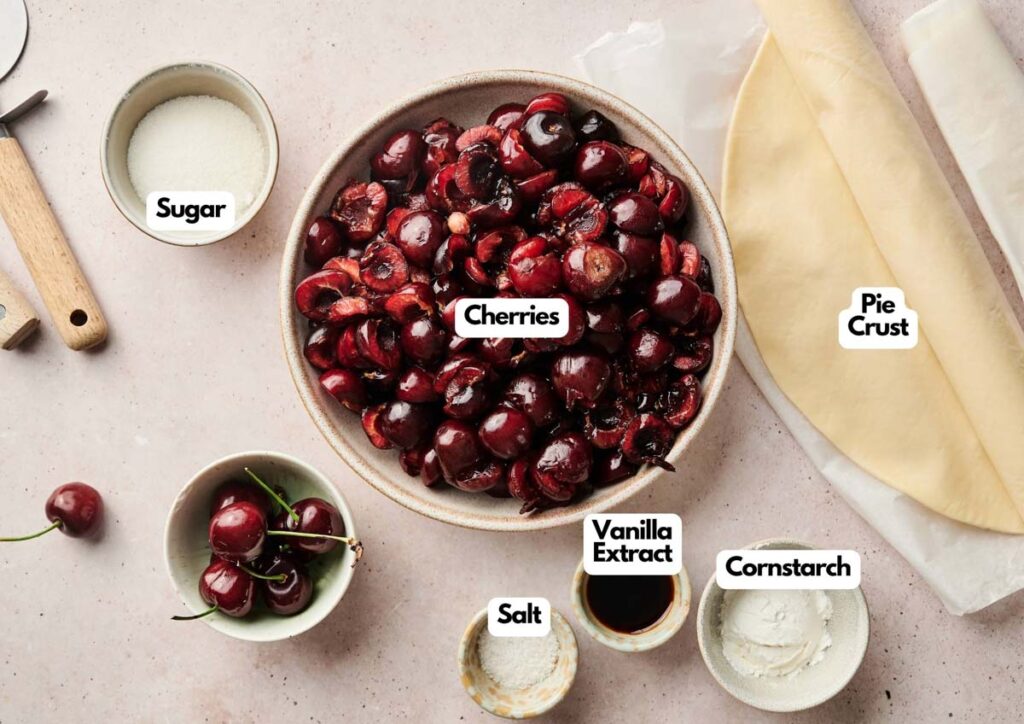
Ingredients You’ll Need
You’ll need all the ingredients shown in the photograph below.
How to Make Cherry Pie with Step-By-Step Instructions
Scroll down for the full recipe card containing a full printable recipe and measurements in both US customary and metric units.
If you follow these simple instructions, you’ll find making this cherry pie is easier than it looks and worth every step.
Preheat the Oven
Set your oven to 350°F (175°C) so it’s ready when your pie is assembled. I place an oven thermometer on the middle rack so I know it’s at the right temperature before baking.
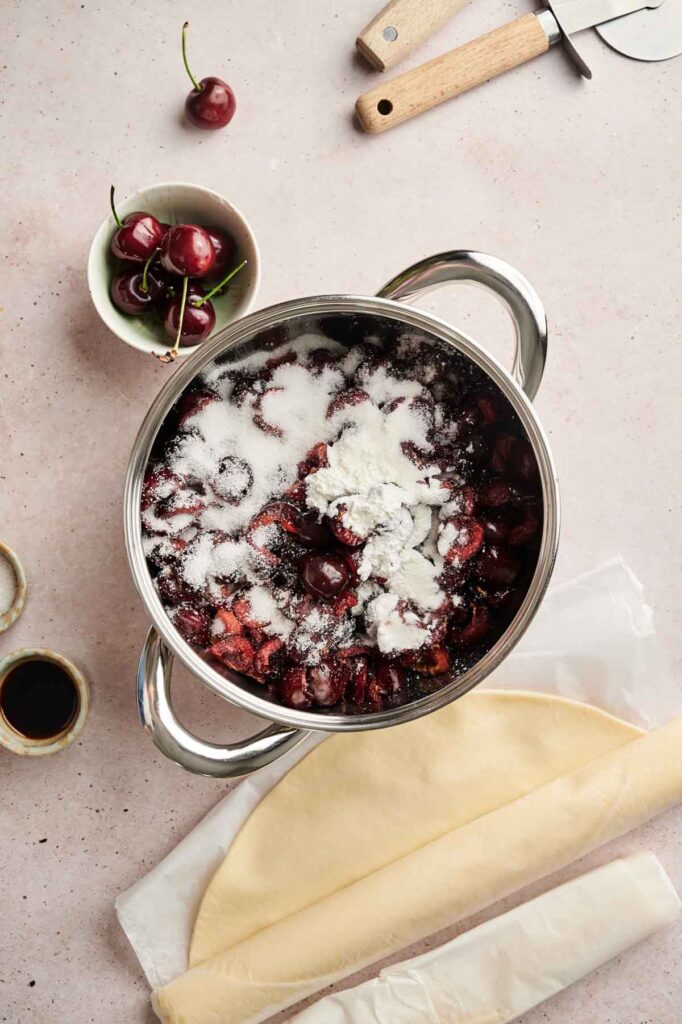
Cook the Cherry Pie Filling
In a medium saucepan over low heat, combine the fresh cherries with sugar and cornstarch. I like using this heavy-duty saucepan so the butter heats evenly without scorching.
Let everything cook until the sugar dissolves and the mixture thickens, stirring occasionally. I use a wooden spoon for this step; it’s gentle on the fruit and makes cleanup quick.
Be careful not to overmix, as it can cause the sweet cherries to break down. You want to keep them mostly whole so the filling has a balance of texture and visible fruit.

Add the Flavoring
Once the mixture has thickened, remove it from the heat. Add the vanilla extract and a pinch of salt to enhance the depth and bring out the cherries’ natural sweetness. Let it cool slightly while you prepare the crust.

SERIOUSLY GOOD
DESSERTS!
Dessert First is a collection of 61 RECIPES to show you that you can make beautiful, impressive desserts right in your own kitchen, no matter your skill level.
Immediate eBook download. No physical book available.
Includes ad-free recipes like:
∙ Lemon Pound Cake
∙ Starbucks Cake Pops
∙ Boston Cream Pie
∙ Chocolate Mousse
∙ Matcha Tiramisu
...and much more!

Line the Pie Dish
Unroll one pre-made pie crust and gently press it into the bottom of a 9-inch pie dish, smoothing it out to eliminate any air pockets. I always grab my ceramic pie dish with fluted edges for this because it bakes beautifully and looks great on the table.
To press the crust gently into the dish without tearing it, this stainless steel measuring cup with a flat bottom works perfectly for getting into the corners. If you’re working with delicate or smaller areas near the edge, a tart tamper can give you more control without damaging the pie dough.
Ensure it fits snugly into the corners and up the sides without stretching, as this can cause it to shrink as it bakes.
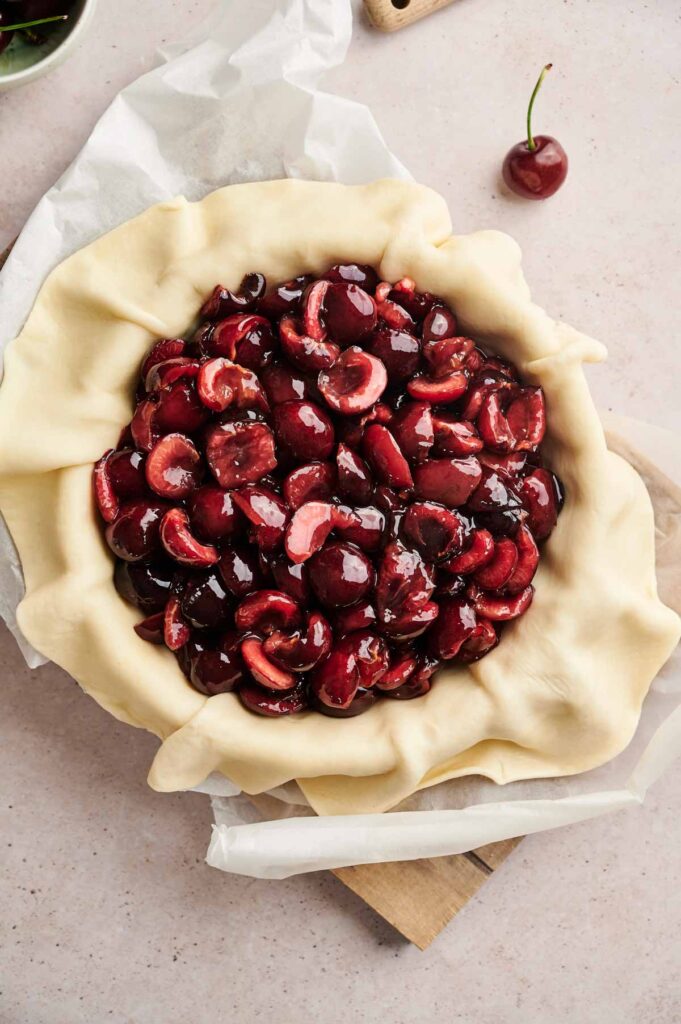
Fill the Pie
Pour the cooled cherry mixture into the prepared crust. Use a spoon or spatula to spread it from edge to edge. This flexible silicone spatula makes it easy to scrape the last of the filling out of the pan.
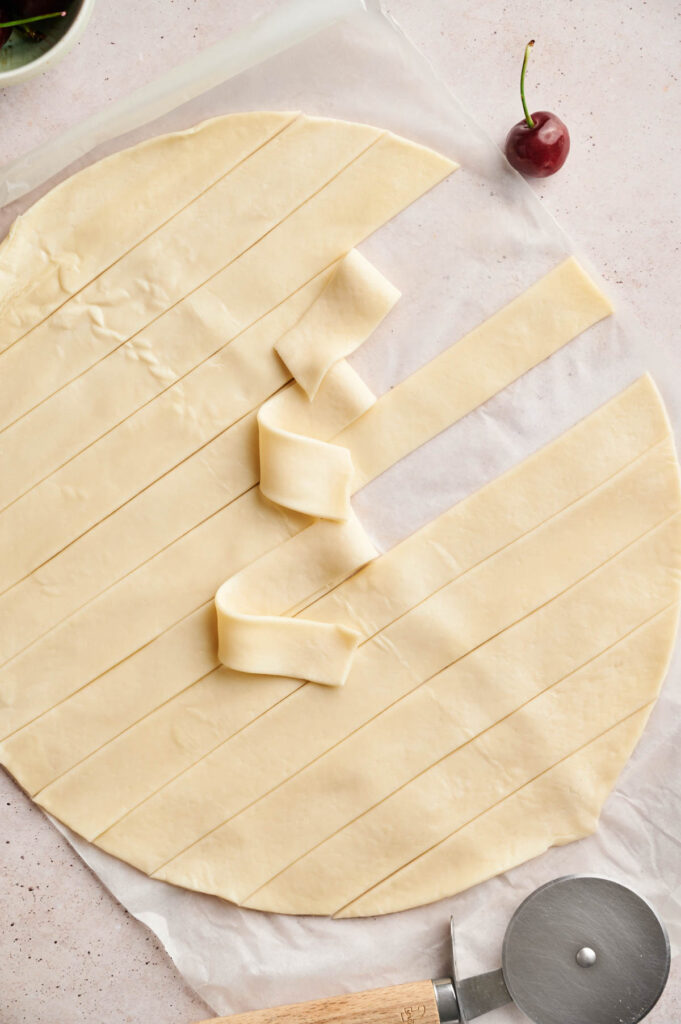
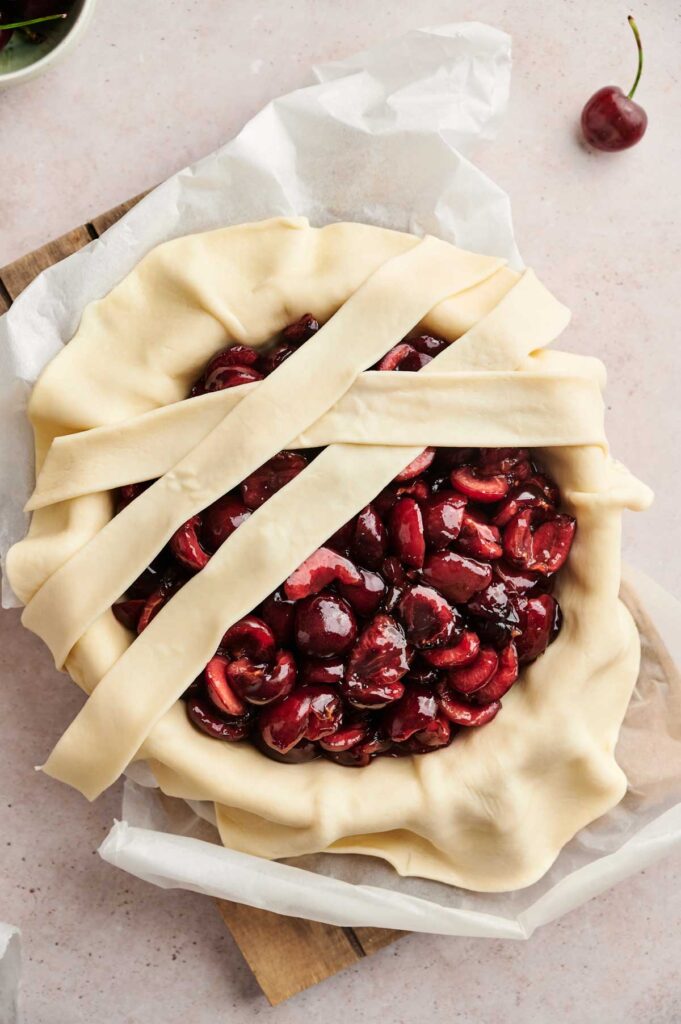
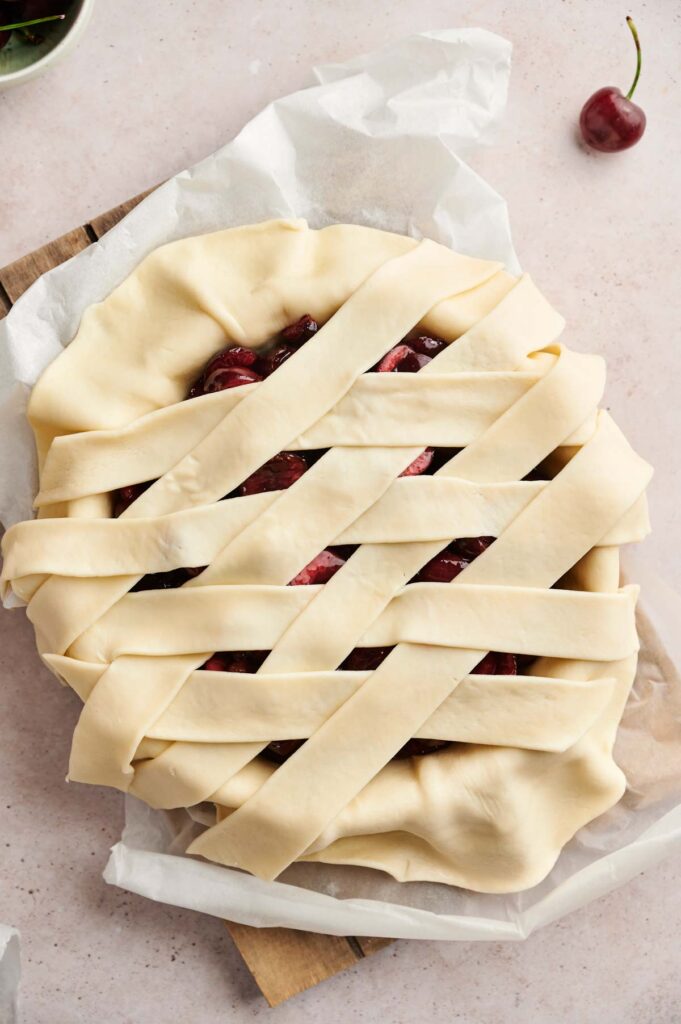
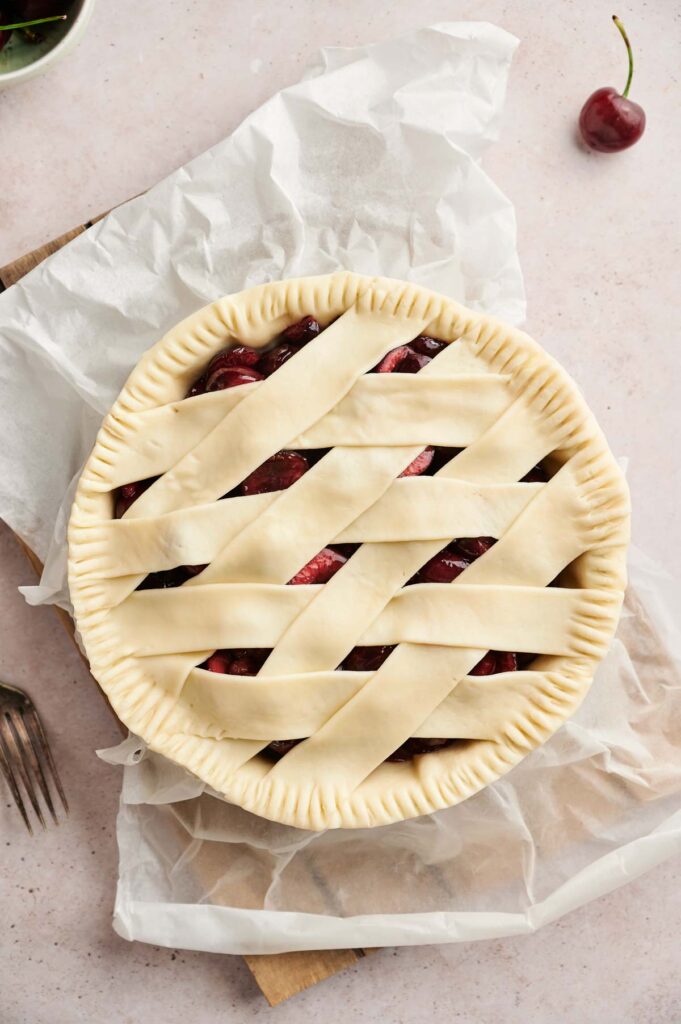
Make the Lattice Top
Slice the second pie crust into strips about ¾ to 1¼ inches wide using a sharp knife or pastry cutter for clean edges. Either a sharp chef’s knife or a pastry wheel works well, as both give smooth strips that bake up nicely.
Lay half the strips of dough evenly across the top of the pie in one direction, then weave the remaining strips over and under to form a classic lattice pattern. Once arranged, press the ends of each strip into the edge of the bottom crust to seal everything together and prevent gaps during baking.
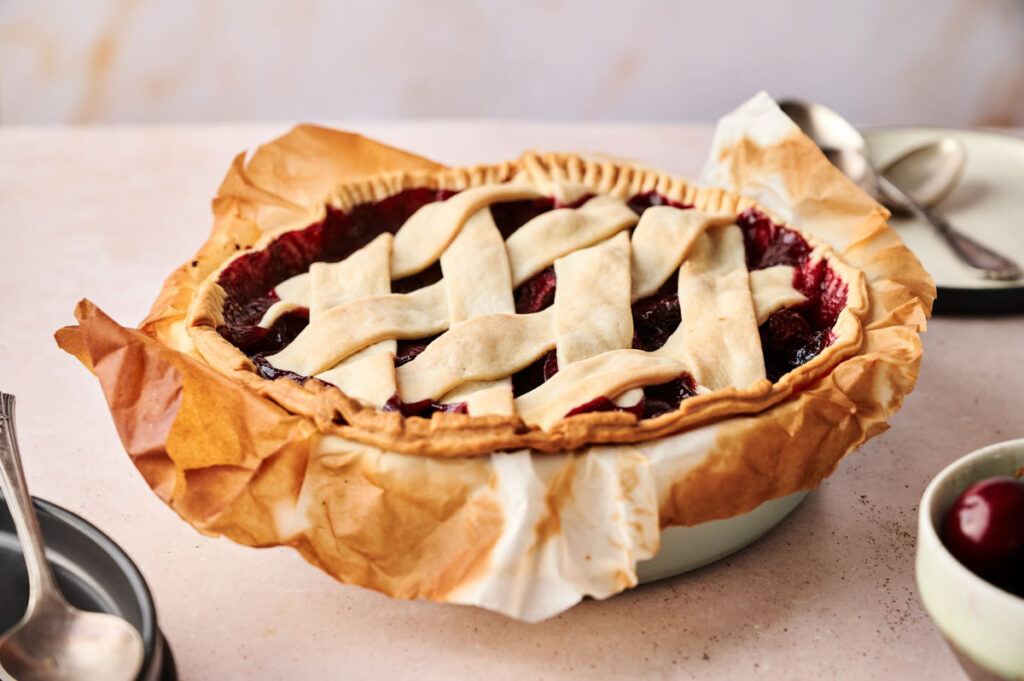
Bake the Homemade Cherry Pie
Place the pie in the preheated oven and bake for 50-60 minutes, or until the top crust is golden brown and the filling is bubbling around the edges. I always place the pie dish on my rimmed baking sheet lined with precut parchment paper in case any filling bubbles over; it saves a messy oven cleanup.
Keep an eye on the crust and loosely cover it with foil if it browns too quickly. It’s helpful to have heavy-duty aluminum foil nearby for tenting the crust toward the end, if needed.

Let It Cool
Once baked, remove the pie from the oven and let it cool at room temperature on a wire rack. This helps the filling set, making it easier to slice and serve. I use this cooling rack to allow air to circulate under the dish.
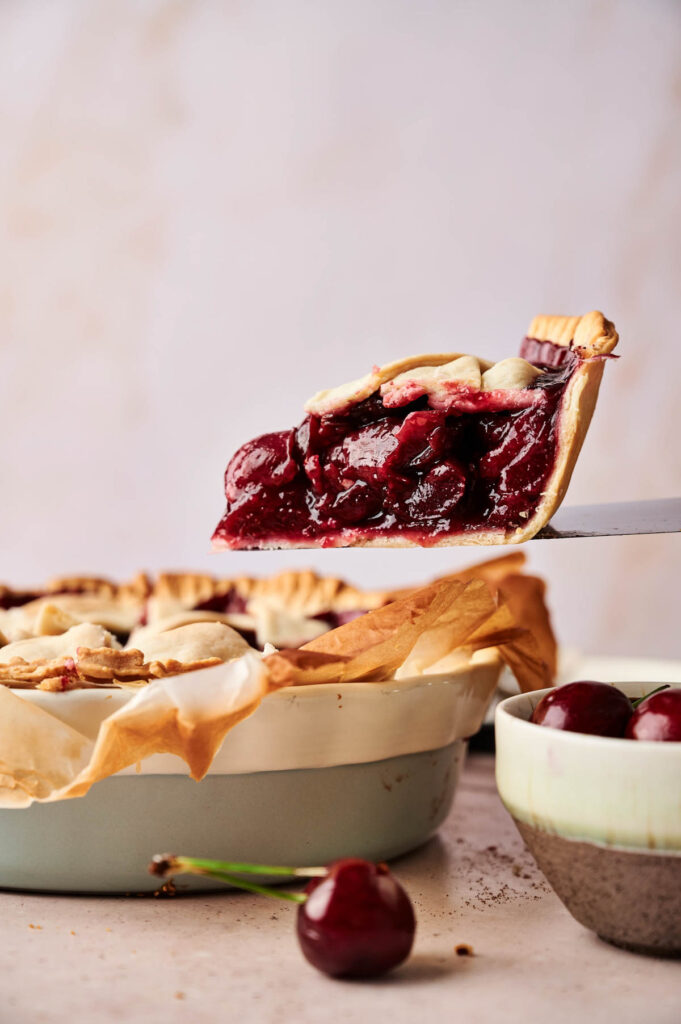
Serve the Pie
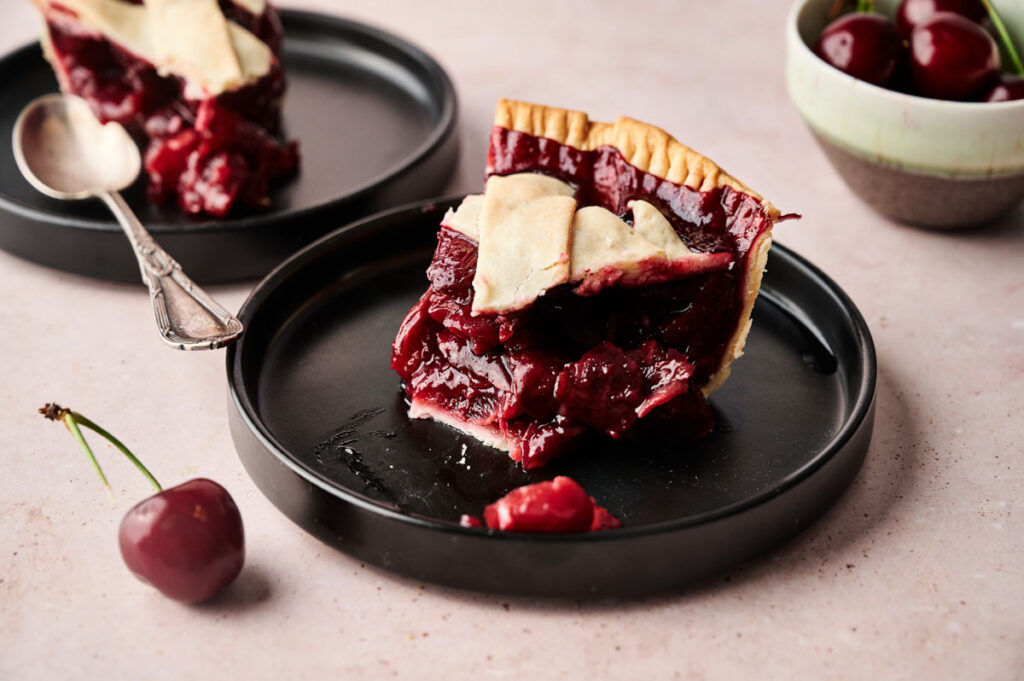
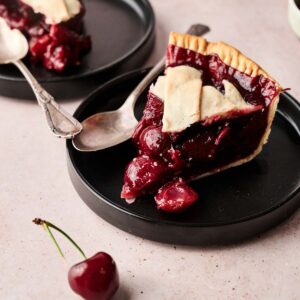
Once the pie has cooled, slice and serve it as is or with your favorite topping, such as vanilla ice cream or whipped cream. To get clean slices without disturbing the crust, I love using a pie cutter and server set; it makes it easy to lift each piece out neatly.
The filling will hold together best when fully cooled. Finally, enjoy your sweet Cherry Pie!
If you’re bringing this to a holiday gathering, I pack it in my cake carrier with a locking lid and handle to prevent it from shifting or getting damaged during transit. To keep it cool along the way, I slide the whole container into this round insulated pie carrier, which holds temperature well and doesn’t take up too much space.
Recipe Notes and Expert Tips
I always like to keep a few helpful tricks in mind when making cherry pie, so everything turns out smooth from start to finish.
- Use Fresh or Frozen Cherries: While sweet cherries are classic, tart cherries/sour cherries, or a mix of both can add depth and balance to the filling.
- Rinse and Pit Carefully: Ensure your cherries are clean and thoroughly pitted to avoid bitter bites or cracked teeth.
- Don’t Over-Stir: Stir just enough to avoid sticking and clumps, but not so much that the cherries lose their shape.
- Use a Large Bowl for Mixing: When tossing the filling, a large bowl helps coat the fruit evenly without making a mess. I use this glass mixing bowl because it’s transparent, so I can easily see if the ingredients are mixed.
- Seal the Crust Edges: Press the lattice strips into the bottom crust to prevent them from lifting or separating during baking.
- Texture and a Twist: Sprinkle coarse sugar over the lattice crust for added sparkle and crunch, or mix in a handful of blueberries to enhance the pie’s flavor and texture.
- Chill the Dough and Use a Floured Surface: If you’re working with homemade pie crust, chill it first to prevent it from losing its shape. Then, roll it out on a floured work surface and trim excess dough.
- Add Subtle Accents: A splash of lemon juice brings out the cherries’ natural juiciness, while a drop of almond extract, paired with the vanilla, adds a soft, bakery-style taste. I always grab my citrus squeezer here to get the fresh lemon juice without seeds.
How to Store Leftovers
Let the pie cool completely, then cover it with foil or plastic wrap and refrigerate for up to 4 days. For wrapping the whole pie tightly, I always reach for a roll of BPA-free plastic wrap that clings well and won’t dry out the crust.
You can also freeze individual slices or the whole pie, tightly wrapped, for up to 3 months. To keep leftovers fresher longer, I store slices in glass airtight containers that stack neatly and won’t absorb odors.
Thaw in the fridge overnight and warm slightly before serving, if desired.
What to Serve With Cherry Pie
A scoop of ice cream is the classic pairing, but whipped cream or even a drizzle of warm chocolate sauce works beautifully, too. For drinks, serve it with iced coffee, black tea, or a glass of milk for a nostalgic touch.
More Easy Sweet Recipes for You to Try at Home
I’ve got plenty of simple, crowd-pleasing bakes and treats if you’re in the mood for more.
- Pumpkin Chocolate Chip Cookies
- Pumpkin Cake
- Pumpkin Pecan Pie Bars
- Blueberry Cheesecake
- Raspberry Cheesecake
Did you make this recipe? We’d love to know! Please leave a 5-star review below (it really helps!) and tag and follow us on Pinterest and Facebook for more tasty inspiration!
Cherry Pie
Equipment
Ingredients
- 6 cups fresh sweet cherries pitted
- ½ cup sugar
- 2 tablespoons cornstarch
- 1 teaspoon vanilla extract
- A pinch of salt
- 2 9-inch pre-made pie crust
Instructions
- Preheat your oven to 350°F (175°C).
- In a medium saucepan over low heat, gently cook the cherries with the sugar and cornstarch. Stir occasionally until the sugar dissolves and the mixture thickens. Be careful not to over-stir to help preserve the shape of the cherries.6 cups fresh sweet cherries, ½ cup sugar, 2 tablespoons cornstarch
- Remove from heat, stir in the vanilla extract and a pinch of salt, then allow the mixture to cool slightly.1 teaspoon vanilla extract, A pinch of salt
- Press one pie crust into the bottom of a 9-inch pie dish. Pour the cherry filling into the crust and spread it evenly.2 9-inch pre-made pie crust
- To create a lattice top: Slice the second pie crust into strips about ¾ to 1¼ inches wide. Lay half the strips across the pie, evenly spaced, then weave the remaining strips over and under to form a lattice pattern.
- Bake for 50 to 60 minutes, or until the crust is golden and the cherry filling is bubbling.
- Let the pie cool before slicing so the filling can set.
Video
Nutrition
SERIOUSLY GOOD
DESSERTS!
Dessert First is a collection of 61 RECIPES to show you that you can make beautiful, impressive desserts right in your own kitchen, no matter your skill level.
Immediate eBook download. No physical book available.
Includes ad-free recipes like:
∙ Lemon Pound Cake
∙ Starbucks Cake Pops
∙ Boston Cream Pie
∙ Chocolate Mousse
∙ Matcha Tiramisu
...and much more!