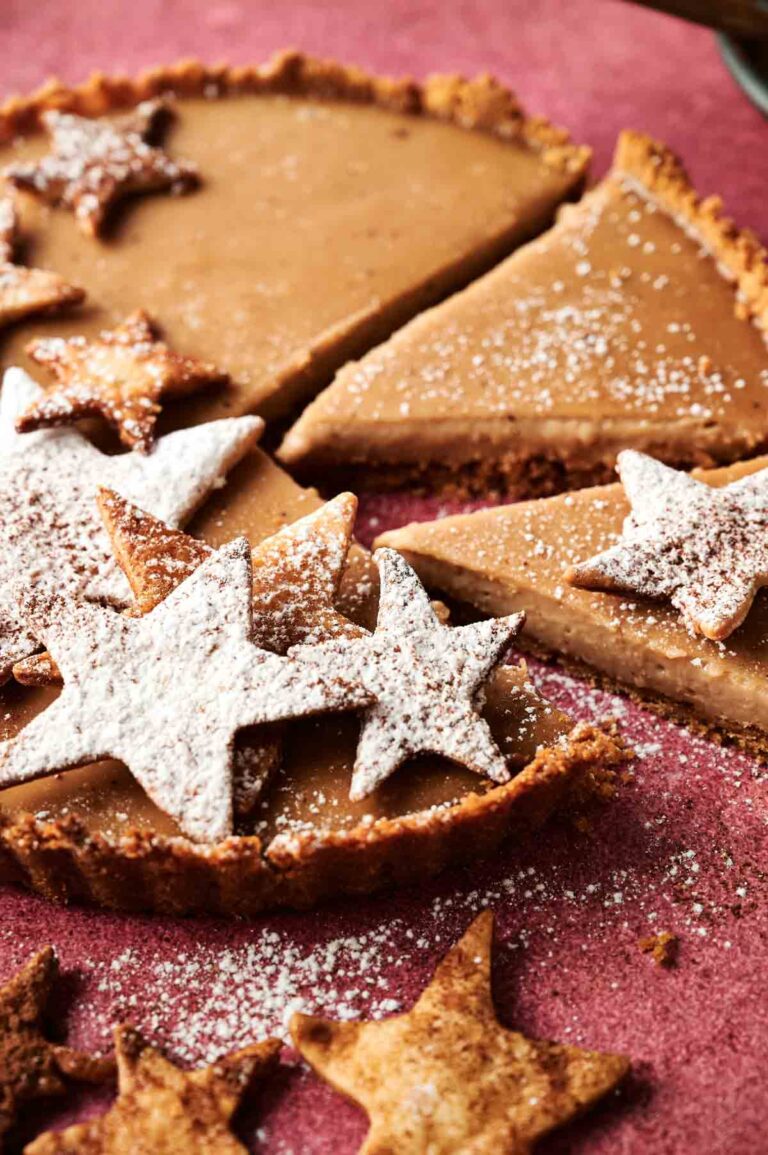
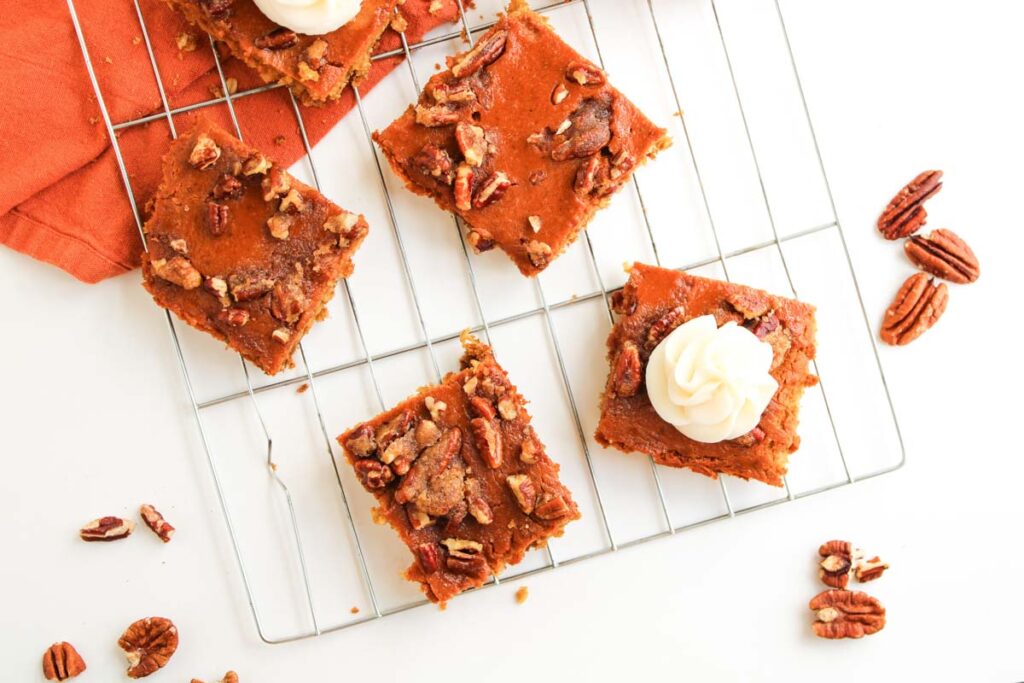
Pumpkin Pecan Pie Bars are one of those fall recipes I usually rely on when I want something festive, yet cozy. They’re easy to make from scratch, and without any pie dough, you still get the best parts: warm spices, creamy filling, and the classic pecan crunch. There’s a simple step that makes sure everything sets cleanly so you can slice and serve with zero stress!
This post contains affiliate links. As an Amazon Affiliate, if you purchase through those links, I earn a commission. Thank you!
I’ve made these bars for everything from game days to Thanksgiving dessert spreads, and they always fit in without a fuss. They’re the kind of treat I can prep in advance and stash away until I’m ready to serve, and they’re freezer-friendly too, so you wouldn’t worry about leftovers. As a home baker and cook myself, that flexibility really matters.
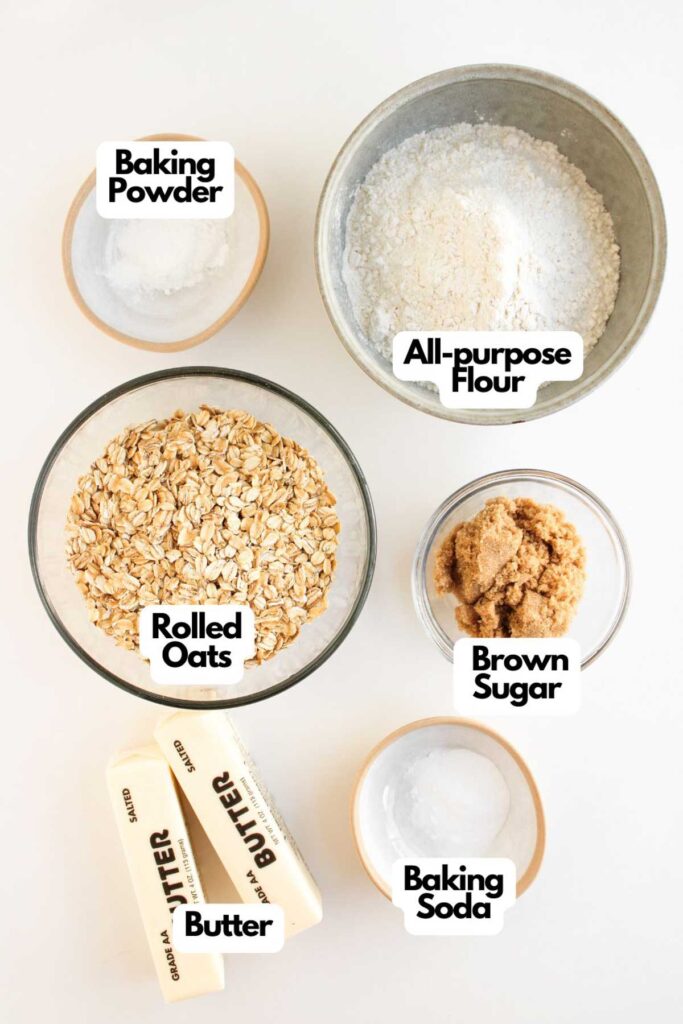
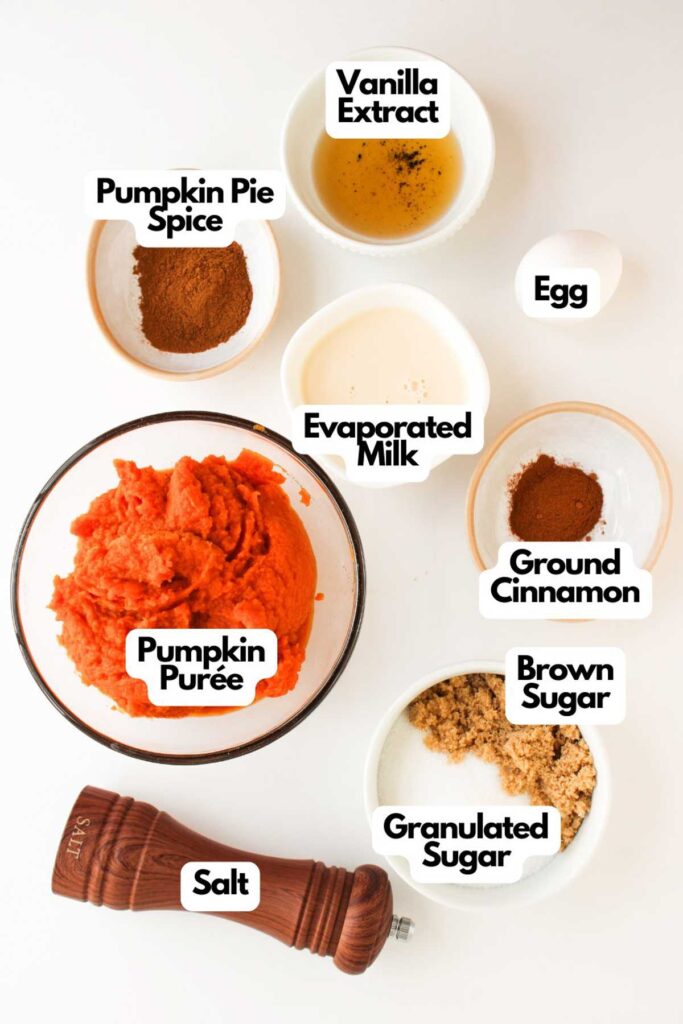
Ingredients You’ll Need
You’ll need all the ingredients shown in the photograph below.

How to Make Pumpkin Pecan Pie Bars with Step-By-Step Instructions
Scroll down for the full recipe card containing a full printable recipe and measurements in both US customary and metric units.
These bars come together easily if you follow my step-by-step instructions, which don’t require any fancy tools.
Prep the Pan and Preheat the Oven
Set your oven to 350°F and lightly grease a 9×13-inch pan. This nonstick baking pan not only makes cleanup easy, but is also warp-resistant and has a handle on both sides, unlike other baking pans I’ve had before.
To grease, I use this oil sprayer so I can just spray as much oil as I need, which is super quick. If you want to make removal extra easy later, go ahead and line the pan with parchment paper too. These pre-cut parchment sheets don’t curl and save time when prepping.

SERIOUSLY GOOD
DESSERTS!
Dessert First is a collection of 61 RECIPES to show you that you can make beautiful, impressive desserts right in your own kitchen, no matter your skill level.
Immediate eBook download. No physical book available.
Includes ad-free recipes like:
∙ Lemon Pound Cake
∙ Starbucks Cake Pops
∙ Boston Cream Pie
∙ Chocolate Mousse
∙ Matcha Tiramisu
...and much more!

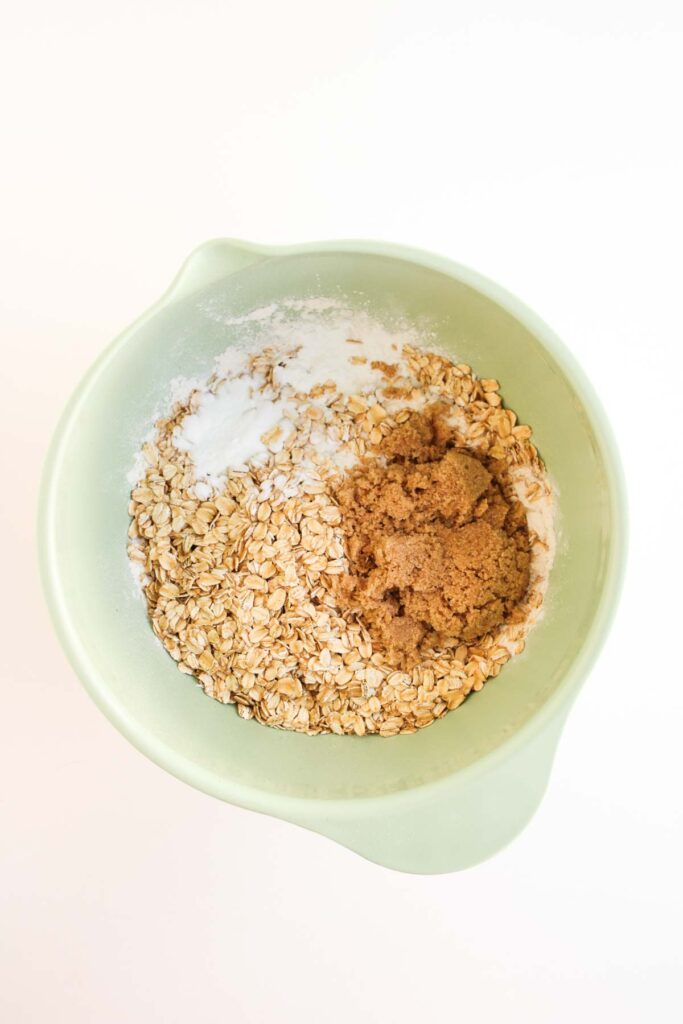
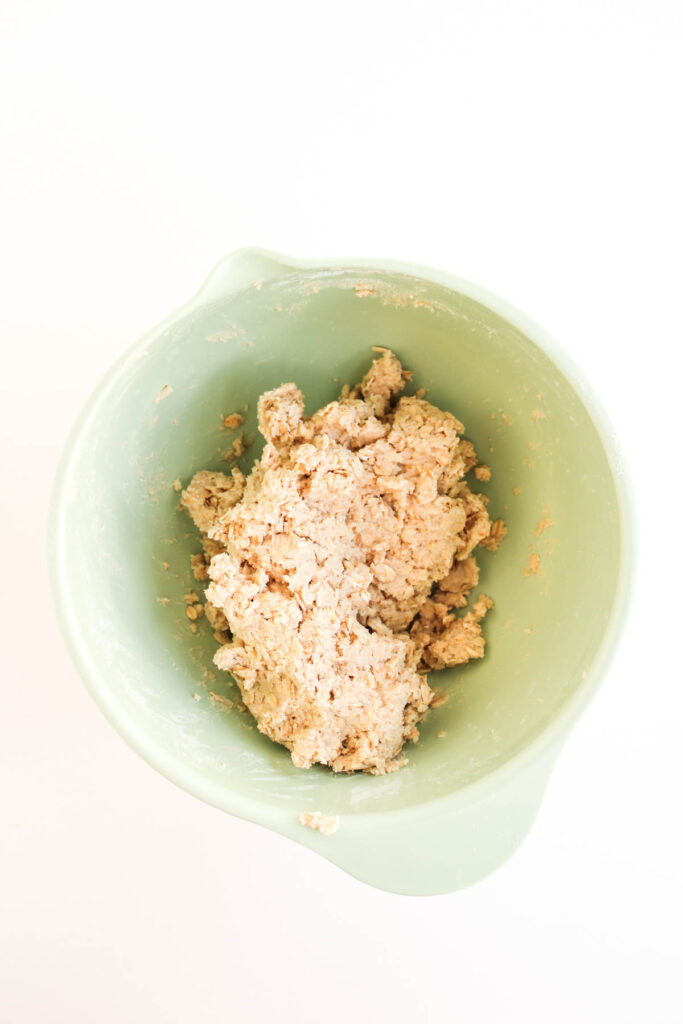
Make the Oat Crust
In a large bowl, mix together the all-purpose flour, oats, baking powder, baking soda, and light brown sugar. A deep mixing bowl like this one gives plenty of room to stir without spilling flour everywhere.
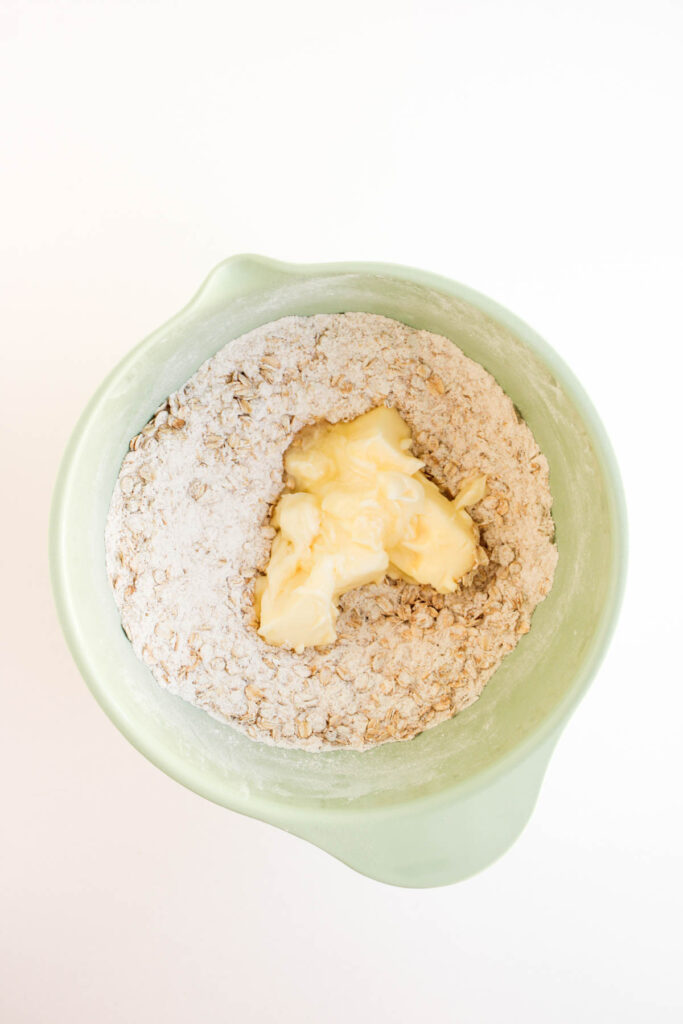
As you go, break up any clumps and make sure everything’s well combined before adding the softened butter. This way, the butter coats everything evenly and better, and you don’t overwork the flour, which could lead to a tough base.
Just work it in using a pastry cutter or your fingers until the dough becomes crumbly and soft. I like using this pastry dough blender to get even pieces of butter mixed in without melting. Once it holds together when pressed, you’re good to go.
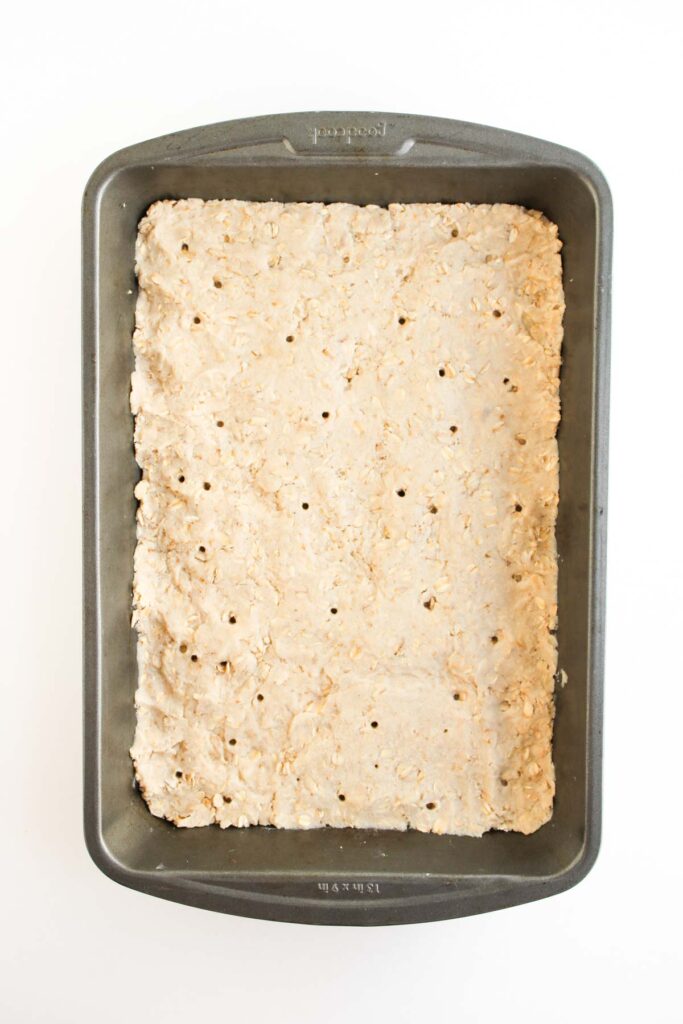
Bake the Crust
Press the oat mixture evenly into the bottom of the prepared pan to create a flat, compact layer, and help the crust hold together once baked. Then, lightly prick the surface with a fork to allow steam to escape during baking and prevent the crust from puffing up.
Bake it for 20 to 22 minutes, or until the top looks lightly golden. This gives it a head start before the filling goes on.
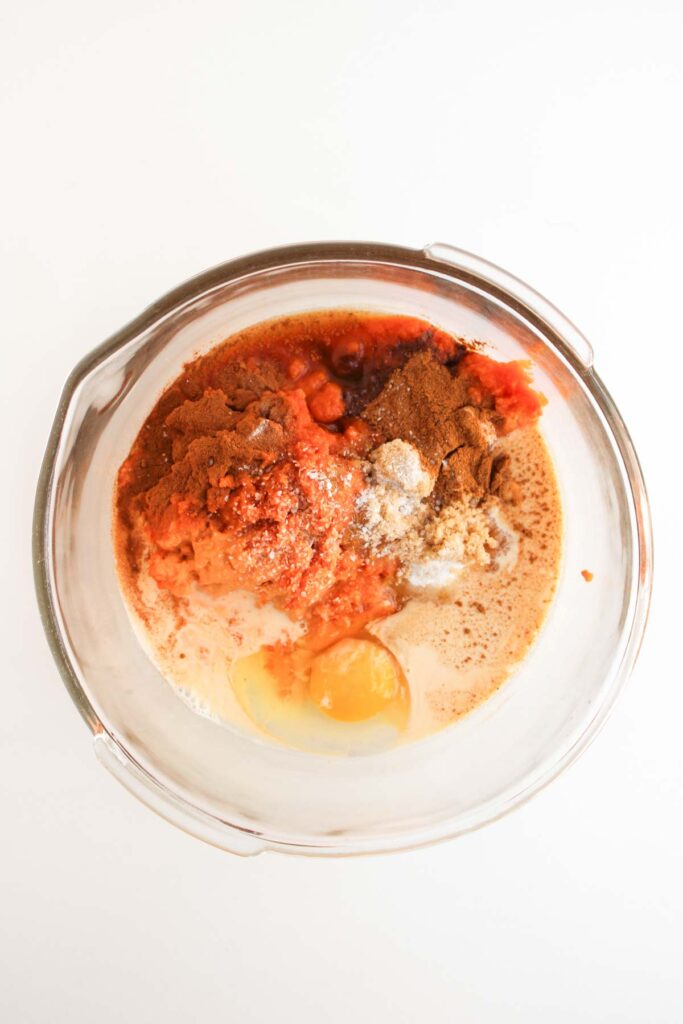
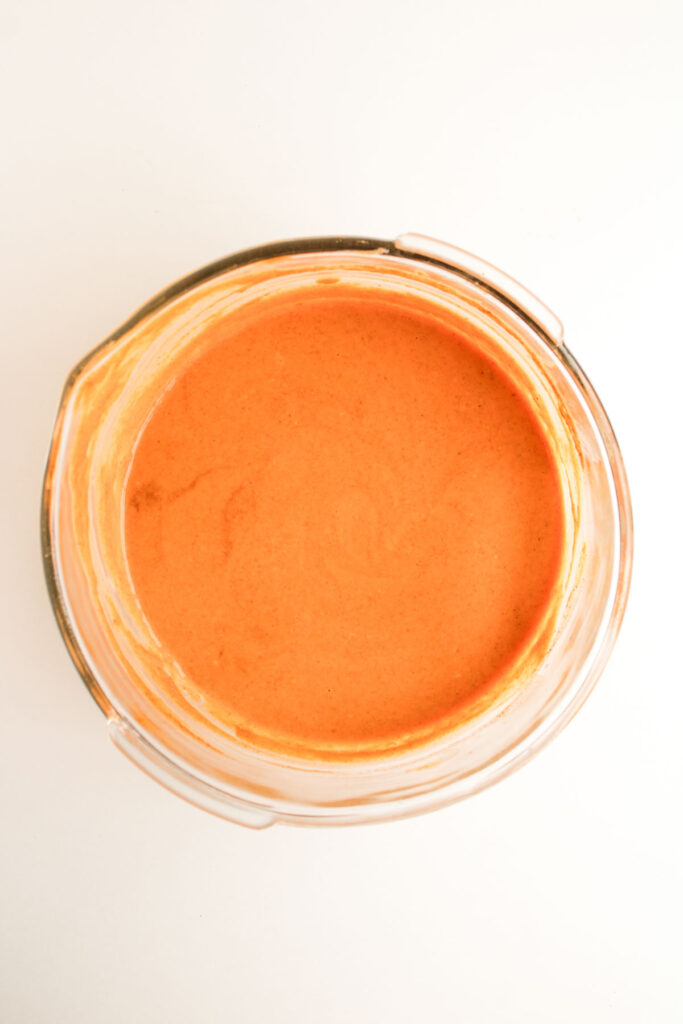
Mix the Pumpkin Pie Filling
While the crust bakes, whisk together the pumpkin puree, evaporated milk, both brown and granulated sugars, egg, cinnamon, vanilla extract, pumpkin pie spice, and salt in another bowl. This spout mixing bowl makes it easy to pour the filling cleanly over the crust.
Mix until the texture is completely smooth and there are no streaks of pumpkin, sugar, or egg. You want everything fully blended so the filling bakes beautifully and stays creamy. I also like using this balloon whisk when I’m whisking for longer periods, as it won’t strain your wrist.
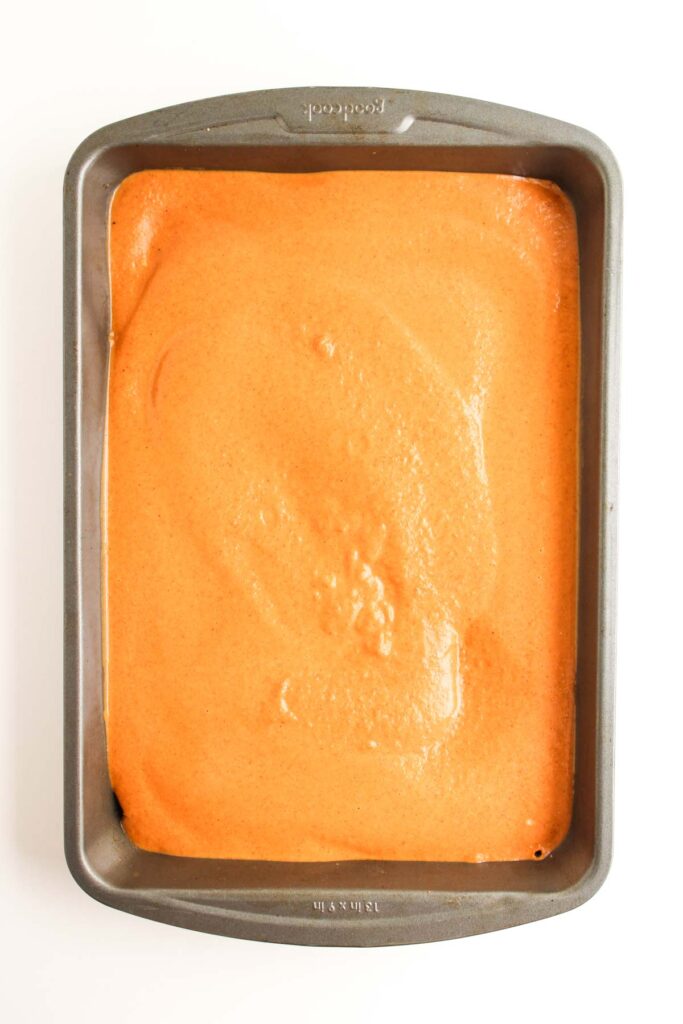
Add the Filling and Bake
Once the crust comes out of the oven, pour the pumpkin mixture right over the top while it’s still warm. The warmth helps the filling spread evenly and stick to the crust, so the layers hold together when sliced.
Return the pan to the oven and bake for 15 minutes; this gives the filling time to start setting before the topping goes on.
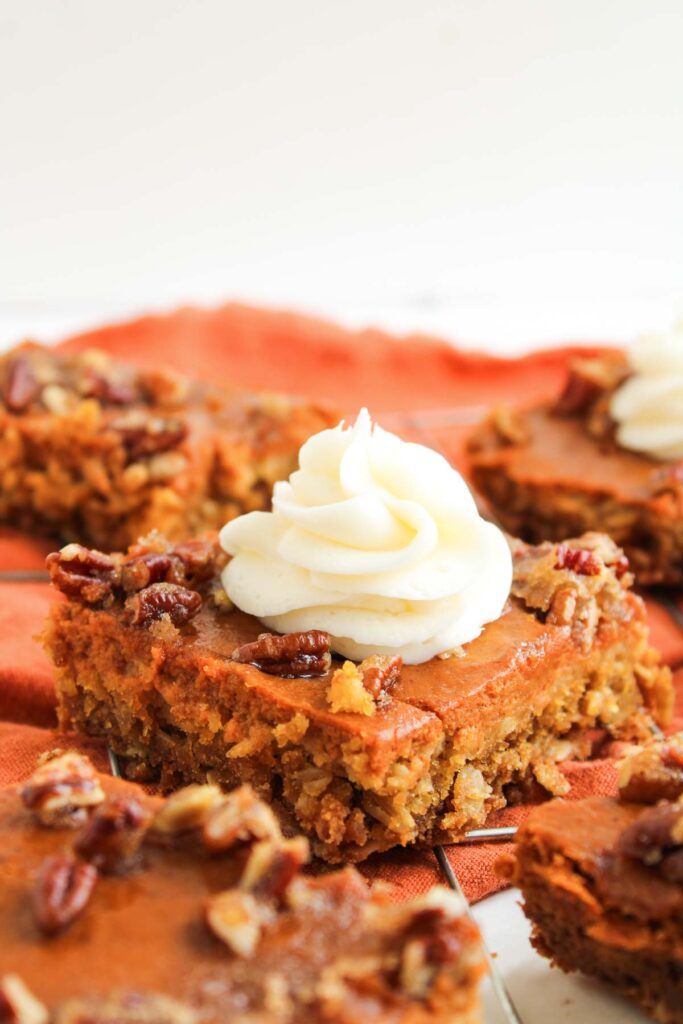
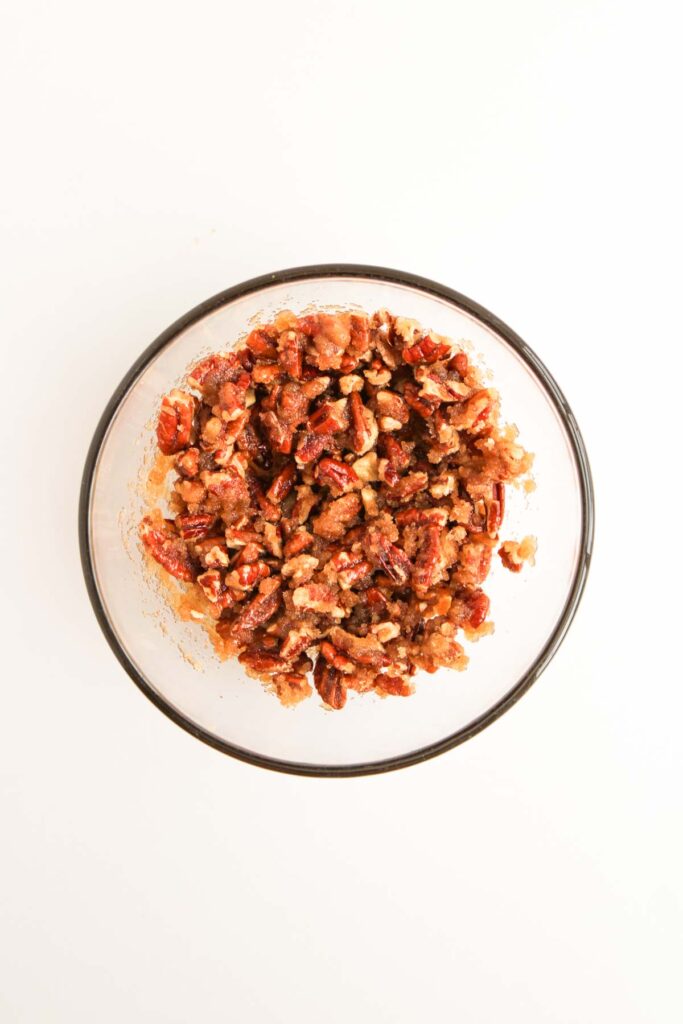
Prepare the Pecan Topping
Meanwhile, stir together the chopped pecans, brown sugar, and melted butter in a small bowl. The mixture should look glossy and sticky and be easy to sprinkle. For sticky sugars that are hard to scrape, I keep this silicone spatula on hand as it does the job well without scratching the bowl.
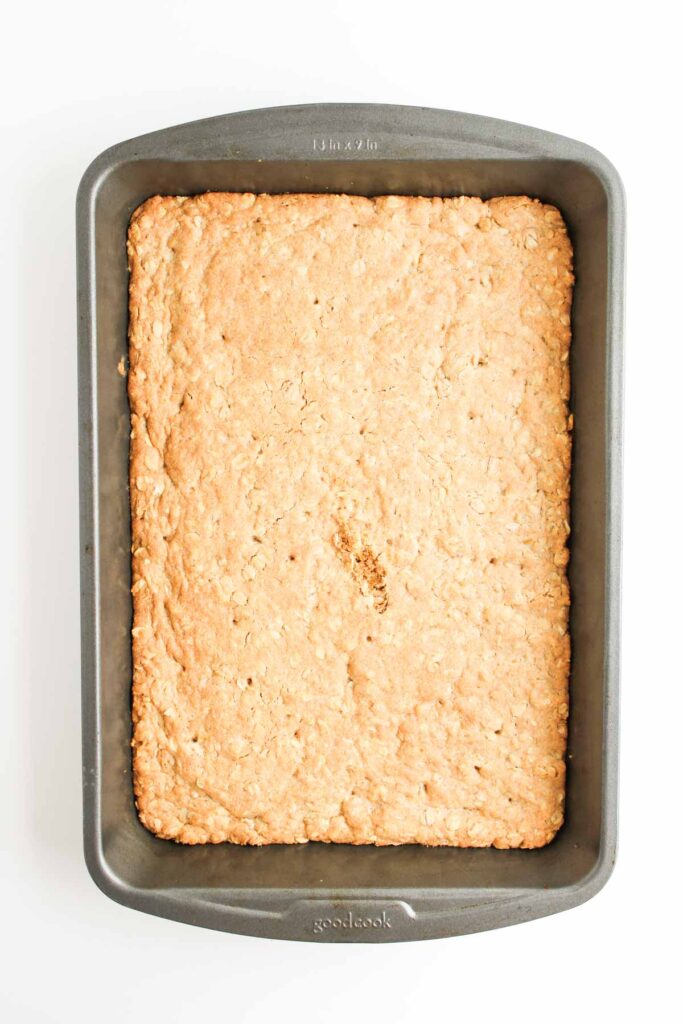
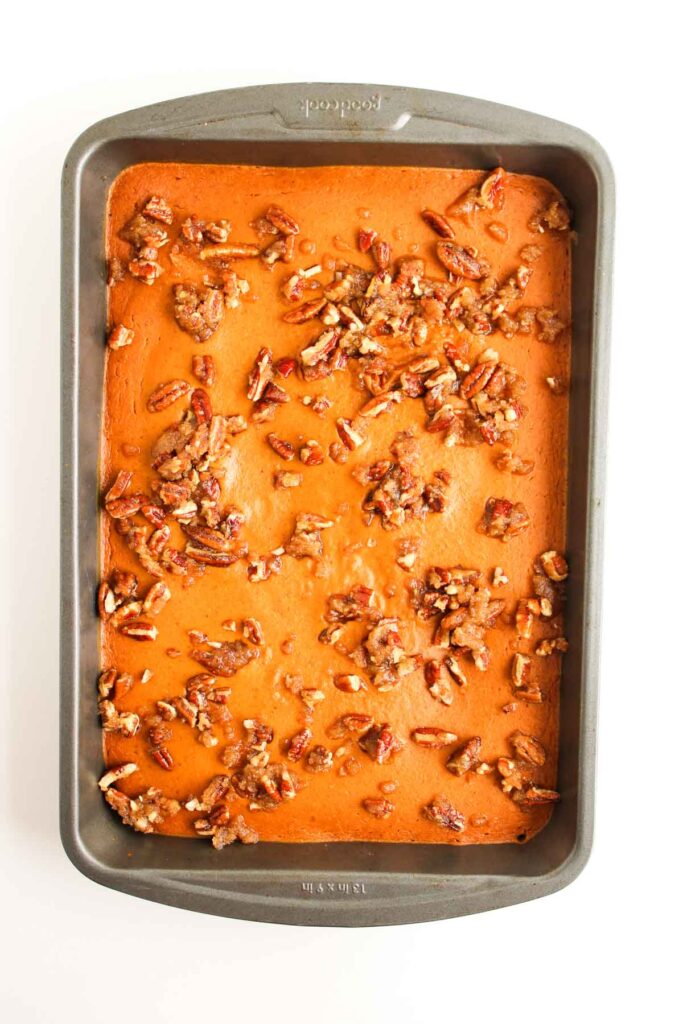
Add the Topping and Finish Baking
After the 15 minutes are up, carefully sprinkle the pecan topping all over the partially baked pumpkin layer, then bake again for 20 minutes. The edges should be set, and the center should still have a slight wobble when you gently shake the pan; that means the filling isn’t overbaked.
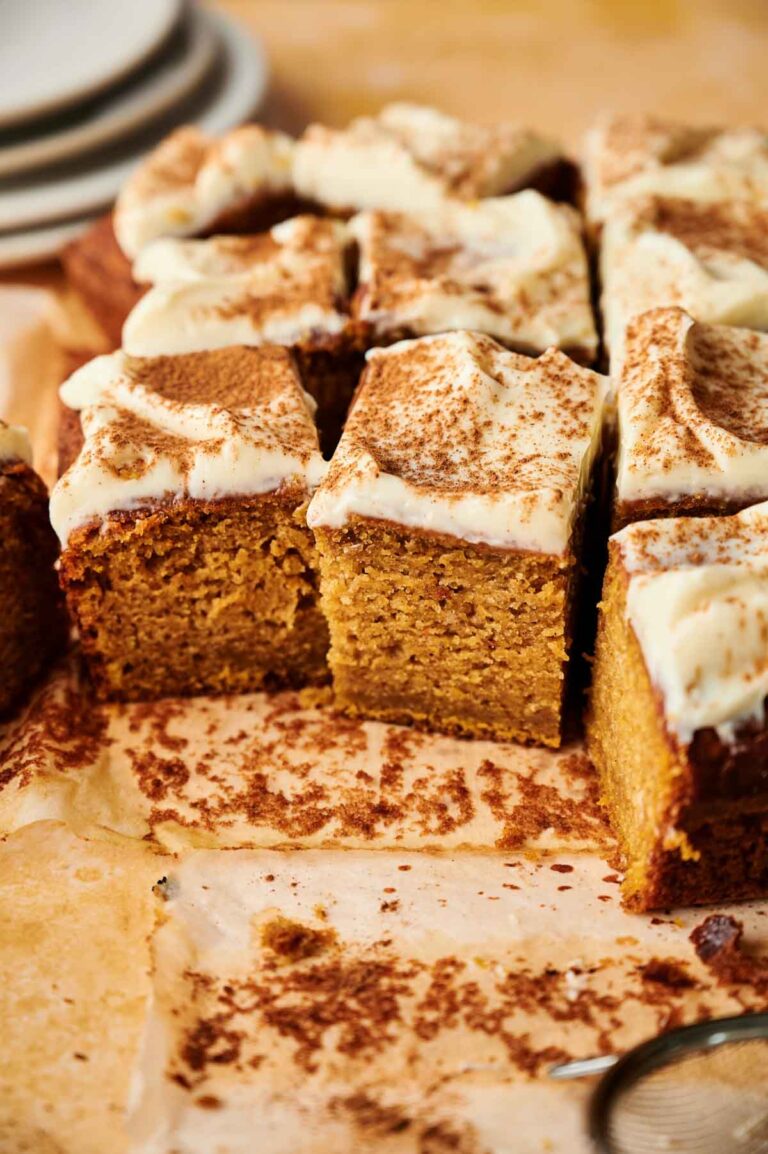
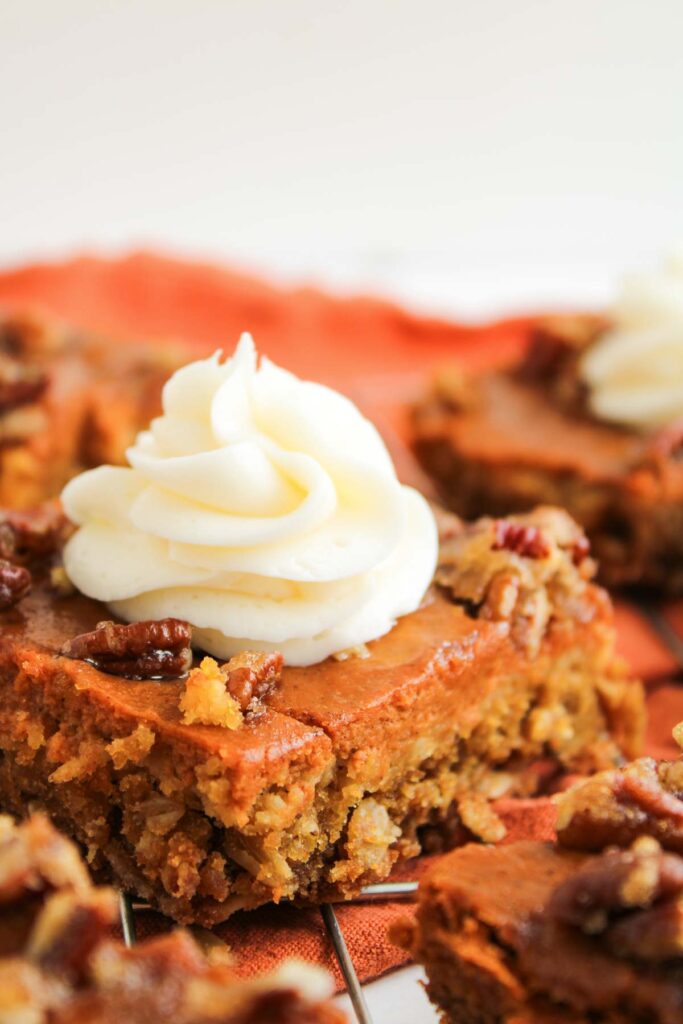
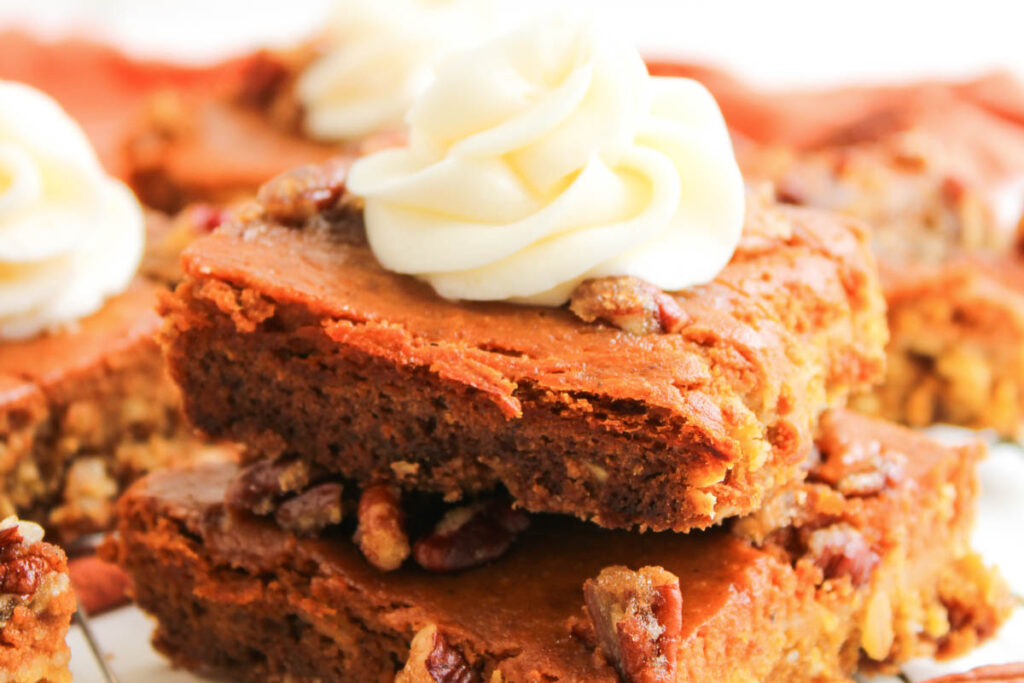
Cool and Slice
Let the bars cool in the pan for at least 1 hour so they firm up. If you want extra clean slices, pop them in the fridge before slicing; a chilled bar is much easier to slice cleanly, especially if you’re serving them for a party or packing them up.
For extra neat edges, use a sharp knife and wipe the blade between cuts. I always reach for this chef’s knife because it slices smoothly without tearing through the topping.
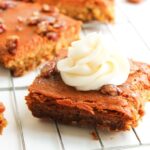
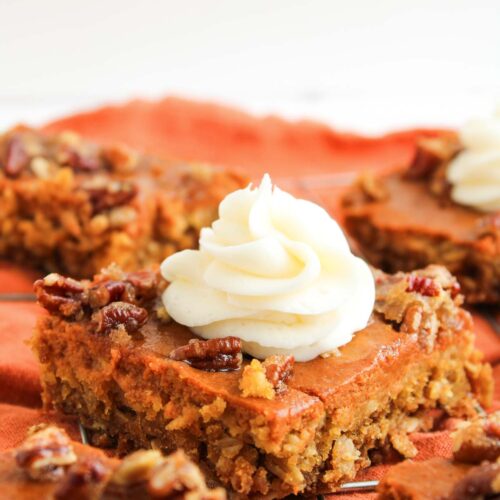
Serve As Is or With Extra Topping
Once all’s sliced up, serve them plain or add a swirl of frosting on top, like cream cheese frosting. Either way, these pecan pumpkin pie bars are something that disappears fast, so be sure to tuck some away for later.
Enjoy!
If you’re taking these to a party, potluck, or holiday event, pack them well and use a hard-sided container to keep the slices from getting smushed. To keep them cool and fresh while traveling, slide the container into an insulated casserole carrier so the bars don’t get too soft or warm.
If you’re gifting these treats, this gift box with a window makes a nice presentation, all the while keeping them protected inside.
Recipe Notes and Expert Tips
I’ve made these for everything from bake sales to Thanksgiving, and a few key tips help them turn out just right every time:
- Grease the Pan Well: Even with parchment, a light coating of grease on the sides helps prevent sticking and makes cleanup easier.
- Use Salted Butter for Balance: Choose salted butter to help offset the sweetness in the crust and topping. If using unsalted butter, stir in a pinch of salt to each mixture to keep the flavors balanced.
- Soften the Butter: The butter should be just soft enough to press easily with your fingers or a spoon. Melted butter makes the dough greasy and harder to control, while chilled butter won’t blend evenly, leaving dry patches and making it tough to press into the pan.
- Don’t Overbake the Crust: You’re aiming for lightly golden, not browned. Overbaking can make it too hard under the soft pumpkin layer.
- Boost the Flavor (Optional): If you want, add ground ginger to the pumpkin filling for a brighter spice, nutmeg to deepen the warmth, or maple syrup for a richer, softer sweetness in the filling.
- Layer the Filling While the Crust Is Hot: Pouring the pumpkin filling over a warm crust helps the layers bond and prevents them from separating.
- Evenly Sprinkle the Pecan Topping: Try to distribute the topping across the whole surface so every bite has a sweet, crunchy contrast.
- Chill Before Slicing: Cold bars cut much more cleanly, which is especially helpful if you’re packing them up for gifting or transporting.
How to Store Leftovers
Let any leftover bars cool completely, then transfer them to an airtight container and refrigerate for up to 4 days. These glass storage containers seal tightly and stack well in the fridge without taking up too much space.
If you want to freeze them, arrange the cooled bars in a single layer on a parchment-lined baking sheet and freeze until firm. After that, you can transfer them to a freezer-safe container or bag, with parchment between layers to prevent sticking.
I use these stackable freezer containers when I want to prep a batch for longer storage, or these thick reusable freezer bags that don’t crack when frozen or tear easily. You can also wrap each slice tightly with plastic wrap, followed by aluminum foil.
This stretch-tight plastic wrap clings really well to each bar, and I like to layer over it with heavy-duty foil to keep everything from freezer burn. They’ll keep well in the freezer for up to 2 months. Let them thaw in the refrigerator overnight before serving.
What to Serve With Pumpkin Pecan Pie Bars
These pumpkin pecan bars are fantastic all on their own, but they also pair well with hot drinks like coffee, cider, or spiced tea. A small dollop of whipped cream or a scoop of vanilla ice cream makes them feel a little more special, especially for a holiday dessert.
You can even serve them alongside other fall favorites like apple crisp, pecan pie, or desserts with mixed nuts or sliced almonds for a cozy dessert spread.
More Easy Recipes for You to Try at Home
I’ve got a few other simple treats that travel well and work for gatherings any time of the year:
- Salted Honey Cookies
- Blueberry Cheesecake Muffins
- Blueberry Cheesecake
- Raspberry Cheesecake
- Strawberry Cheesecake Dip
Did you make this recipe? We’d love to know! Please leave a 5-star review below (it really helps!) and tag and follow us on Pinterest and Facebook for more tasty inspiration!
Pumpkin Pecan Pie Bars
Equipment
Ingredients
For the Oat Crust:
- 1½ cups all-purpose flour
- 1½ cups rolled oats
- ½ teaspoon baking powder
- ¼ teaspoon baking soda
- ½ cup light brown sugar packed
- 1 cup salted butter very soft
For the Pumpkin Pie Filling:
- 1¼ cups pumpkin purée
- 12 ounces evaporated milk
- ½ cup light brown sugar packed
- ¼ cup granulated sugar
- 1 large egg
- ½ teaspoon ground cinnamon
- 1 teaspoon vanilla extract
- 2 teaspoons pumpkin pie spice
- ¼ teaspoon salt
For the Pecan Topping:
- 1 cup chopped pecans
- ½ cup light brown sugar packed
- 2 tablespoons salted butter melted
Instructions
- Preheat your oven to 350°F (180°C). Lightly grease a 9×13-inch baking pan or line it with parchment paper for easy removal.
- To make the crust, combine the flour, oats, baking powder, baking soda, and brown sugar in a large bowl. Add the softened butter and mix with your hands or a pastry cutter until the mixture forms a soft, crumbly dough.1½ cups all-purpose flour, 1½ cups rolled oats, ½ teaspoon baking powder, ¼ teaspoon baking soda, ½ cup light brown sugar, 1 cup salted butter
- Press the dough evenly into the bottom of the prepared pan. Use a fork to lightly prick the surface.
- Bake for 20–22 minutes, or until lightly golden.
- While the crust is baking, prepare the pumpkin filling. Whisk together the pumpkin purée, evaporated milk, brown sugar, granulated sugar, egg, cinnamon, vanilla, pumpkin pie spice, and salt in a large bowl until smooth and well combined.1¼ cups pumpkin purée, 12 ounces evaporated milk, ½ cup light brown sugar, ¼ cup granulated sugar, 1 large egg, ½ teaspoon ground cinnamon, 1 teaspoon vanilla extract, 2 teaspoons pumpkin pie spice, ¼ teaspoon salt
- Pour the pumpkin filling over the warm, partially baked crust. Return the pan to the oven and bake for 15 minutes.
- While the bars are baking, stir together the chopped pecans, brown sugar, and melted butter in a small bowl.1 cup chopped pecans, ½ cup light brown sugar, 2 tablespoons salted butter
- After the 15 minutes are up, carefully sprinkle the pecan mixture over the top of the pumpkin layer. Bake for another 20 minutes, or until the edges are set and the center has just a slight jiggle.
- Let the bars cool in the pan for at least 1 hour before slicing. For clean cuts, chill them further in the fridge.
Notes
- Grease the Pan Well: Even with parchment, a light coating of grease on the sides helps prevent sticking and makes cleanup easier.
- Use Salted Butter for Balance: Choose salted butter to help offset the sweetness in the crust and topping. If using unsalted butter, stir in a pinch of salt to each mixture to keep the flavors balanced.
- Soften the Butter: The butter should be just soft enough to press easily with your fingers or a spoon. Melted butter makes the dough greasy and harder to control, while chilled butter won’t blend evenly, leaving dry patches and making it tough to press into the pan.
- Don’t Overbake the Crust: You’re aiming for lightly golden, not browned. Overbaking can make it too hard under the soft pumpkin layer.
- Boost the Flavor (Optional): If you want, add ground ginger to the pumpkin filling for a brighter spice, nutmeg to deepen the warmth, or maple syrup for a richer, softer sweetness in the filling.
- Layer the Filling While the Crust Is Hot: Pouring the pumpkin filling over a warm crust helps the layers bond and prevents them from separating.
- Evenly Sprinkle the Pecan Topping: Try to distribute the topping across the whole surface so every bite has a sweet, crunchy contrast.
- Chill Before Slicing: Cold bars cut much more cleanly, which is especially helpful if you’re packing them up for gifting or transporting.
Nutrition
SERIOUSLY GOOD
DESSERTS!
Dessert First is a collection of 61 RECIPES to show you that you can make beautiful, impressive desserts right in your own kitchen, no matter your skill level.
Immediate eBook download. No physical book available.
Includes ad-free recipes like:
∙ Lemon Pound Cake
∙ Starbucks Cake Pops
∙ Boston Cream Pie
∙ Chocolate Mousse
∙ Matcha Tiramisu
...and much more!