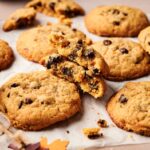
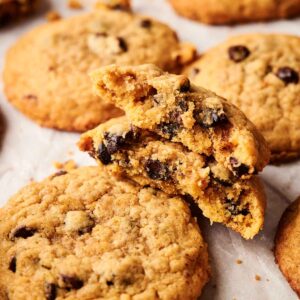
If you ever find yourself with a little leftover pumpkin purée, Pumpkin Chocolate Chip Cookies are the best way to use it. They’ve got rich brown butter, warm spices, and just enough chocolate chips to turn every bite into a treat. There’s a step I take before baking that makes them soft and chewy, and you might end up opening a fresh can of pumpkin just to bake another batch.
This post contains affiliate links. As an Amazon Affiliate, if you purchase through those links, I earn a commission. Thank you!
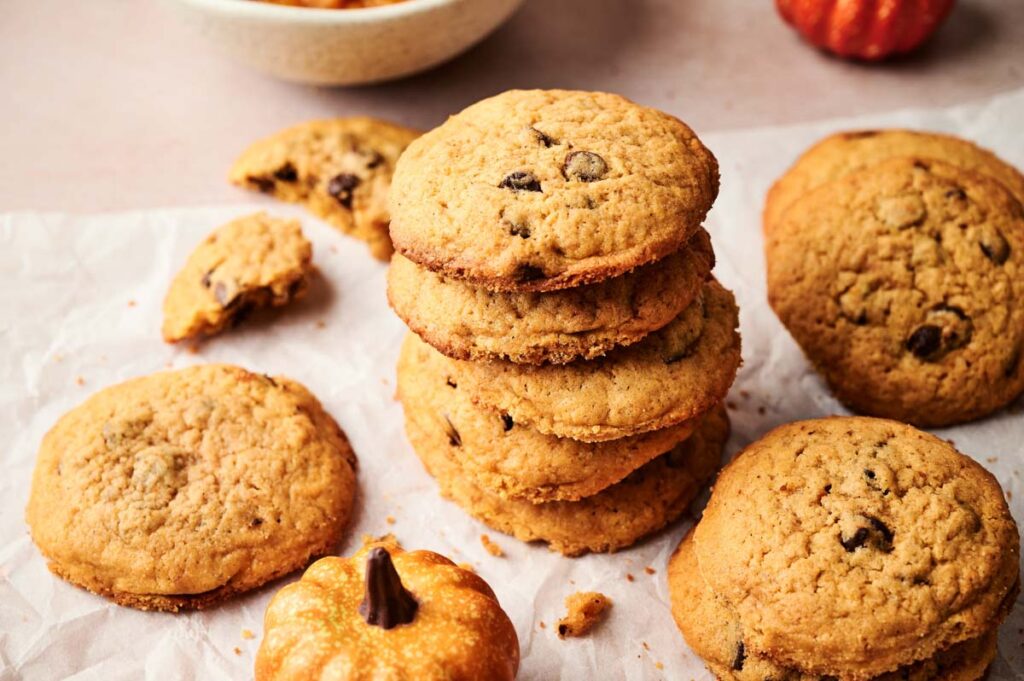
I love making these Pumpkin Chocolate Chip Cookies during fall baking season, whether it’s for a Halloween party, a fall potluck with friends, or a Thanksgiving dessert table. They freeze beautifully, so I usually bake ahead and stash a batch for coffee breaks. One batch never seems to be enough.
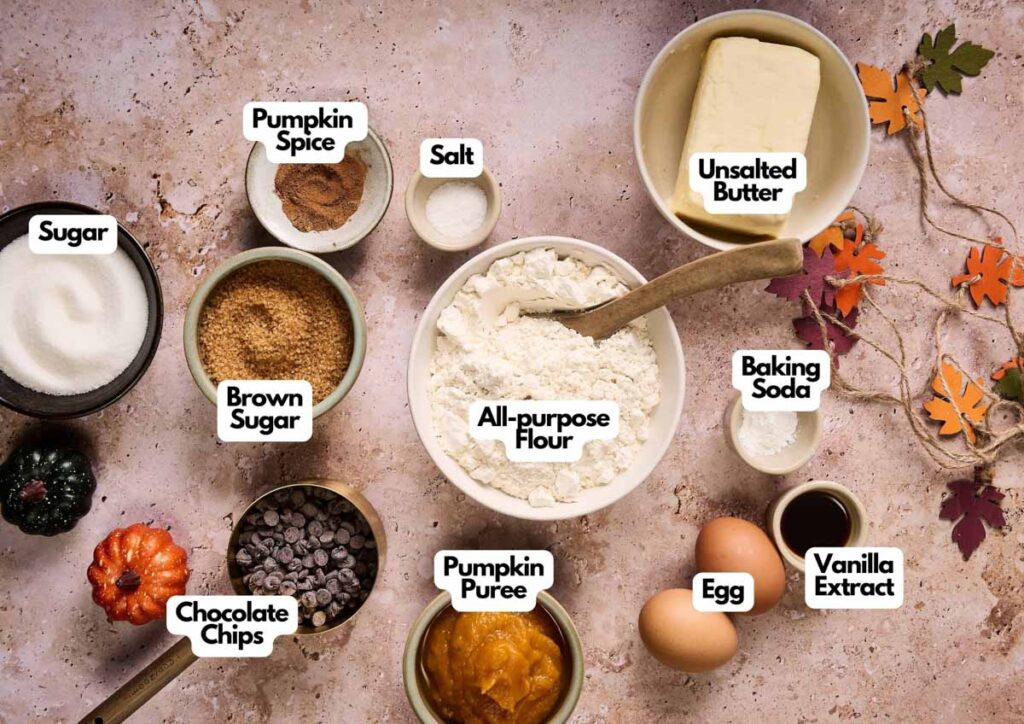
Ingredients You’ll Need
You’ll need all the ingredients shown in the photograph below.
How to Make Pumpkin Chocolate Chip Cookies with Step-By-Step Instructions
Scroll down for the full recipe card containing a full printable recipe and measurements in both US customary and metric units.
You’ll find that this Pumpkin Chocolate Chip Cookie recipe comes together easily if you follow my simple instructions below.
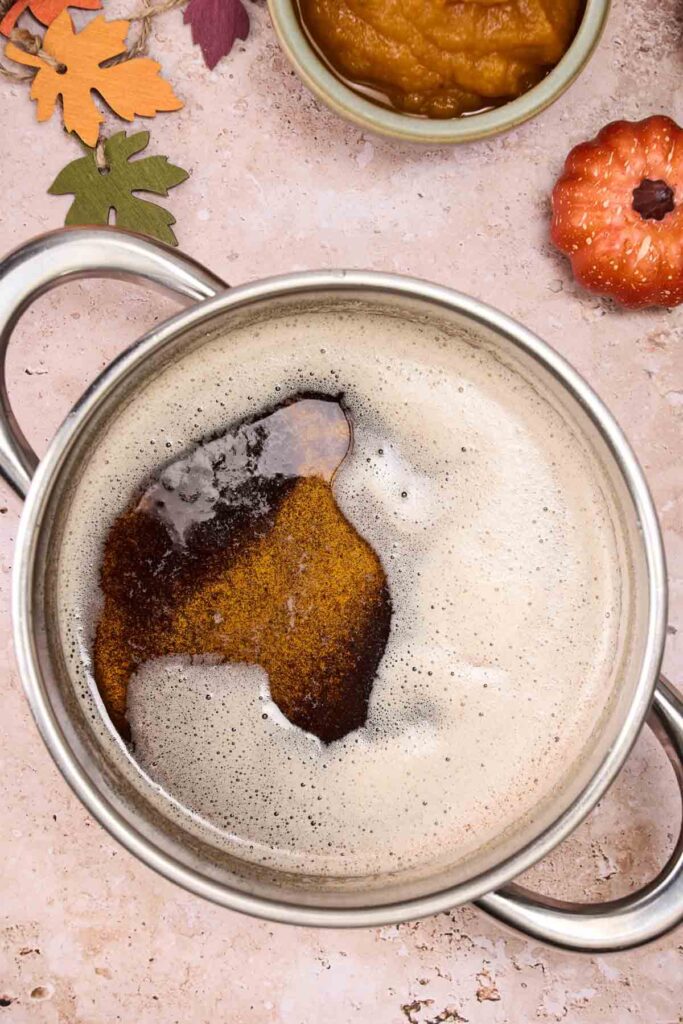
Brown the Butter
Melt the butter in a saucepan over low heat, stirring frequently to prevent burning. I like using this heavy-duty saucepan so the butter heats evenly without scorching.
Once it foams and turns golden, with a nutty aroma, remove it from the heat and pour it into a heatproof bowl. I use a glass mixing bowl for the batter, as it’s heat-safe and easy to clean.
Let it cool at room temperature for 15–20 minutes, then put it in the refrigerator for an additional 15 minutes to set slightly.

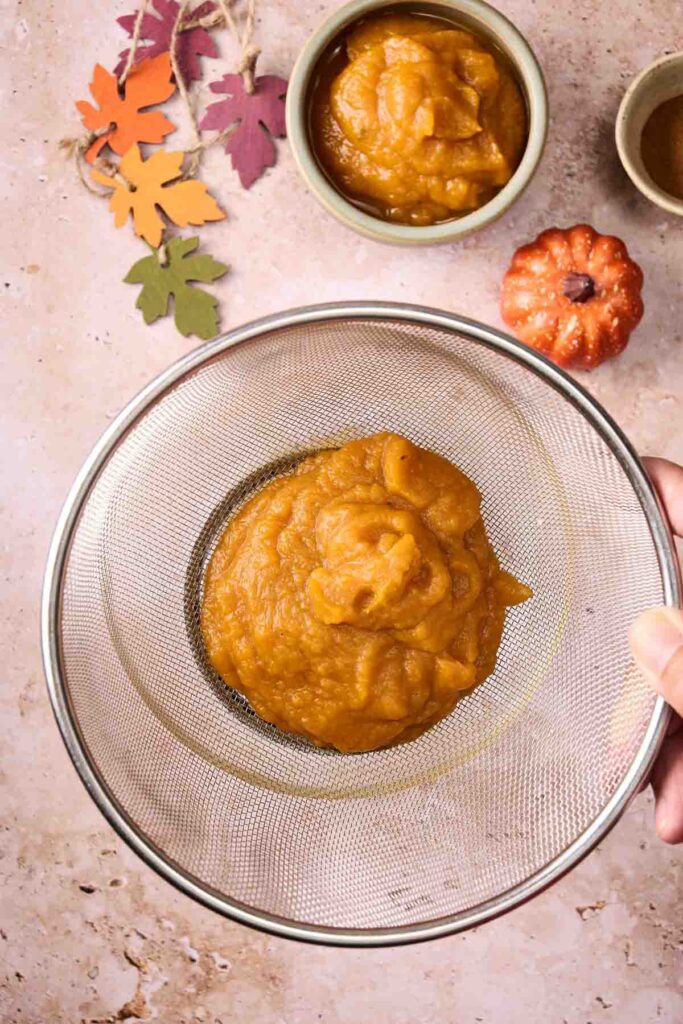
Drain the Pumpkin
While the butter is cooling, place the pumpkin purée in a fine mesh strainer or wrap it in a piece of cheesecloth and set it over a bowl. I always grab my fine-mesh strainer, which fits neatly over a bowl.
When I’m not using the strainer, I go for this flour sack towel because it’s washable and doesn’t leave fibers in the purée. I also keep a deep mixing bowl just for straining and draining. It holds liquid well and gives enough space.
Let it sit for 5–10 minutes to drain off any excess liquid, as too much moisture in the purée can make your cookies have a cakey texture instead of a chewy one. Once it looks thick and less watery, it’s ready to use.
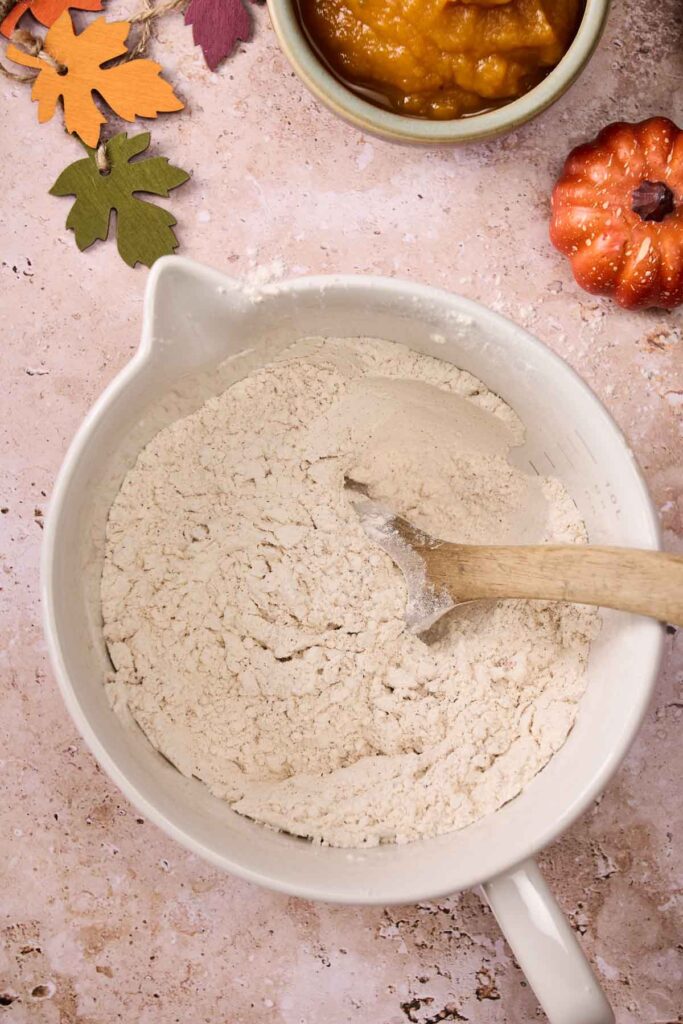
Mix the Dry Ingredients
In a separate bowl, whisk together the all-purpose flour, pumpkin spice, baking soda, and salt until the spices are evenly distributed and no streaks remain. I use this batter bowl with a handle and spout for this step, so everything is surely whisked.
I love using a set of stainless steel measuring spoons and cups, so the spice and leavening amounts are always accurate. Once everything is well blended, set the bowl aside while you finish preparing the wet ingredients.
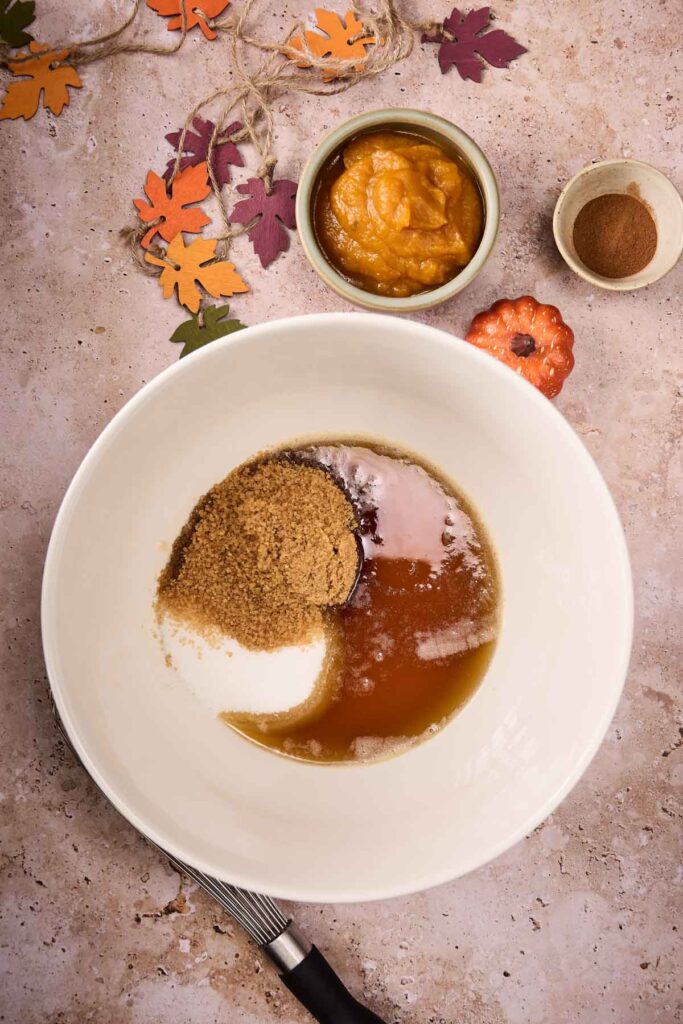
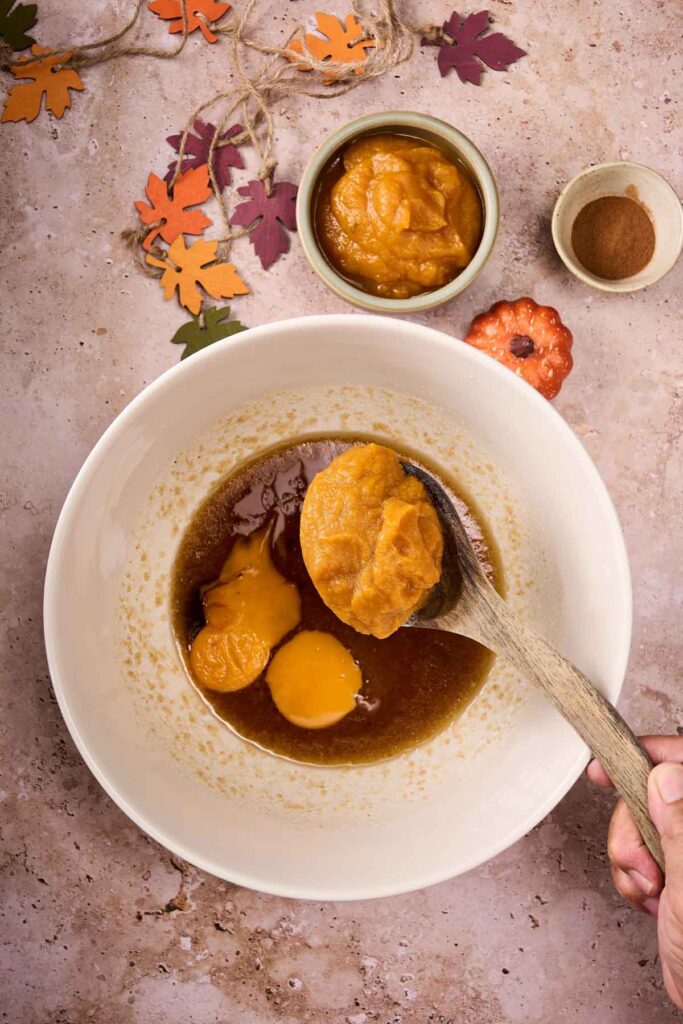
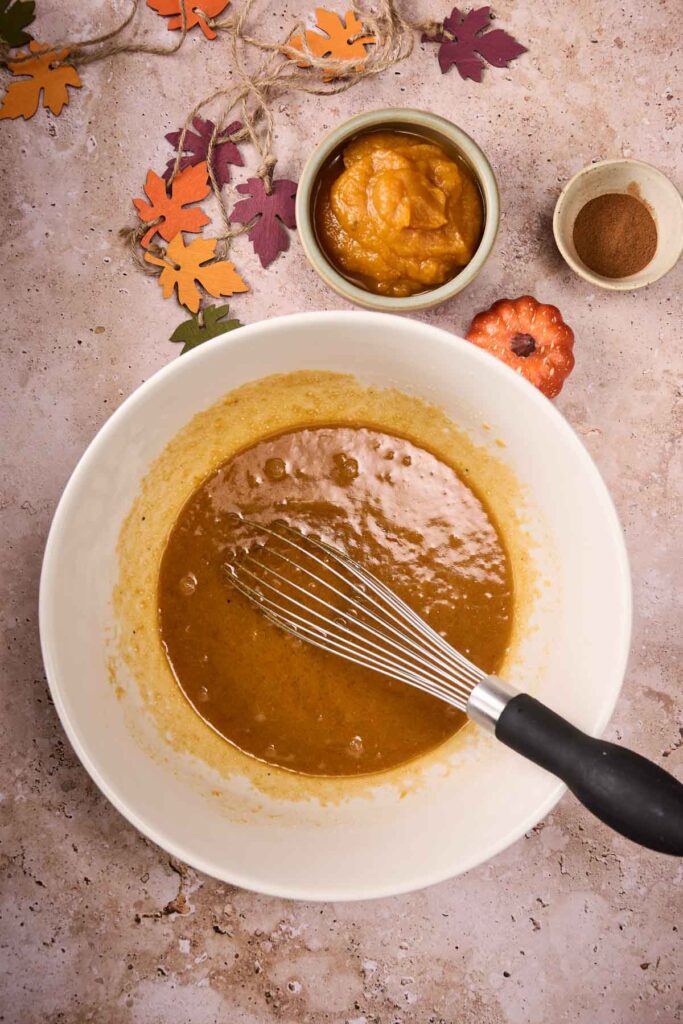
Combine the Wet Ingredients
Combine the cooled, browned butter with the granulated sugar and brown sugar, ensuring the mixture is smooth and slightly glossy. Add the egg yolks, vanilla extract, and the drained pumpkin puree, then mix again so it’s fully incorporated.
I usually grab my balloon whisk here; it whips everything smoothly without scratching the bowl. This step builds the base flavor and texture for your cookie dough.
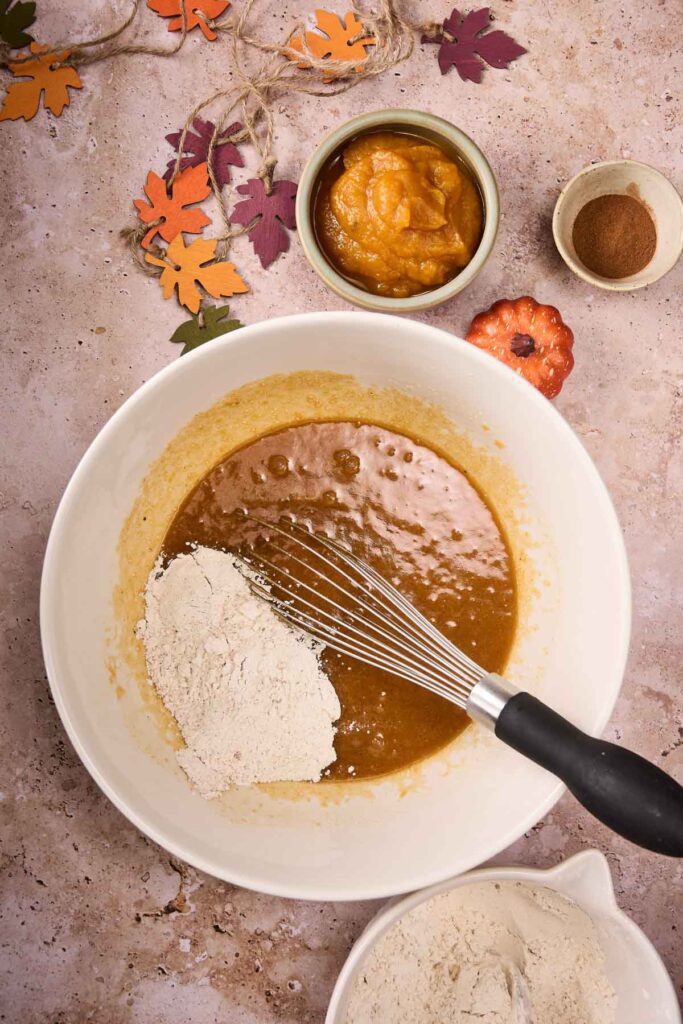
Add the Dry Ingredients and Chocolate Chips
Pour the flour mixture into the bowl with the wet ingredients and use a spatula or wooden spoon to stir just until it’s incorporated into the dough. A flexible silicone spatula works best here to scrape down the sides and fold everything together without overmixing.
If you prefer a classic option, this wooden spoon is a reliable choice that offers more control. It’s essential not to overmix here; doing so can develop too much gluten, resulting in dense or tough cookies.
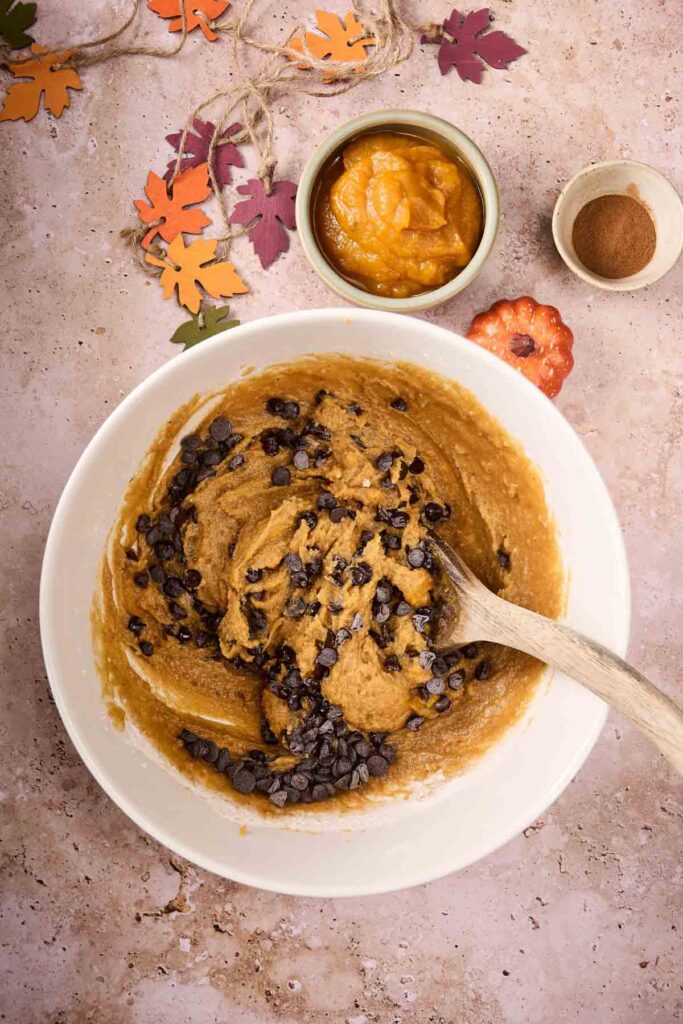
Once the dough is mostly combined, gently fold in the chocolate chips, ensuring they’re distributed throughout. The dough will be soft and slightly sticky, but it should hold together well.
Stop mixing as soon as everything looks uniform to keep the cookies light and chewy.
Chill the Dough
Cover the bowl tightly with plastic wrap and place it in the refrigerator for 30 to 60 minutes. Chilling the dough allows the flavors to develop, enabling the browned butter and pumpkin spice to fully integrate into the mix.
I cover mine with my stretch silicone lid so I can pop it right into the fridge. This BPA-free plastic wrap also works, as it’s quick and seals well, too.
It also helps firm up the dough, making it quicker to scoop and preventing the cookies from spreading too much in the oven.
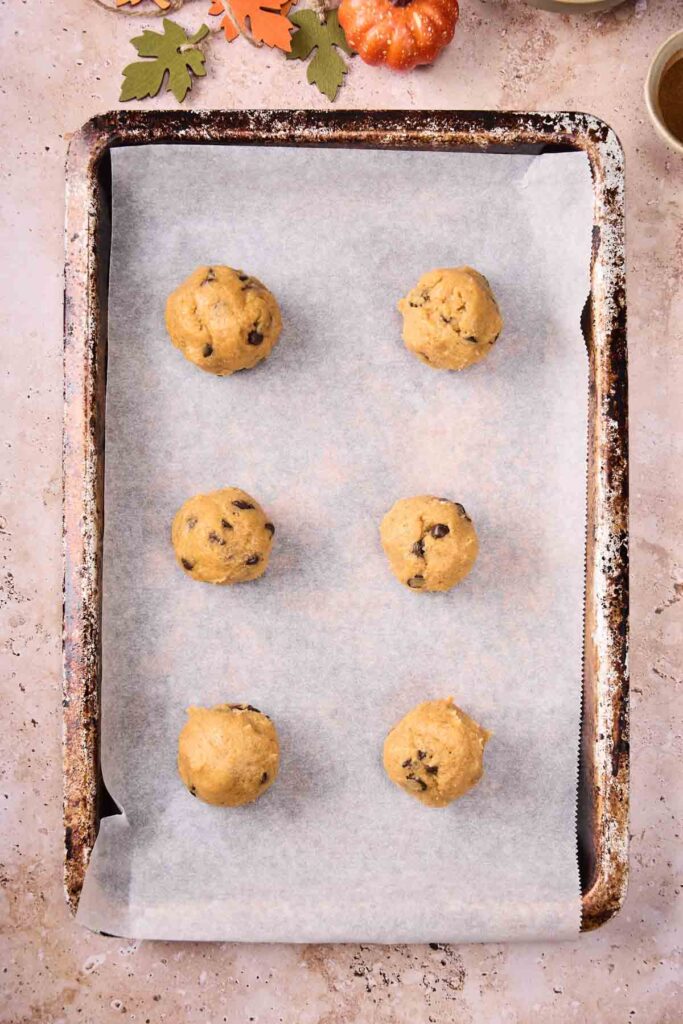
Scoop and Bake
Preheat your oven to 375°F (190°C) and line a baking sheet with parchment paper. I always use an oven thermometer to double-check my actual temperature; it’s the easiest way to avoid underbaked or overbaked cookies.
This rimmed baking sheet is what I rely to as it holds the heat and doesn’t warp in a hot oven. I top that with pre-cut parchment sheets because they lay flat and save time.
Use a medium cookie scoop to portion the dough into balls, spacing them about 3 inches apart. A cookie scoop makes this job neater and uniform.
Press in a few extra chocolate chips on top if you like. Bake for 9 to 11 minutes in your preheated oven, until the edges are just golden and the centers look slightly soft.
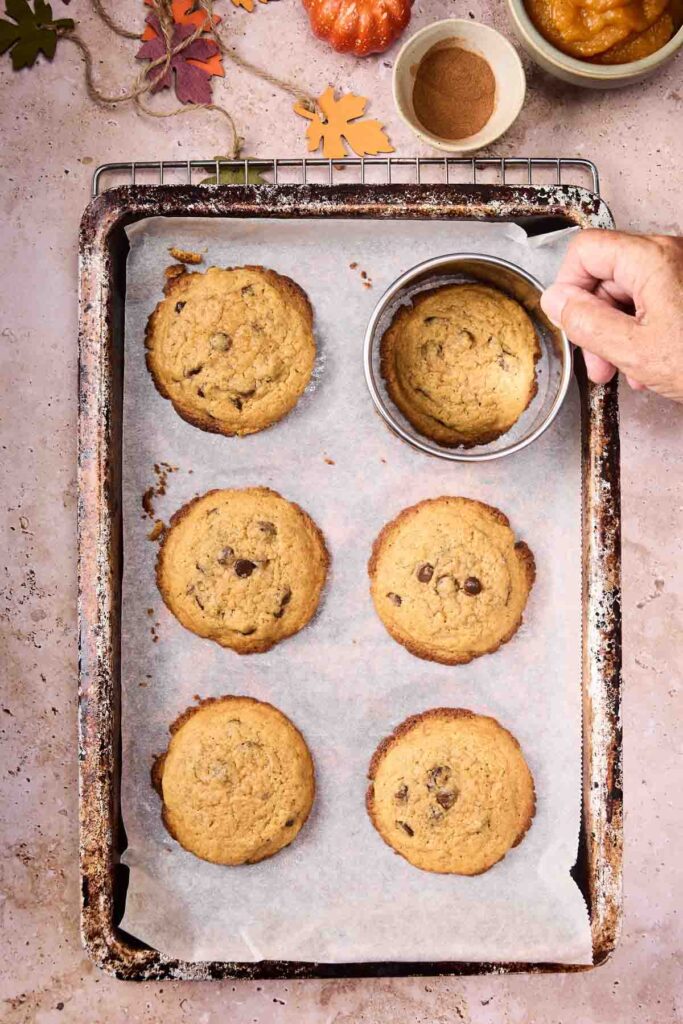
Shape and Cool
Right out of the oven, use a round cookie cutter or a glass to gently swirl the cookies into perfect circles if desired. I use cookie cutters to do this little swirl trick; it gives a bakery-style look without fuss.
Let them cool on the cookie sheet for 10 minutes before moving them to a wire rack. When it’s time to cool, I transfer them to a wire rack with a tight grid, so nothing sags or slips through while the cookies set.
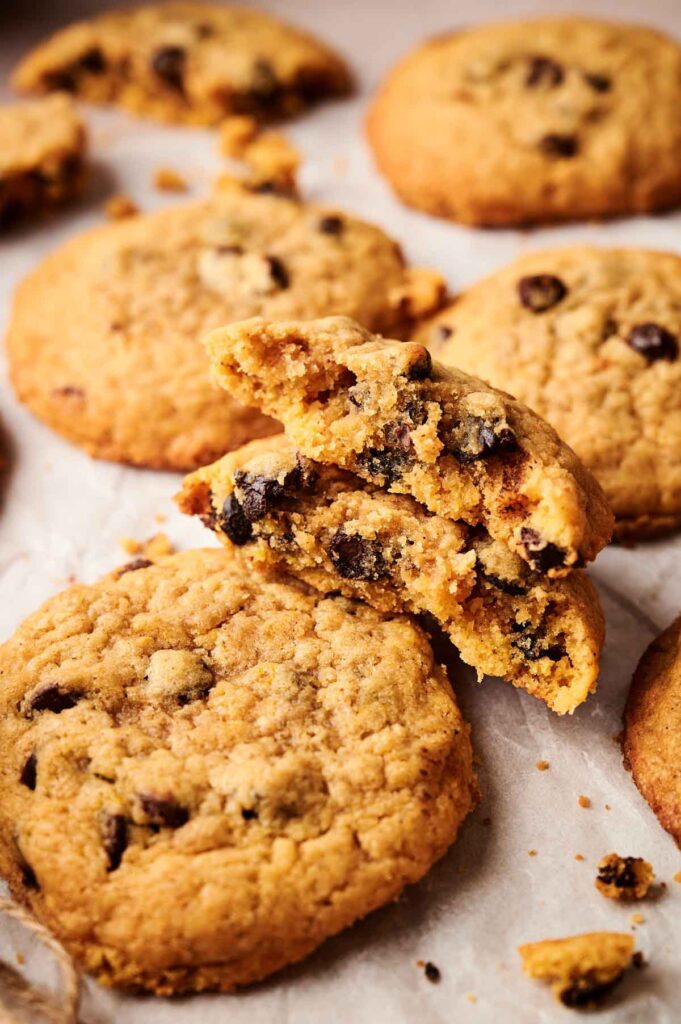
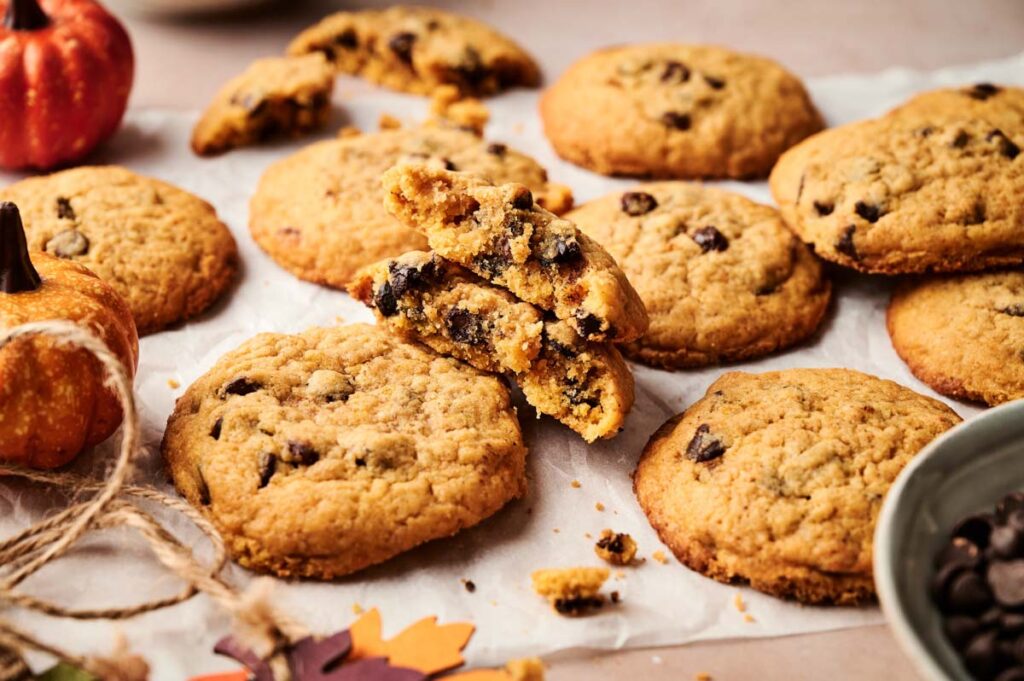
Serve and Enjoy
Once cooled, serve your Pumpkin Chocolate Chip Cookies with your favorite fall drink or dessert pairing. I usually stack them on this ceramic tray when I’m serving a crowd; it looks pretty and keeps them from getting soft underneath.
They’re perfect on their own, but even better with a cozy mug of cider or a scoop of ice cream. Enjoy!
If you’re taking a batch to a friend’s place or sharing them at a weekend get-together, I pack them into my portable storage container so they don’t break while I’m heading over. Then slide the container into this insulated casserole carrier to keep the cookies at a steady temperature during the ride.
And if you’re giving them as gifts, I like packing a small stack in a hard-sided giftable kraft box like this; it’s sturdy enough to protect the cookies and looks sweet with a ribbon.

Recipe Notes and Expert Tips
I’ve included a few helpful tips below to make sure your cookies turn out just right every time.
- Brown the butter slowly: Stir continuously as it melts to prevent burning and catch the moment it turns golden and smells nutty. This adds a deep flavor boost.
- Drain the pumpkin well: Removing moisture is key to avoiding cakey cookies. A fine mesh sieve or a clean kitchen towel over a large bowl works best.
- Use room temperature yolks and pumpkin: This helps the ingredients blend more smoothly and evenly into the butter and sugar.
- Don’t overmix the dough: Once you add the dry ingredients, stir until just combined. Overmixing can make the cookies dense.
- Chill the dough: This prevents spreading and helps the flavors develop. Even 30 minutes makes a difference.
- Use a cookie scoop for even baking: A medium scoop gives you cookies that are uniform in size and bake evenly.
- Shape while hot: Gently swirl a round cutter around each cookie straight from the oven for a perfectly round bakery look.
- Cool completely on a rack: Letting them sit for 10 minutes before transferring helps them firm up without falling apart.
How to Store Leftovers
Let the cookies cool completely before storing. You can keep them in an airtight container at room temperature for 3–4 days. I like using this glass cookie jar for the counter because it looks nice and keeps the cookies soft. If I want something that stacks better in the pantry, I go for stackable glass containers to seal in freshness.
For longer storage, freeze them in a zip-top bag or sealed container for up to 2 months. A freezer-safe bag is thick and seals well. These freezer-safe containers with locking lids also work well to protect the cookies against freezer burn.
To freeze the unbaked dough, portion it out first, then freeze the dough balls on a baking sheet before transferring to a bag. This freezer-safe baking sheet makes this easy, you can pop it straight into the freezer without worrying about warping or cracking.
Bake straight from frozen, adding an extra minute or two.
What to Serve With Pumpkin Chocolate Chip Cookies
I usually bring these out with a mug of hot apple cider or spiced chai, especially in the fall. They’re also great tucked into a holiday cookie box, served alongside ice cream, milk chocolate, or enjoyed with a glass of cold milk for a simple treat.
More Easy Recipes for You to Try at Home
I’ve got plenty more sweet ideas if you’re in the mood to bake.
- Pumpkin Cake
- Worms and Dirt Cake Pops
- Pumpkin Pecan Pie Bars
- Blueberry Cheesecake Muffins
- Salted Honey Cookies
Did you make this recipe? We’d love to know! Please leave a 5-star review below (it really helps!) and tag and follow us on Pinterest and Facebook for more tasty inspiration!
Pumpkin Chocolate Chip Cookies
Equipment
Ingredients
- 1 cup (2 sticks) unsalted butter cold
- ⅔ cup pumpkin purée room temperature (drained)
- ½ cup sugar
- ½ cup light brown sugar packed
- 2 large egg yolks room temperature
- 2 teaspoons vanilla extract
- 1 ⅔ cups all-purpose flour + 1 tablespoon
- 2 ½ teaspoons pumpkin spice
- 1 teaspoon baking soda
- ½ teaspoon salt
- 1 cup chocolate chips plus extra for topping, optional
Instructions
- In a saucepan over low heat, melt the butter. Stir frequently as it foams and turns golden with a nutty aroma. When browned, pour into a heatproof bowl. Cool at room temperature for 15–20 minutes, then chill in the fridge for 15 minutes more.1 cup (2 sticks) unsalted butter
- Place the pumpkin purée in a strainer for 5–10 minutes to remove excess liquid.⅔ cup pumpkin purée
- In a medium bowl, whisk together flour, pumpkin spice, baking soda, and salt. Set aside.1 ⅔ cups all-purpose flour, 2 ½ teaspoons pumpkin spice, 1 teaspoon baking soda, ½ teaspoon salt
- In a large bowl, whisk the cooled browned butter with both sugars until smooth. Add egg yolks, vanilla, and drained pumpkin purée. Mix until fully combined.½ cup light brown sugar, 2 large egg yolks, 2 teaspoons vanilla extract, ½ cup sugar
- Stir in the dry ingredients until just incorporated, then gently fold in chocolate chips.1 cup chocolate chips
- Cover and refrigerate for 30–60 minutes while preheating the oven.
- Preheat oven to 375°F (190°C). Line a baking sheet with parchment paper.
- Using a medium scoop (about 2 tablespoons), portion dough into balls. Place 3 inches apart on the prepared sheet. Press in extra chocolate chips on top if desired.
- Bake for 9–11 minutes, until the edges are lightly golden and set. The centers will look slightly soft. While hot, use a round cookie cutter to gently nudge cookies into a perfect circle.
- Let cool on the sheet for 10 minutes, then transfer to a wire rack. Enjoy!
Video
Notes
- Brown the butter slowly: Stir continuously as it melts to prevent burning and catch the moment it turns golden and smells nutty. This adds a deep flavor boost.
- Drain the pumpkin well: Removing moisture is key to avoiding cakey cookies. A fine mesh sieve or a clean kitchen towel over a large bowl works best.
- Use room temperature yolks and pumpkin: This helps the ingredients blend more smoothly and evenly into the butter and sugar.
- Don’t overmix the dough: Once you add the dry ingredients, stir until just combined. Overmixing can make the cookies dense.
- Chill the dough: This prevents spreading and helps the flavors develop. Even 30 minutes makes a difference.
- Use a cookie scoop for even baking: A medium scoop gives you cookies that are uniform in size and bake evenly.
- Shape while hot: Gently swirl a round cutter around each cookie straight from the oven for a perfectly round bakery look.
- Cool completely on a rack: Letting them sit for 10 minutes before transferring helps them firm up without falling apart.