
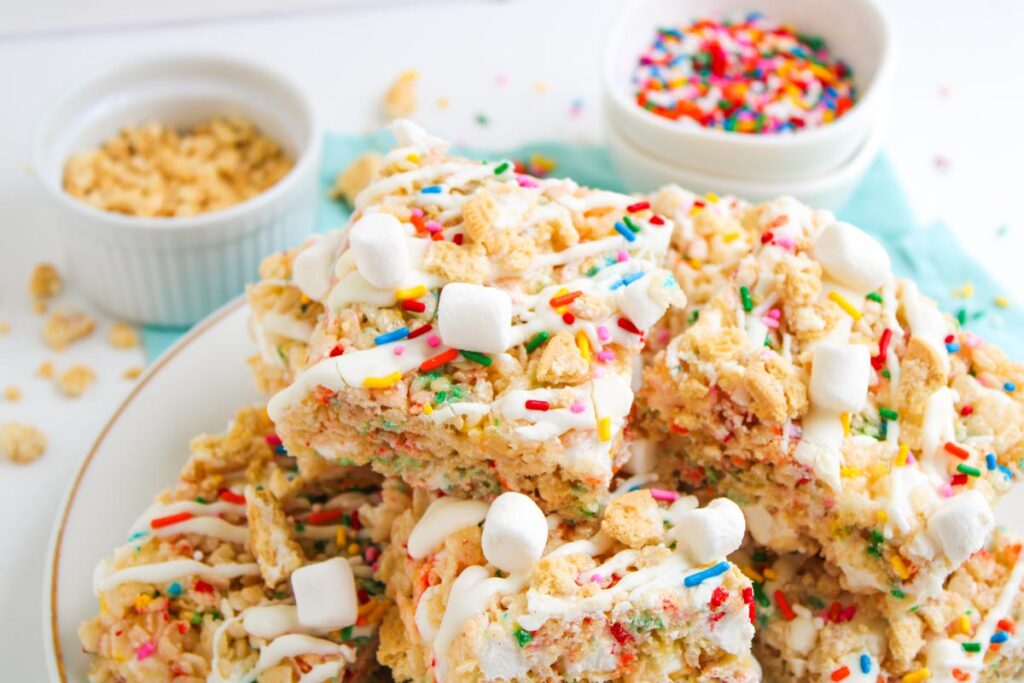
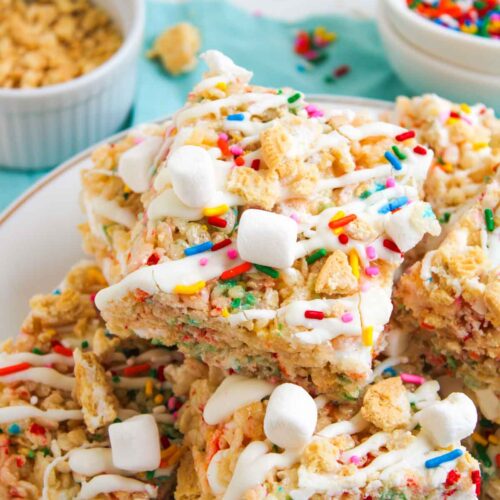
I love serving Funfetti Rice Krispie Treats because they look like a party on a platter with rainbow sprinkles, white chocolate drizzle, and cookie crumbles. Every bite has soft, melty marshmallow that tastes sweet and buttery against crispy cereal. Those bright colors make them disappear fast at any gathering.
This post contains affiliate links. As an Amazon Affiliate, if you purchase through those links, I earn a commission. Thank you!
I make them for birthday parties, bake sales, and classroom treats because they’re no-bake, travel well, and kids go crazy for them. They’re perfect for Christmas gatherings and holiday parties when you want a colorful and festive dessert. They stay fresh at room temperature for about 3 days or freeze for up to 2 months.
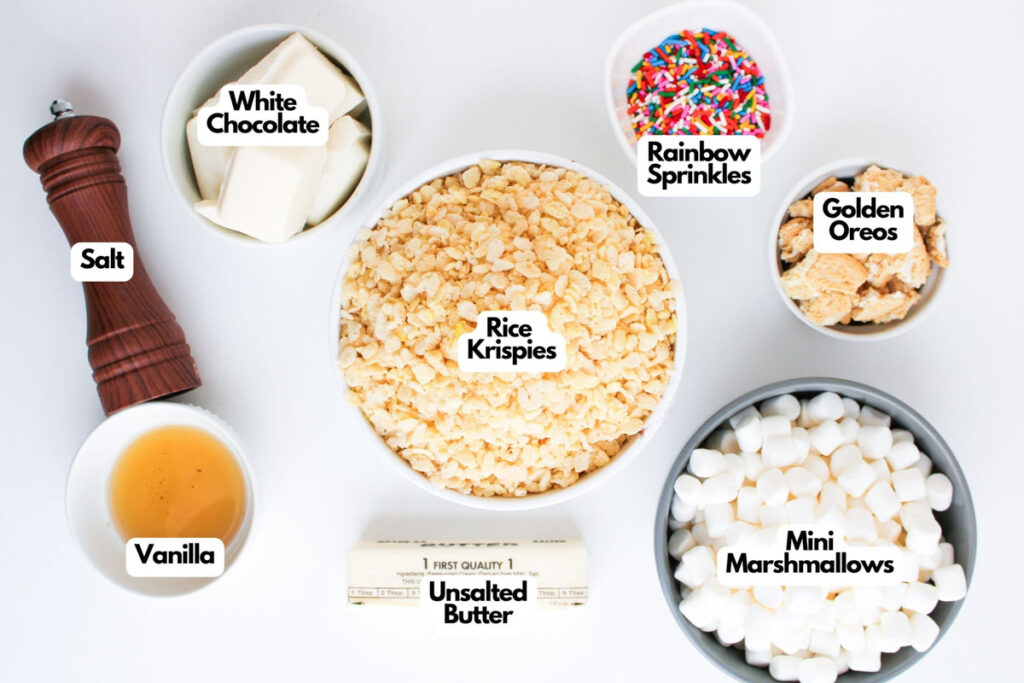
Ingredients You’ll Need
You’ll need all the ingredients shown in the photograph below.
How to Make Funfetti Rice Krispie Treats with Step-By-Step Instructions
Scroll down for the full recipe card containing a full printable recipe and measurements in both US customary and metric units.
You’ll have these treats ready in about 20 minutes, and most of that time is just letting them cool.
Prep Your Pan
Line a 9×13-inch baking pan with aluminum foil and lightly coat it with nonstick spray. This makes removing the treats super easy once they’re set. I like using this nonstick baking sheet because it’s sturdy and the treats release cleanly every time.
Melt the Butter and Marshmallows
In a large pot over medium-low heat, melt the butter completely. Stir in the vanilla and salt, then add 10 ounces of the mini marshmallows. Save the other 5 ounces for later.
Mix constantly so the marshmallows are melted and smooth. A silicone spatula works well here because nothing sticks to it, and you can easily scrape down the sides.
Add the Cereal
Remove the pot from the heat and stir in the Rice Krispies cereal until every piece is coated in the marshmallow mixture. Work quickly so the marshmallows don’t start to set.

SERIOUSLY GOOD
DESSERTS!
Dessert First is a collection of 61 RECIPES to show you that you can make beautiful, impressive desserts right in your own kitchen, no matter your skill level.
Immediate eBook download. No physical book available.
Includes ad-free recipes like:
∙ Lemon Pound Cake
∙ Starbucks Cake Pops
∙ Boston Cream Pie
∙ Chocolate Mousse
∙ Matcha Tiramisu
...and much more!

Fold In the Fun Stuff
Add the remaining 5 ounces of mini marshmallows and the rainbow sprinkles. Fold them in gently so they distribute throughout the mixture without melting completely.
These unmelted marshmallows create soft, gooey pockets that make the treats extra chewy.
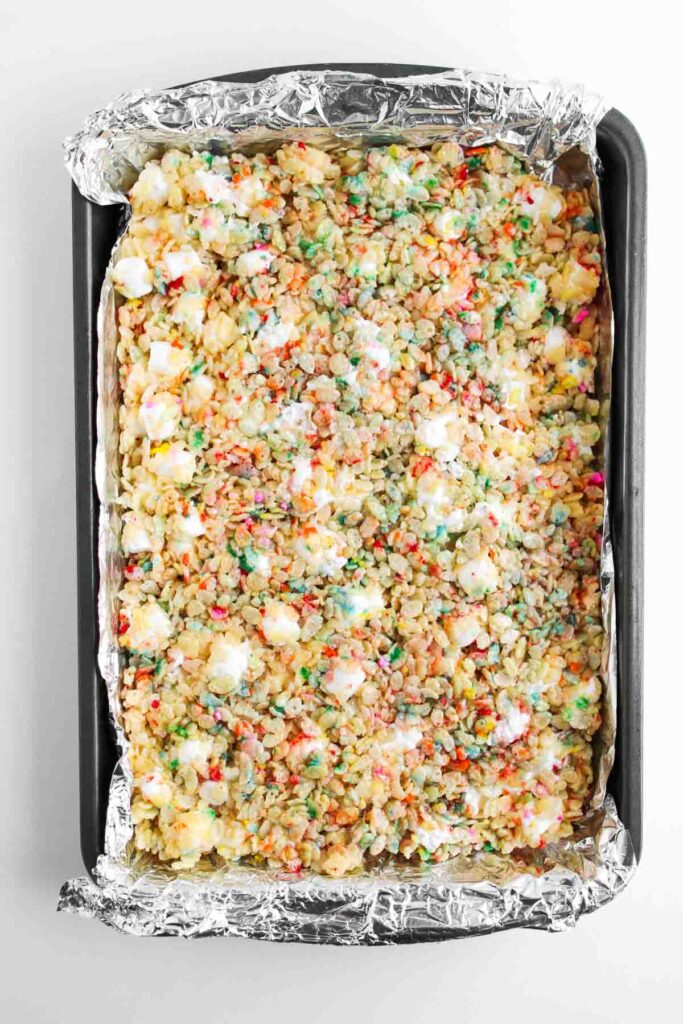
Press Into the Pan
Transfer the mixture to your prepared baking dish and press it down evenly with a greased rubber spatula. I use cooking spray on the spatula so the mixture doesn’t stick and spreads smoothly without tearing.
Press firmly, but don’t compact it too much, or the treats will be hard. Let them cool at room temperature until set, about 15 minutes.
Add the Toppings
Melt the white chocolate in a microwave-safe bowl in 20–30-second intervals, stirring between each interval, until smooth. A glass mixing bowl like this one works perfectly for this.
Remove the treats from the pan using the foil as handles, then drizzle the melted white chocolate over the top. Sprinkle with crushed Golden Oreos, extra rainbow sprinkles, and a few more mini marshmallows.
Let the chocolate set completely before slicing into squares.
Slice and Serve
Use a sharp knife to cut the treats into squares. For the cleanest cuts, wipe your knife with a damp paper towel between slices to prevent the marshmallow from sticking.
Serve them on a platter or stack them in a container for easy grab-and-go snacking. Enjoy!
These treats travel beautifully to parties, potlucks, and bake sales. Stack them in this portable storage container, with parchment paper between the layers to prevent sticking. For longer trips, use a container with a tight-sealing lid to keep them fresh.
If you’re taking them somewhere warm, I keep the container in an insulated casserole carrier so the white chocolate doesn’t melt. They hold up well during transport and always arrive looking festive and ready to serve.
Funfetti Rice Krispie Treats
Equipment
Ingredients
- ½ cup unsalted butter
- 15 ounces mini marshmallows
- 1 teaspoon vanilla
- ¼ teaspoon salt
- 6 cups Rice Krispies cereal
- ½ cup rainbow sprinkles plus some for garnish
- ½ cup white chocolate
- ¼ cup golden Oreos crushed
Instructions
- Line a 9×13-inch baking pan with aluminum foil and lightly coat with nonstick spray. Set aside.
- In a large pot over medium-low heat, melt the butter. Stir in the vanilla and salt. Add 10 ounces of the mini marshmallows (reserve the remaining 5 ounces) to the pot. Stir constantly until melted and smooth.½ cup unsalted butter, 1 teaspoon vanilla, ¼ teaspoon salt, 15 ounces mini marshmallows
- Remove the pot from the heat. Stir in the Rice Krispies cereal until evenly coated in the marshmallow mixture.6 cups Rice Krispies cereal
- Fold in the remaining 5 ounces of mini marshmallows and the rainbow sprinkles. Stir gently to distribute.½ cup rainbow sprinkles
- Press the mixture into the prepared pan using a greased rubber spatula. Spread evenly. Let cool at room temperature until set.
- In a microwave-safe bowl, melt the white chocolate in 20–30 second intervals, stirring between each, until smooth.½ cup white chocolate
- Remove the bars from the pan. Drizzle with melted white chocolate, then sprinkle with crushed Golden Oreos, extra sprinkles, and remaining mini marshmallows. Allow the chocolate to set before slicing into squares.¼ cup golden Oreos
Notes
- Use fresh marshmallows: Stale marshmallows won’t melt smoothly and can make the treats hard. Fresh marshmallows provide a soft, stretchy texture.
- Press gently: Use a greased spatula to press the mixture into the pan with light pressure. Pressing too hard makes the treats dense and hard instead of light and chewy.
- Let the chocolate set completely: Wait until the white chocolate drizzle is fully hardened before cutting. This prevents toppings from smearing and allows clean slices.
- Flash freeze for clean cuts: Freeze the uncut treats for 30 minutes before slicing. The cold helps you get perfect squares without the marshmallow sticking to your knife.
- Storage pro tip: Wrap individual squares in plastic wrap before freezing so you can grab one at a time. They thaw in about 20 minutes at room temperature and taste fresh-baked.
- Cake-batter variation: Melt butter completely, fold in 1 cup of dry funfetti cake mix with the cereal for a denser, cake-like texture, and use white chocolate chips instead of bar chocolate for smoother melting and drizzling.
Nutrition
SERIOUSLY GOOD
DESSERTS!
Dessert First is a collection of 61 RECIPES to show you that you can make beautiful, impressive desserts right in your own kitchen, no matter your skill level.
Immediate eBook download. No physical book available.
Includes ad-free recipes like:
∙ Lemon Pound Cake
∙ Starbucks Cake Pops
∙ Boston Cream Pie
∙ Chocolate Mousse
∙ Matcha Tiramisu
...and much more!
How to Store Leftovers
Keep them at room temperature in an airtight container for up to 3 days. They stay soft if you layer parchment paper between the squares to prevent sticking.
For longer storage, freeze them in a freezer-safe glass container for up to 2 months. Let frozen treats thaw at room temperature for about 30 minutes before serving.
They’ll taste just as fresh as the day you made them. Don’t refrigerate them, as they’ll harden and lose their chewy texture.
What to Serve With Funfetti Rice Krispie Treats
Serve them with vanilla ice cream or a glass of cold milk for a classic pairing. The creamy, cold contrast enhances the chewy marshmallow texture. I also love setting them out with fresh fruit like strawberries or raspberries at parties because the tartness balances the sweetness.
They’re perfect on a dessert table alongside brownies, cookies, or cupcakes. The bright sprinkles make them stand out, and they’re easy to grab and eat without plates or forks.
More Easy Dessert Recipes for You to Try at Home
You’ll love these other kid-friendly sweet treats that are ideal for parties and bake sales too.