
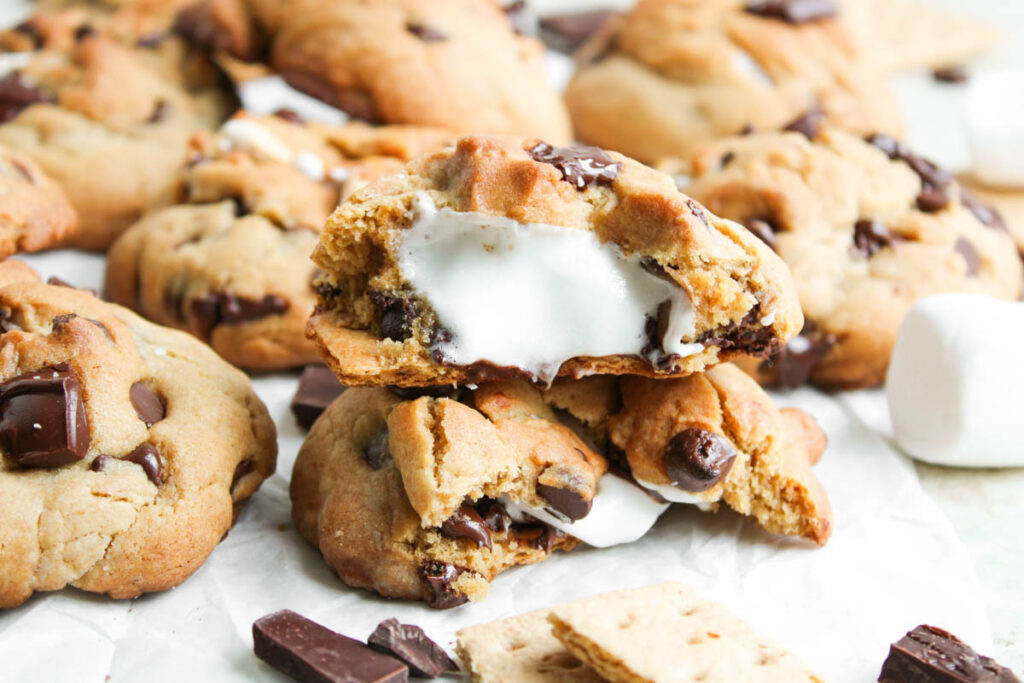
There’s something about s’mores that makes everything feel a little more fun. These S’mores Stuffed Cookies combine gooey marshmallow, melty chocolate, and a crisp graham cracker layer into rich brown butter cookie dough. There’s a quick trick that holds every layer in place while it bakes, and you’ll notice the difference from the first bite.
This post contains affiliate links. As an Amazon Affiliate, if you purchase through those links, I earn a commission. Thank you!
I love making these for Christmas cookie exchanges, holiday baking weekends, or summer BBQs when they’re easy to pass around and everyone’s into something sweet. I like that I can prep them ahead and freeze a batch to keep on hand. They’re the kind of dessert that never sticks around for long.
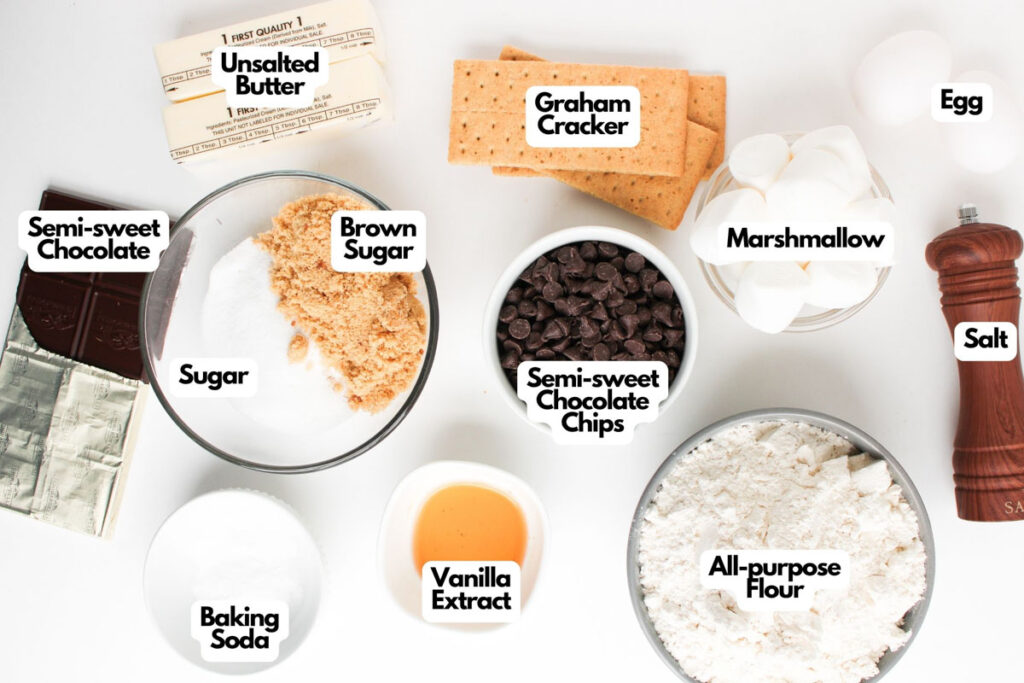
Ingredients You’ll Need
You’ll need all the ingredients shown in the photograph below.
How to Make S’mores Stuffed Cookies with Step-By-Step Instructions
Scroll down for the full recipe card containing a full printable recipe and measurements in both US customary and metric units.
If you follow these simple steps, you’ll find that making S’mores Stuffed Cookies at home is easier than you think, and way more fun than wrestling with sticky marshmallows.
Brown the Butter
Melt the unsalted butter in a saucepan over medium-high heat. I like using this heavy-duty saucepan because it heats evenly and gives you full control while browning the butter. As it heats, it will start to foam and bubble. This is normal and part of the browning process.
Stir constantly with a heatproof spatula to prevent the milk solids from sticking to the bottom and burning. I always use a flexible silicone spatula for this, so I can scrape the bottom without worrying about it melting or burning.
After about 5 to 10 minutes, the butter will begin to shift in color, turning a warm golden brown and releasing a rich, nutty aroma. Once it reaches a deep amber color and you see brown bits forming on the bottom, take it off the heat immediately.
Let it cool for a few minutes so it doesn’t scramble the eggs when you mix it into the dough.

SERIOUSLY GOOD
DESSERTS!
Dessert First is a collection of 61 RECIPES to show you that you can make beautiful, impressive desserts right in your own kitchen, no matter your skill level.
Immediate eBook download. No physical book available.
Includes ad-free recipes like:
∙ Lemon Pound Cake
∙ Starbucks Cake Pops
∙ Boston Cream Pie
∙ Chocolate Mousse
∙ Matcha Tiramisu
...and much more!

Mix the Wet Ingredients
In a large bowl, stream in the slightly cooled browned butter, making sure to scrape in the flavorful brown bits from the bottom of the pan. I grab this glass mixing bowl so I can easily see everything as I’m mixing.
Add the brown sugar and granulated sugar, then whisk until glossy and smooth, creating a chewy cookie texture. A balloon whisk makes this quicker and prevents burning while keeping the butter moving constantly.
Once the sugars are fully blended with the butter, crack in the eggs one at a time, whipping after each addition. Pour in the vanilla extract and continue beating so the mixture becomes silky and cohesive.
It should look thick, shiny, and well-emulsified, with no streaks of egg or clumps of sugar.

Combine the Dry Ingredients
In a separate bowl, sift together the all-purpose flour, salt, and baking soda. This is to ensure the baking soda activates properly and the salt doesn’t clump in one spot.
This plastic batter bowl is my go-to for dry ingredients as it’s lightweight and doesn’t slide around on the counter. A flour sifter really helps with this step; it breaks up any lumps and gives you a smoother, more even dough.
Gradually combine the dry mixture with the wet ingredients, stirring after each addition to keep the dough silky and consistent. Once everything is fully combined and the dough has come together, gently fold in the chocolate chips so they’re evenly spread throughout.
Assemble the Cookie Centers
Line a baking sheet with parchment paper. I always grab my freezer-safe rimmed pan for this because it’s sturdy, doesn’t warp, and lets me chill or freeze cookies directly on it. I top that with parchment paper so nothing sticks, and cleanup is quick afterward.
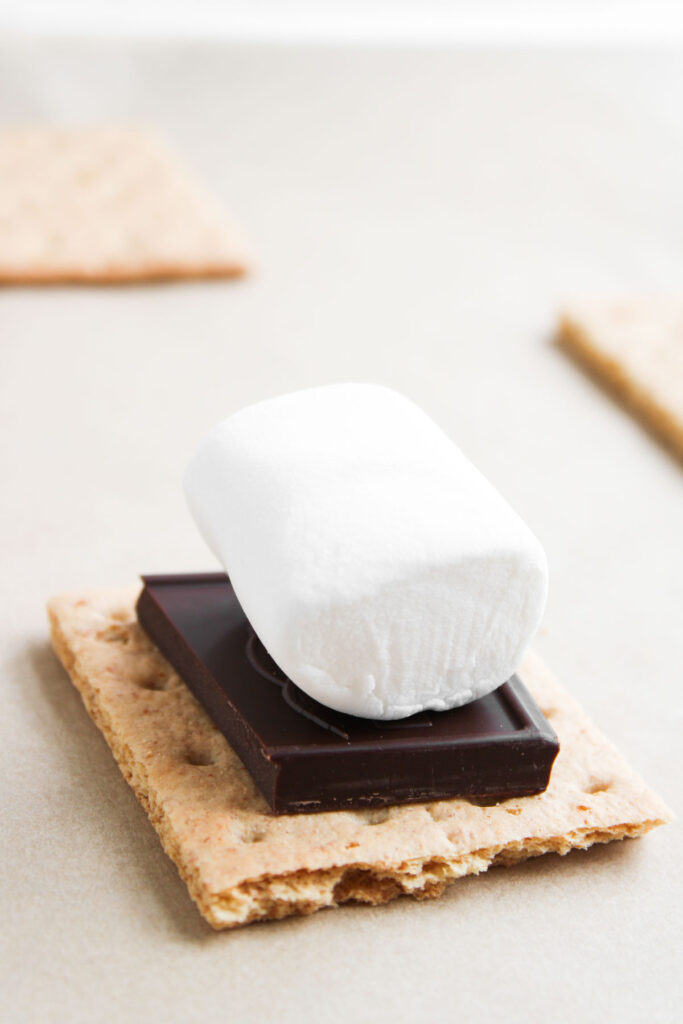
Space out graham cracker squares across the sheet, leaving enough room between each one for the cookies to spread as they bake. On top of each graham cracker, place a square of semi-sweet chocolate bar, then a single marshmallow.
This forms the gooey center of each cookie and gives you that classic s’mores combo in every bite.
Wrap the Dough Around the S’mores Stack
Take a generous scoop of cookie dough and roll it into a ball, then flatten it in the palm of your hand so it’s wide enough to cover the s’mores stack. I use a cookie scoop here so all the dough balls are the same size, then I put on a pair of latex disposable gloves when flattening them to keep my hands cleaner.
Carefully lift the dough and put it over the graham cracker, marshmallow, and chocolate layer, pressing gently around the edges to seal everything inside.
Make sure there are no gaps where the marshmallow could escape during baking. Once sealed, smooth the surface slightly and, if you’d like a bakery-style finish, press a few extra chocolate chips or chunks on top before chilling.
Chill the Dough
Arrange the filled cookie dough balls back onto the parchment-lined baking sheet, leaving space between each one to allow for spreading. Refrigerate the tray for about 15 minutes; this brief chill helps the dough firm up, so the cookies don’t flatten too much in the oven.
Bake the Cookies
Preheat your oven to 350°F (180°C). I place an oven thermometer on the middle rack so I know it’s at the right temperature before baking.
Once the oven is ready, place the chilled cookie tray inside and bake for 12 to 15 minutes. Keep an eye on them, you’re looking for golden edges and tops that appear just set but still slightly soft in the center.
Don’t wait for the entire cookie to look firm, as they’ll continue to bake on the hot tray even after you take them out. This ensures you get that ideal texture with crisp edges and a soft, gooey middle.
If you’re handling hot trays and transferring cookies fresh out of the oven, I always reach for my oven gloves; they give you more control and protect your wrists, too.
Cool and Serve
Let the cookies rest on the baking sheet for 5 minutes, then transfer to a wire rack. I use this cooling rack to allow air to circulate under the dish.
Sprinkle with a little flaky sea salt if you want, and serve while they’re still warm and gooey. Enjoy!
If you’re taking a batch to a friend’s place or sharing them at a weekend get-together, I pack them into my portable storage container so they don’t break while I’m heading over. Then slide the container into this insulated casserole carrier to keep the cookies at a steady temperature during the ride.
And if you’re giving them as gifts, I like packing a small stack in a hard-sided giftable kraft box like this; it’s sturdy enough to protect the cookies and looks sweet with a ribbon.

S’mores Stuffed Cookies
Equipment
Ingredients
- 1 cup unsalted butter
- ¾ cup brown sugar
- ¼ cup granulated sugar
- 2 teaspoons vanilla extract
- 2 large eggs
- 2 ½ cups all-purpose flour
- ½ teaspoon salt
- 1 teaspoon baking soda
- 1 cup semi-sweet chocolate chips
- 10 to 12 medium-sized marshmallows
- 10 to 12 Graham cracker squares
- 10 to 12 semi-sweet baking chocolate squares
Instructions
- Start by browning the butter in a saucepan over medium-high heat. Stir constantly as it melts and begins to foam, cooking until it turns a golden amber color and gives off a rich, nutty aroma. This takes about 5 to 10 minutes. Once browned, remove it from the heat and let it cool for a few minutes.1 cup unsalted butter
- In a large mixing bowl, combine the browned butter with brown and granulated sugar, whisking until smooth. Add the eggs and vanilla extract, and mix again until everything is fully combined and silky.¾ cup brown sugar, ¼ cup granulated sugar, 2 teaspoons vanilla extract, 2 large eggs
- In another bowl, whisk together the flour, salt, and baking soda. Gradually add the dry mixture to the wet ingredients, stirring until a soft dough forms. Fold in the chocolate chips to finish the dough.2 ½ cups all-purpose flour, ½ teaspoon salt, 1 teaspoon baking soda
- Line your baking sheet with parchment paper. On each spot, place a graham cracker square topped with a baking chocolate square and a marshmallow.10 to 12 Graham cracker squares, 10 to 12 semi-sweet baking chocolate squares, 10 to 12 medium-sized marshmallows
- Take a generous scoop of the cookie dough, flatten it in your hand, and carefully wrap it around the s’mores stack—covering it completely. Add a few extra chocolate chips or chunks on top for a gooey finish.1 cup semi-sweet chocolate chips
- Place the assembled cookies in the fridge for about 15 minutes to firm up and hold their shape while baking.
- Preheat your oven to 350°F (180°C). Once ready, bake the cookies for 12 to 15 minutes, until the edges are golden and the tops are just set.
- Let them cool on the baking sheet for 5 minutes before transferring to a wire rack. For an extra touch, sprinkle with flaky sea salt and serve while still warm to enjoy the full gooey s’mores experience.
Notes
- Don’t Rush the Butter: Browning the butter adds a toasted flavor, making the cookies richer and more complex. Keep stirring so it doesn’t burn.
- Cool the Butter Slightly: If the butter is too hot, it can scramble the eggs when you mix it in. Let it sit for a few minutes first.
- Use Room-Temp Eggs: Cold eggs can cause the butter to seize, which can affect how the dough mixes.
- Chill the Dough: Popping the dough in the fridge before baking helps the cookies hold their shape and prevents too much spreading. If you’ve added mini marshmallows into the dough itself for extra gooey pockets, the chill helps keep them from melting too fast.
- Switch It Up and Shape Like a Pro: Swap in a milk chocolate bar or a peanut butter cup in the center for a richer twist.
- Avoid Extra Moisture: Be sure to measure ingredients like butter accurately using a measuring cup; too much can make the cookies greasy or cause them to spread too far.
- Finish with Balance: A light dusting of cinnamon in the dough adds gentle warmth, and a final sprinkle of sea salt on top makes the sweetness pop while balancing the melty chocolate squares inside.
Nutrition
SERIOUSLY GOOD
DESSERTS!
Dessert First is a collection of 61 RECIPES to show you that you can make beautiful, impressive desserts right in your own kitchen, no matter your skill level.
Immediate eBook download. No physical book available.
Includes ad-free recipes like:
∙ Lemon Pound Cake
∙ Starbucks Cake Pops
∙ Boston Cream Pie
∙ Chocolate Mousse
∙ Matcha Tiramisu
...and much more!
How to Store Leftovers
Let your cookies cool completely before storing. You can keep them in an airtight container at room temperature for up to 3 days. I like using this glass cookie jar for the counter because it looks nice and keeps the cookies soft. If I want something that stacks better in the pantry, I go for stackable glass containers to seal in freshness.
If you want to make a batch ahead or save extras, they freeze well, too. Just wrap each cookie individually in plastic wrap and store in a freezer-safe bag or container. I always reach for plastic wrap that clings well and doesn’t tear when wrapping the cookies.
For longer storage, a freezer-safe bag is thick and seals well. These freezer-safe containers with locking lids also work well to protect the cookies against freezer burn.
To reheat, pop one in the microwave for about 10–15 seconds until warm and gooey again.
What to Serve With S’mores Stuffed Cookies
These cookies are rich and indulgent on their own, but they’re great with a glass of cold milk or a scoop of ice cream. You could also serve them with hot chocolate for a full-on cozy dessert night or add them to a platter with other campfire-inspired treats.
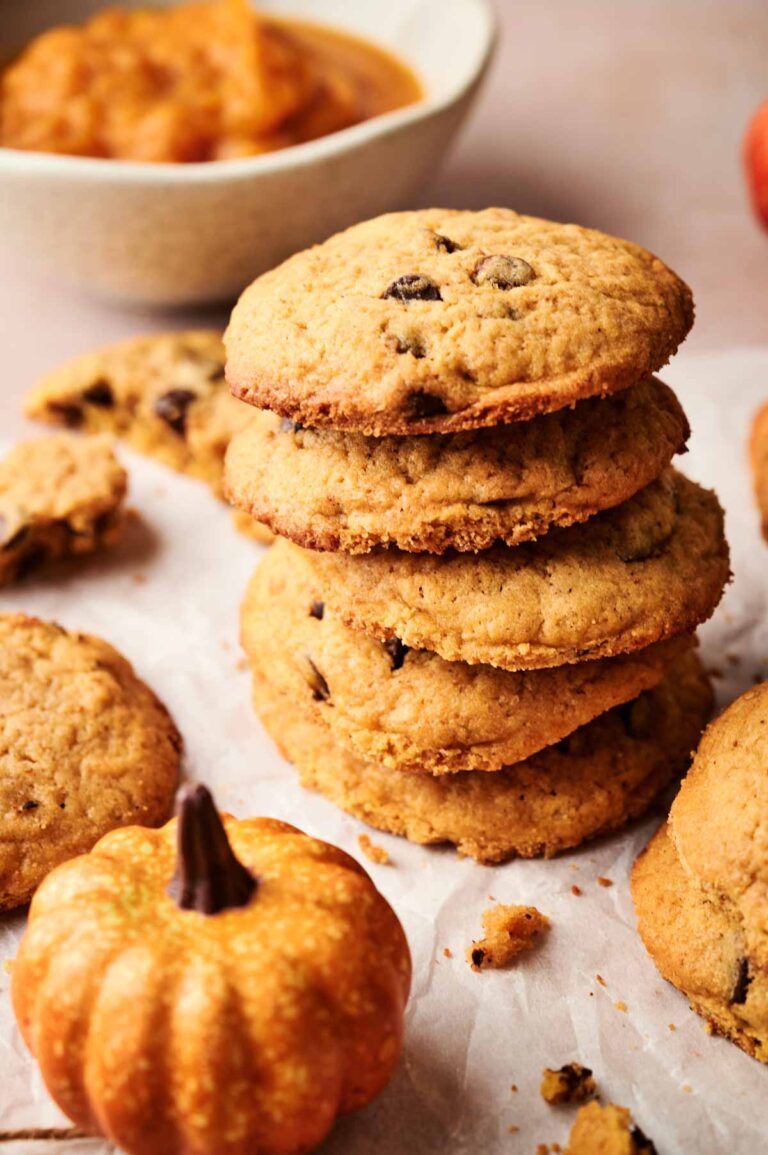
More Easy Cookie Recipes for You to Try at Home
I’ve got plenty of cookie ideas that keep things fun and low-stress, perfect for when you want something sweet without the fuss.