
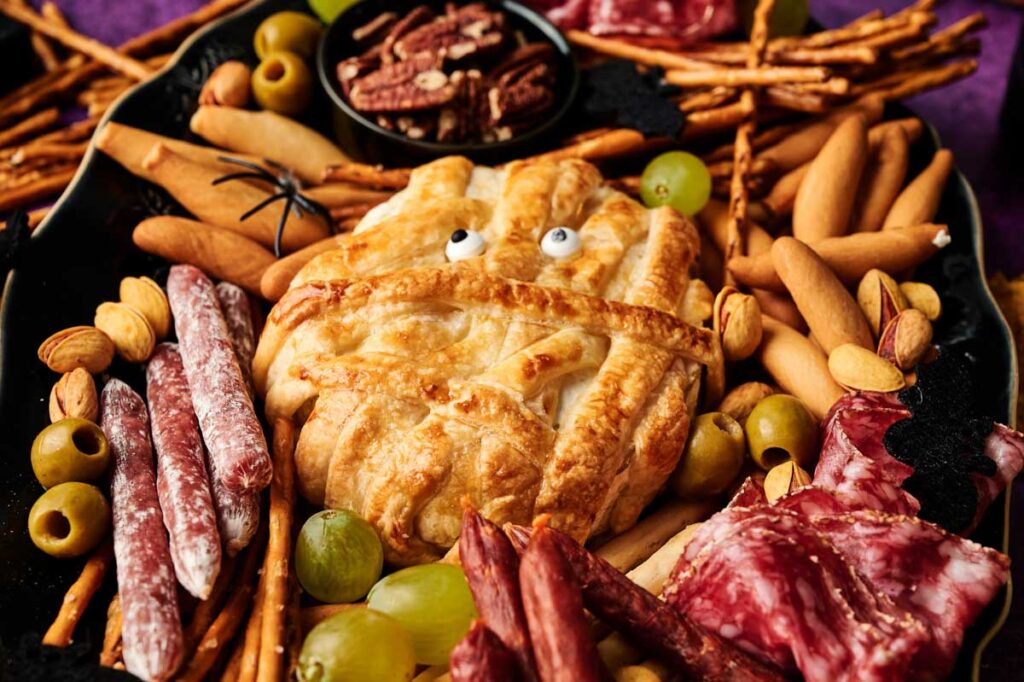
I love giving a wheel of Camembert a little makeover by dressing it up into a Camembert Cheese Mummy for Halloween, and it instantly steals the show. It’s playful, fun, festive, and just as delicious as it looks, especially when you know the simple timing trick that keeps it nice and golden with a gooey center and melty cheese that oozes perfectly without turning messy.
This post contains affiliate links. As an Amazon Affiliate, if you purchase through those links, I earn a commission. Thank you!
When I’m hosting a Halloween party or putting together a Halloween cheese board, this is one of those spooky party snacks I like having on the table because it’s crowd-friendly and fuss-free. Both kids and grown-ups enjoy it, and you can prep it in advance so it’s ready to go. If you have leftovers, which is quite unusual in my case, this Halloween appetizer stores easily in the fridge.
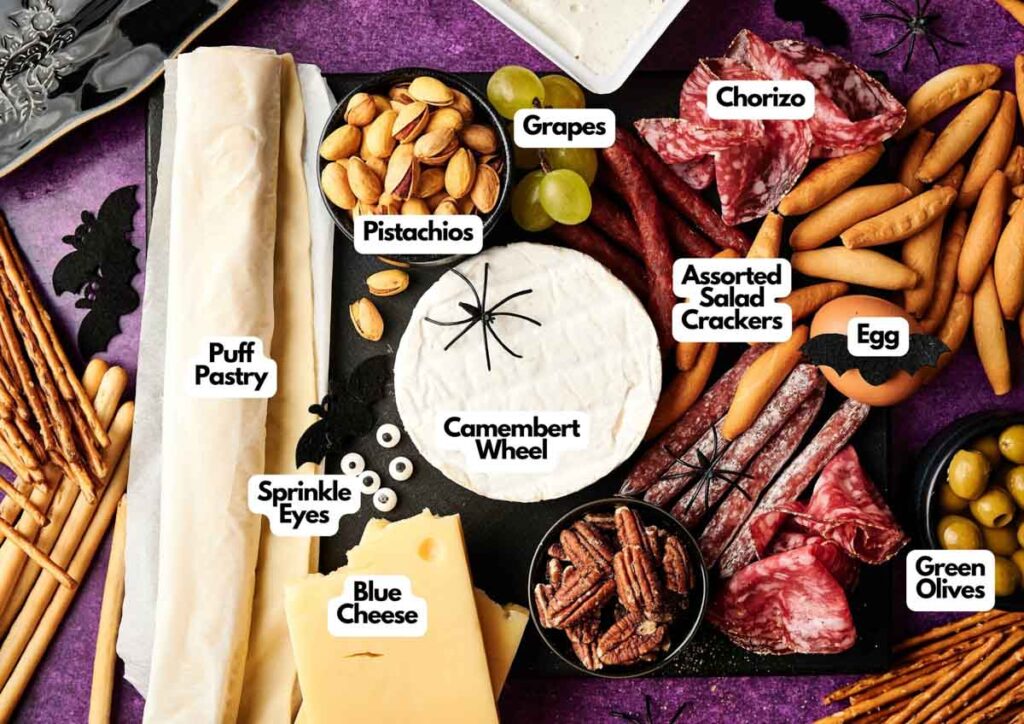
Ingredients You’ll Need
You’ll need all the ingredients shown in the photograph below.
How to Make Camembert Cheese Mummy with Step-By-Step Instructions
Scroll down for the full recipe card containing a full printable recipe and measurements in both US customary and metric units.
If you follow my simple directions, you’ll see how easy it is to turn plain cheese into a fun centerpiece for your Halloween table.
Prepare the baking sheet
Preheat your oven to 400°F (200°C) and line a baking tray with parchment paper, so nothing sticks and cleanup is quick.
I use this rimmed baking sheet because it’s warp-resistant and can withstand high heat. To save myself from the hassle of curly rolled parchment paper that won’t lay flat on the sheet pan, pre-cut parchment sheets are my go-to.
Roll and cut the puff pastry
Lay out the thawed puff pastry sheet on a lightly floured surface or a piece of parchment paper. Use a sharp knife or pastry wheel to cut it into ½-inch wide strips. These strips will give the cheese that wrapped mummy look.
I like using a pizza cutter for this because it gives the strips nice, smooth edges, or a pastry wheel like this one, when I want to give them a little flair and make the mummy look more fun.
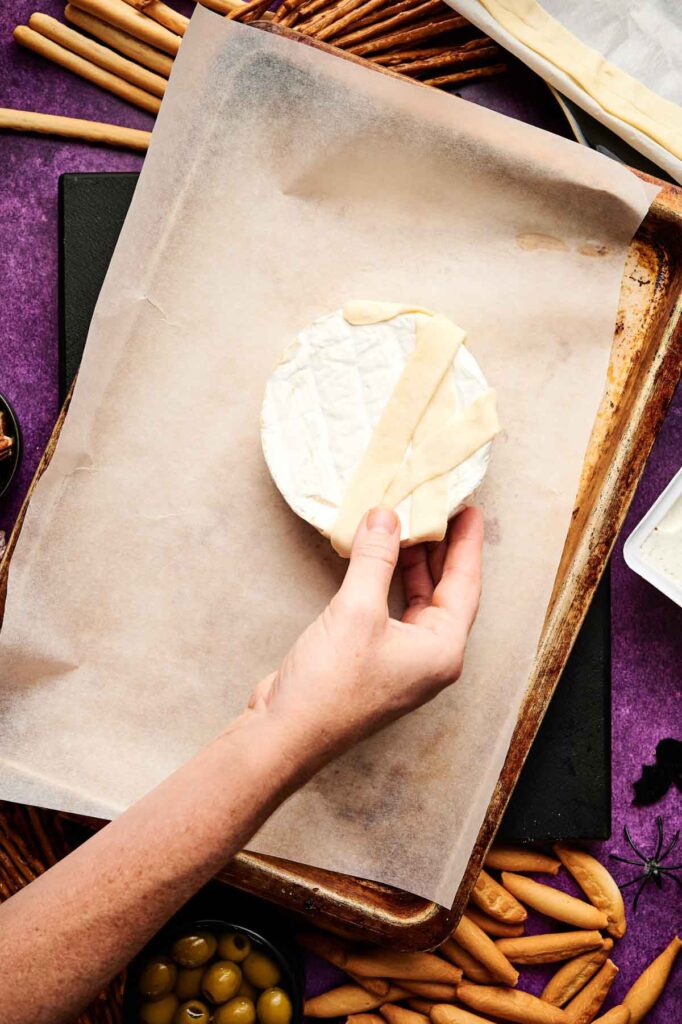
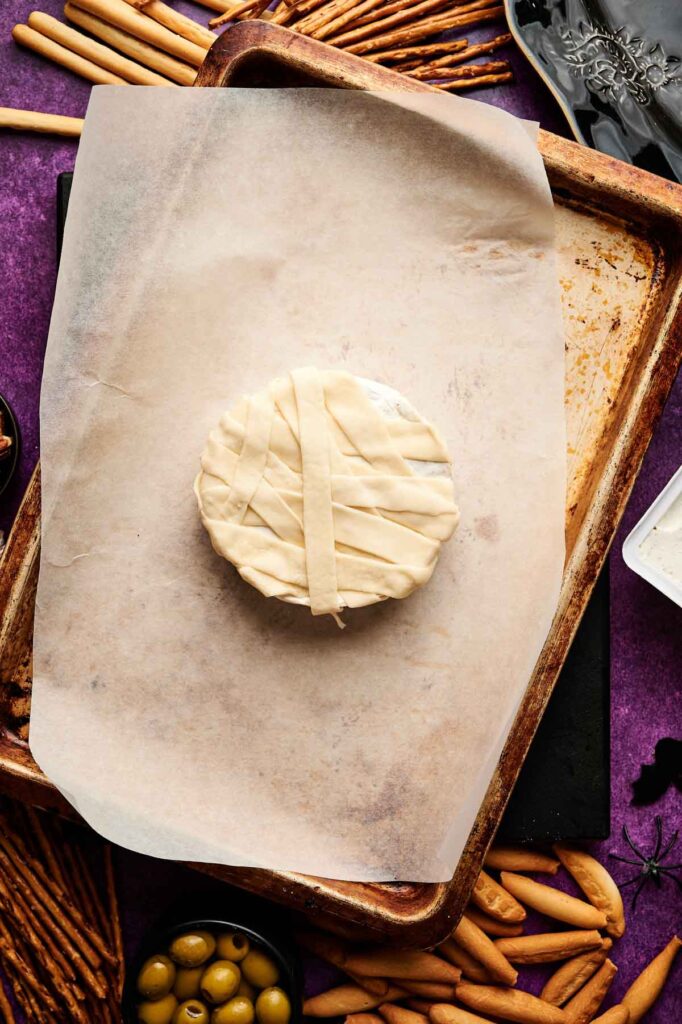
Wrap the Camembert
Place the Camembert wheel in the center of the parchment-lined baking sheet. Drape the strips of dough over the cheese, crisscrossing as you go so it looks like bandages.
Make sure to tuck or pinch the ends underneath so they stay in place and don’t lift up or peel away in the oven while baking.

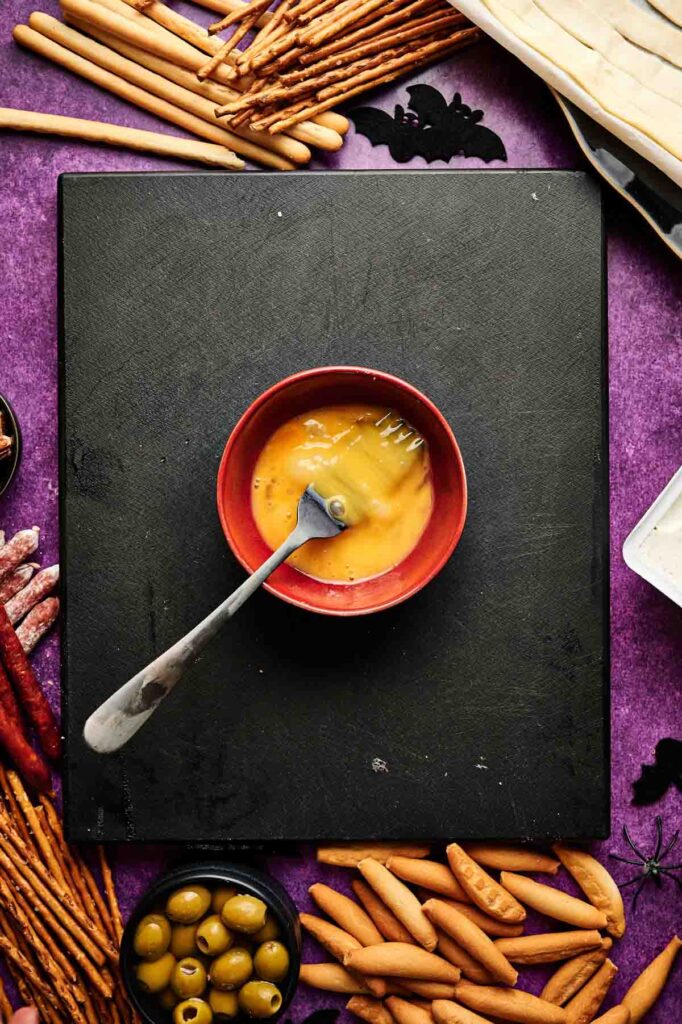
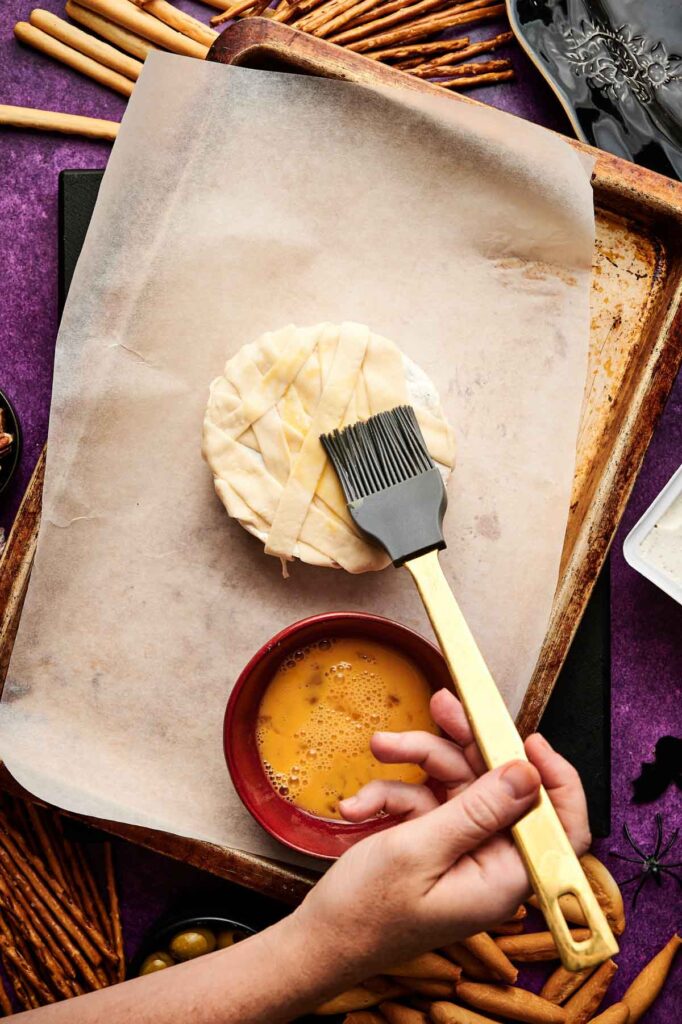
Brush with egg wash
Whisk together one egg yolk and a tablespoon of water in a small bowl until smooth and slightly frothy. A mini whisk works really well here to quickly combine everything.
Brush this egg wash generously over the puff pastry strips to help them bake into a shiny golden crust. Using a silicone pastry brush makes this step easy and mess-free.
Bake until golden
Slide the baking sheet into the oven and bake for 18–20 minutes. You’ll know it’s ready when the pastry is puffed and golden brown, and you see a little ooze of melted cheese at the edges.
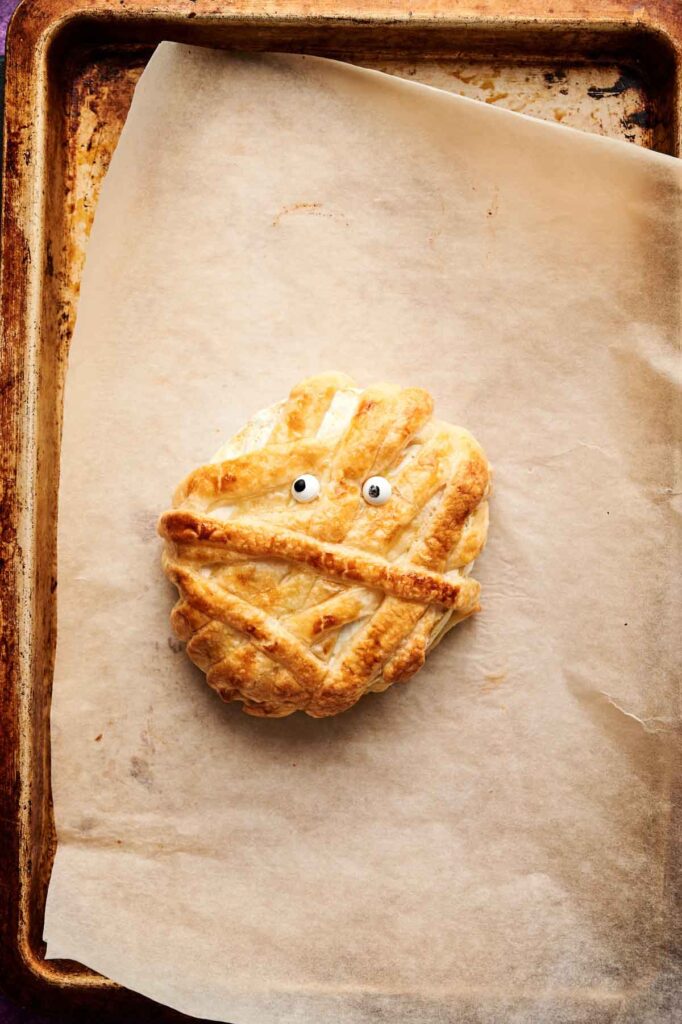
Add the eyes
Once it’s out of the oven, press candy eyes or edible sprinkle eyes gently and right away onto the pastry; the warmth of the cheese helps hold the candy eyes in place, so they don’t fall off. This instantly turns your Camembert into a spooky little mummy.
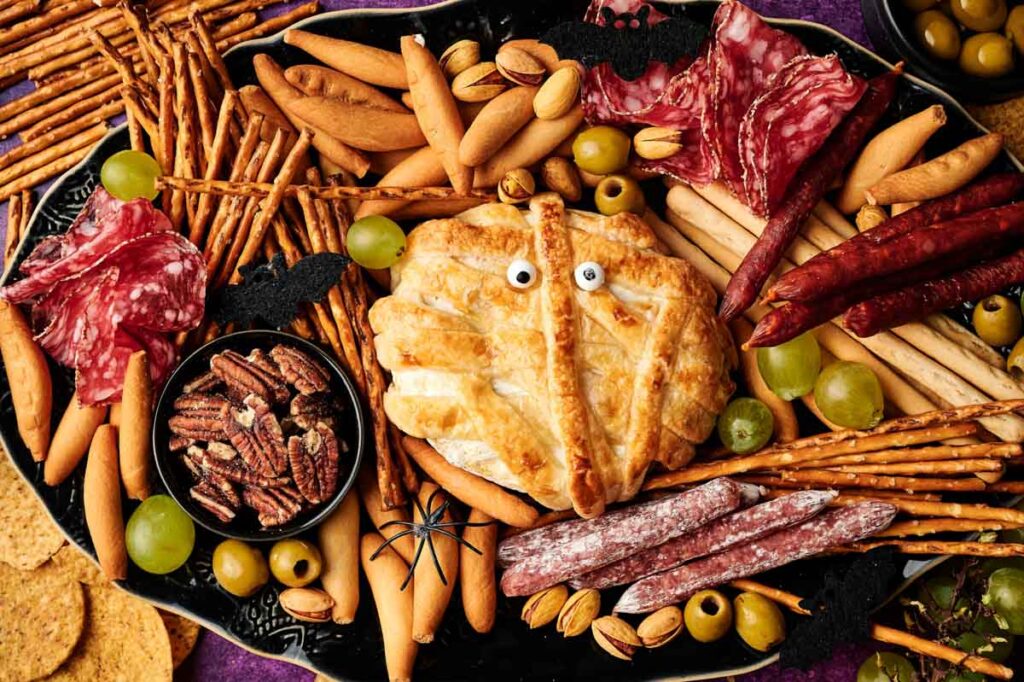
Set it out on a large oval serving platter if you’re feeling a little fancy. You could also go classic with a wooden serving board like this one for a rustic and spookier vibe.
Serve with extras
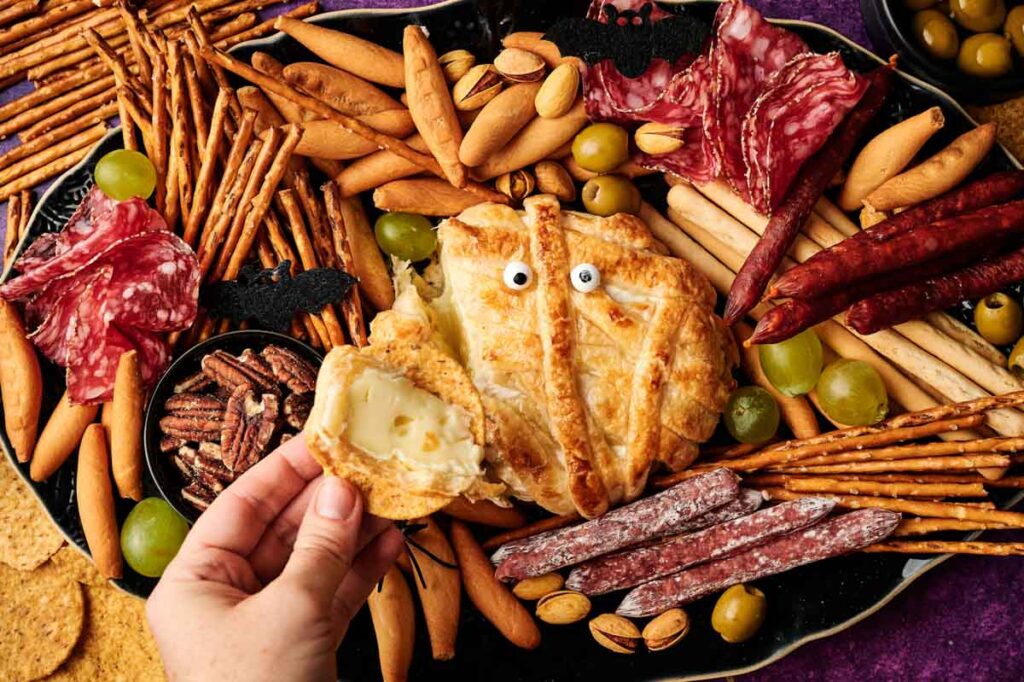
Bring your Camembert Cheese Mummy to the table while it’s still warm. Surround it with crackers, olives, grapes, pistachios, or slices of cured meats for a full-on Halloween spread. Finally, dig in and enjoy!
If you’re taking this to a party or potluck, pack everything up nicely in this large sheet cake carrier with the mummy at the center, so it’s ready for serving once you put it out on the table.
You could also place the mummy in a hard-sided container to protect its shape during transport and pop it into an insulated casserole bag to help it stay warm. For the crackers and everything else, a bento box container will keep them separate, organized, and fresh.
Recipe Notes and Expert Tips
I’ve learned a few tricks along the way that make this scary mummy Camembert come out perfectly every time.
- Thaw the puff pastry fully: If it’s still frozen, it will crack when you try to roll or cut it. Cold but pliable dough works best.
- Cut even strips: Keeping the wrap strips the same size makes the mummy wrapping look uniform and bakes more evenly.
- Swap in Brie if you like: Use a Brie wheel in place of Camembert to make a mummy brie variation with a milder flavor. Some people slice off the top of the brie rind before wrapping, which makes the inside creamier and helps it melt more evenly once baked.
- Try goat’s cheese for a twist: Goat’s cheese gives a tangier flavor and firmer texture compared to Camembert or Brie, but note that it won’t ooze in the same way.
- Season lightly: A pinch of freshly cracked pepper over the Camembert or Brie wheel before wrapping adds a subtle kick that balances the rich cheese. I use a pepper grinder like this so I can adjust the coarseness and grind size.
- Tidy up the pastry as you wrap: Trim excess pastry so the mummy shape stays neat all the way through. You don’t have to discard scraps entirely; bake them separately for a quick snack or use them for mini decorations on the cheese.
- Don’t skip the egg wash: Brushing the pastry helps it get its shiny golden color that makes the mummy look polished.
- Bake until just oozing: Watch for the first signs of cheese melting at the edges so the inside stays gooey but not overcooked.

How to Store Leftovers
If you have some left after your party, let the Camembert cheese mummy cool to room temperature before wrapping it tightly or storing it in an airtight container. Keep it in the fridge for up to 2–3 days, and store the crackers or everything else you serve it with separately.
I always keep a roll of plastic wrap on hand for this; it clings really well and is convenient to use, thanks to its built-in slide cutter. I also use these glass storage containers to help keep everything fresh and odor-free in the fridge, and since they’re oven-safe, reheating is easy.
To reheat, place it in a 350°F (175°C) oven until warmed through, and optionally uncover near the end to bring back some crispness. I don’t recommend freezing it because puff pastry loses some of its flaky texture once thawed, so it’s best to enjoy it fresh.
More Easy Recipes for You to Try at Home
I’ve got plenty of other fun, simple recipes you can make to round out your party table and put together a spread without extra fuss:
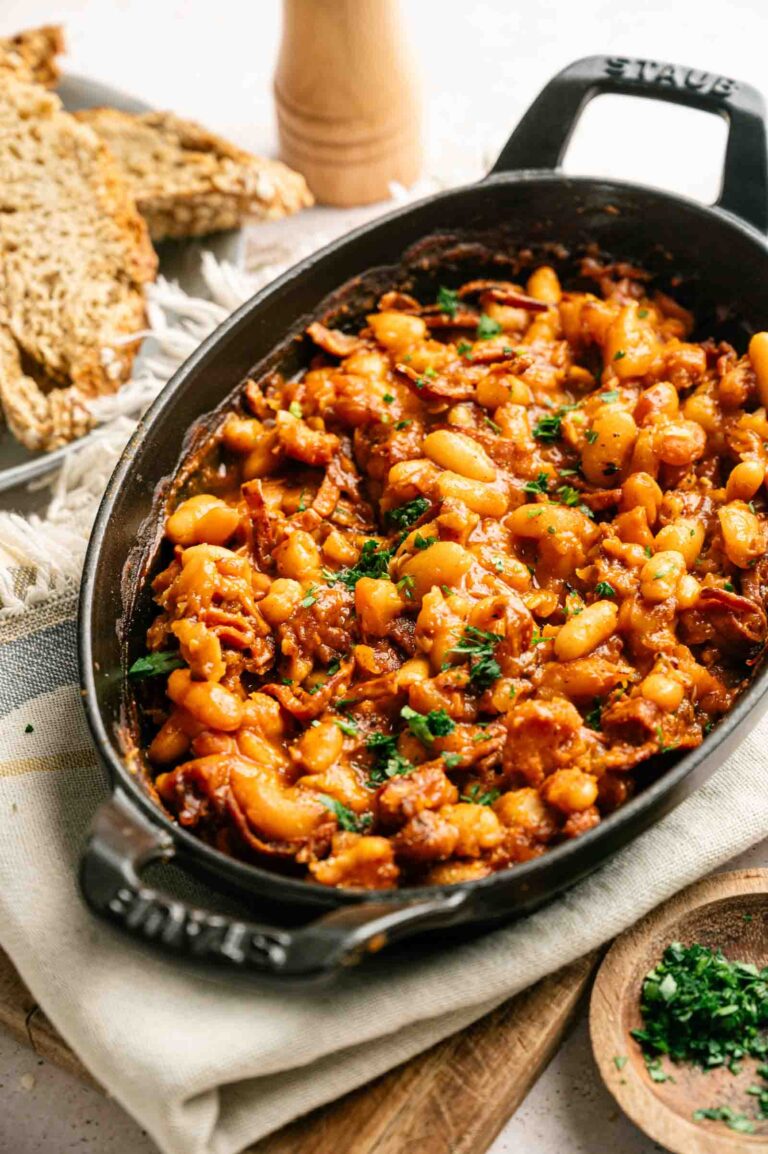
- Cheddar Bay Sausage Balls
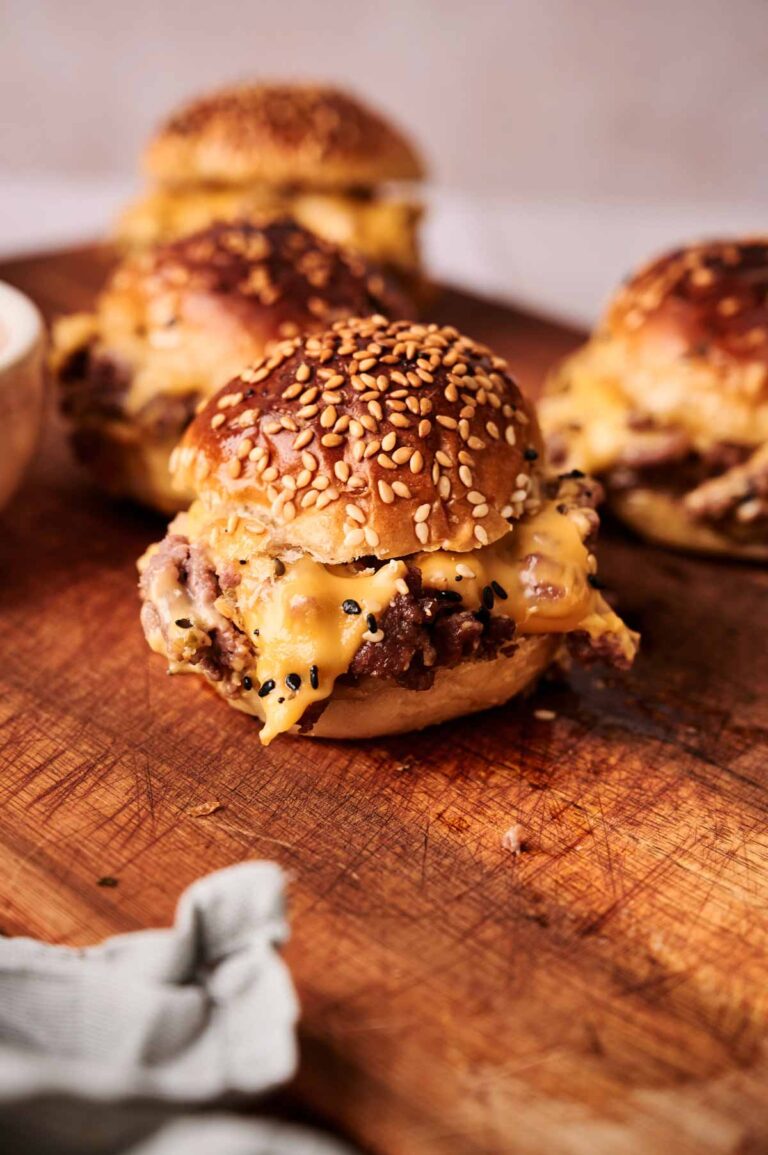
- Big Mac Pinwheels
- Whipped Feta Dip
- Strawberry Cheesecake Dip
- Melted Ice Cream Cake Pops
Did you make this recipe? We’d love to know! Please leave a 5-star review below (it really helps!) and tag and follow us on Pinterest and Facebook for more tasty inspiration!

Camembert Cheese Mummy
Equipment
Ingredients
- 8 ounces 1 piece Camembert wheel
- 1 sheet puff pastry thawed
- 1 large egg yolk
- 1 tablespoon water
- 2 candy eyes or edible sprinkle eyes
For serving:
- Crackers
- Marinated green olives
- Blue cheese
- Chorizo
- Grapes
- Pistachios
Instructions
- Set the oven to 400°F (200°C). Line a baking sheet with parchment paper.
- Roll out the puff pastry sheet and cut into ½-inch wide strips. Place the Camembert wheel in the center of the baking sheet.8 ounces 1 piece Camembert wheel, 1 sheet puff pastry
- Drape the pastry strips over the cheese, crisscrossing to create a “mummy bandage” look. Tuck or pinch the ends at the back to secure.
- In a small bowl, whisk together the egg yolk and water. Brush evenly over the puff pastry for a golden finish.1 large egg yolk, 1 tablespoon water
- Bake for 18–20 minutes, or until the pastry is puffed and golden, and the cheese begins to ooze slightly.
- While still warm, gently press candy eyes onto the mummy for a spooky effect.2 candy eyes
- Pair with crackers, olives, grapes, pistachios, or cured meats for a complete Halloween cheese board.Crackers, Marinated green olives, Blue cheese, Chorizo, Grapes, Pistachios
Video
Notes
- Thaw the puff pastry fully: If it’s still frozen, it will crack when you try to roll or cut it. Cold but pliable dough works best.
- Cut even strips: Keeping the wrap strips the same size makes the mummy wrapping look uniform and bakes more evenly.
- Swap in Brie if you like: Use a Brie wheel in place of Camembert to make a mummy brie variation with a milder flavor. Some people slice off the top of the brie rind before wrapping, which makes the inside creamier and helps it melt more evenly once baked.
- Try goat’s cheese for a twist: Goat’s cheese gives a tangier flavor and firmer texture compared to Camembert or Brie, but note that it won’t ooze in the same way.
- Season lightly: A pinch of freshly cracked pepper over the Camembert or Brie wheel before wrapping adds a subtle kick that balances the rich cheese. I use a pepper grinder like this so I can adjust the coarseness and grind size.
- Tidy up the pastry as you wrap: Trim excess pastry so the mummy shape stays neat all the way through. You don’t have to discard scraps entirely; bake them separately for a quick snack or use them for mini decorations on the cheese.
- Don’t skip the egg wash: Brushing the pastry helps it get its shiny golden color that makes the mummy look polished.
- Bake until just oozing: Watch for the first signs of cheese melting at the edges so the inside stays gooey but not overcooked.